#sewmystyle – May – Califaye Collection Pocket Skirt
Another month has whizzed by but unlike the past couple of months, I’ve actually managed to make this month’s garment in time for the end of the month!
Another month has whizzed by but unlike the past couple of months, I’ve actually managed to make this month’s garment in time for the end of the month!
Once again, I found myself blundering out of another month without a completed project for #sewmystyle. My flaw in April was that I completely forgot to prewash the fabric until the day I chose to cut out the pieces. I ended up washing it while I cut out pieces for another project on my list, and then with other deadlines appearing, April came and went! (more…)
I missed the #sewmystyle March project share last Sunday as March flew by at an alarming rate! I set aside time this week to catch up instead. (more…)

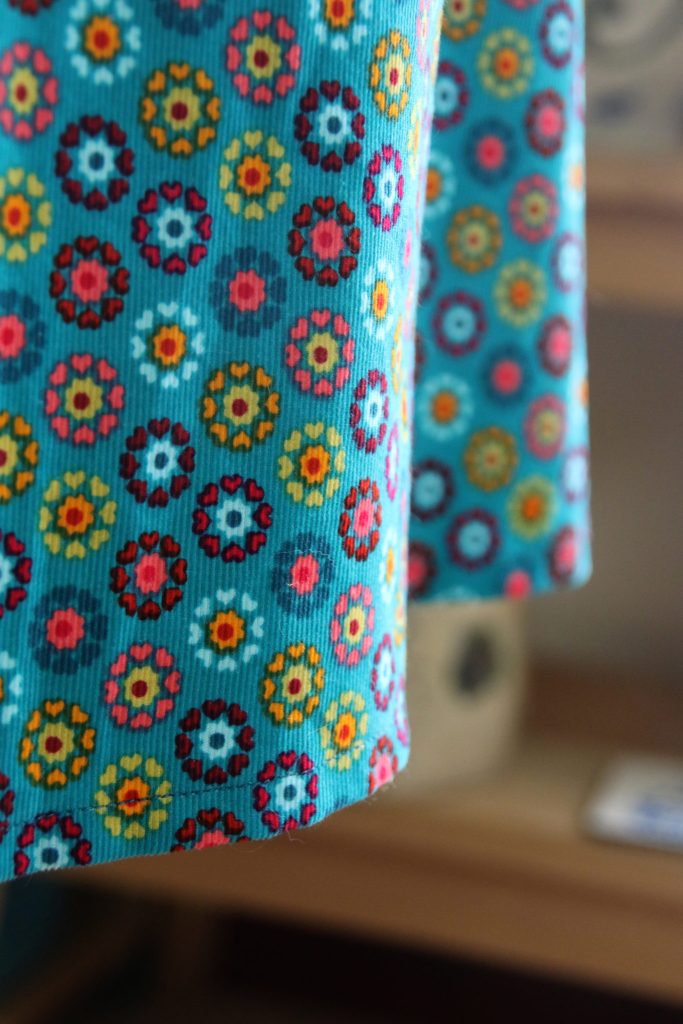
February has whizzed by, and I was slightly concerned about getting the second Sew my Style make made in time for the end of the month! However, I did not have to worry as it turned out to be a relatively simple make, even if it was with knit fabric. (more…)
For the last few weeks, I have been going to some dressmaking classes nearby. I thought it might be useful for learning how to adjust and adapt patterns, as this is something I don’t do very much of. (more…)
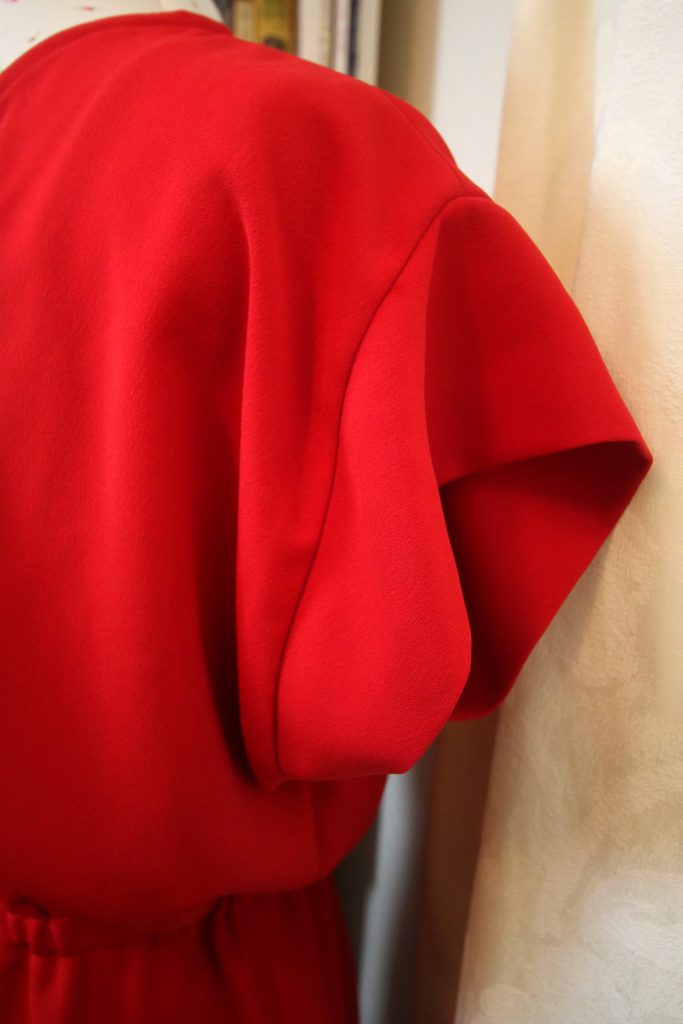
Here is my first make as part of project #sewmystyle The first pattern was toaster sweater 2 by Sew House Seven. This is not a pattern I would automatically choose myself. However, the whole point of completing this challenge is to move out of my comfort zone! I chose a red jersey fabric from a local haberdashery. This fabric was sturdy, which works well to maintain the neck collar. The instructions are detailed well. I used the pdf version to save money and found that using a guillotine sped along the cut and stick stage! Another new product I tested with this make is using carbon paper, which revolutionised the cutting stage! It is much faster as I did not have to trace my size and then cut it out before pinning it on. Tilly and the Buttons have a great tutorial on how to use it here. This was my third attempt with knit fabrics and I decided to use my overlocker for the seams round the shoulders and down the sides. I was quite nervous using it as it trims at the same time, leaving little margin of error! However, it does a great job as it feels less like you are going to stretch the garment out of shape! It's very quick too. The main issue I had was with using a twin needle. I adjusted the tension and used knit hemming tape alongside a walking foot, but I think that a stretch or ball point twin needle was needed. I wasn't sure about the dropped hem at the back, but now it's made, I like this feature. Overall, it was a great make and I look forward to starting February's garment; the fabrics ready and waiting!
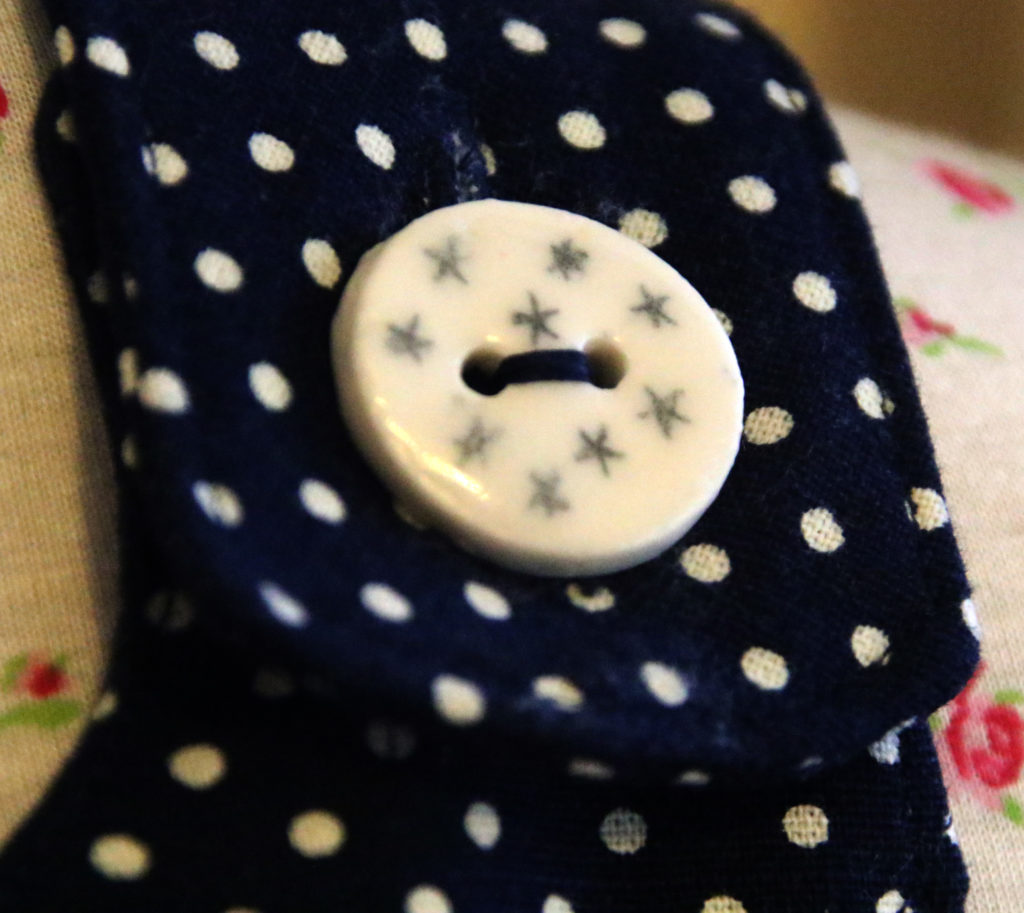
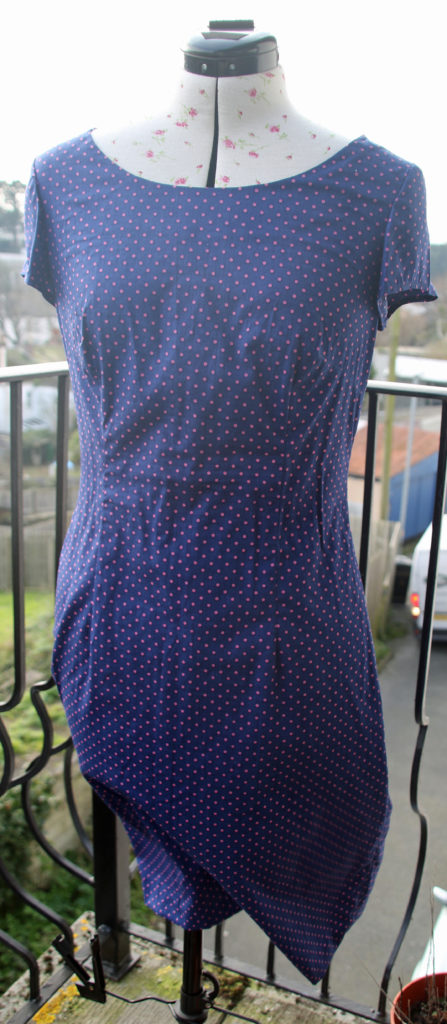
I've been enjoying a bit of dressmaking this month and am finally cutting into some fabrics I bought in one go for numerous projects. One piece of fabric was some navy polka dot cotton bought especially for the ivy pinafore pattern by Jennifer Lauren. One worry I had at the very beginning was that I didn't have enough fabric. The pattern for view 1 advises to purchase 150cm wide fabric, and my own fabric was 115cm after pre-washing. However, my fabric did not have a one way nap or design, so i was able to re-jig the cutting layout plan, which reduced fabric waste as well. I may have enough to make a tote bag too at some point! I still have my stash of ceramic buttons from taking pottery classes last year, and have only used one so far, so I wanted to use some of these if possible for the fastenings. The pattern suggests larger buttons, and I was worried that they wouldn't be big enough. However, I left worrying about this until the button hole stage came up, and decided that my own buttons would work well. It's a real buzz to see my own handmade buttons on a garment! I selected a traditional lining fabric for the lining, as I wanted this make to work well with tights, leggings or jeggings. It was a little tricky to work with, and I ended up hemming the lining by hand, but I think it means I will get a lot more use out of it! It's a real joy to wear this garment. It's loose fittings with seam pockets, which makes it a great lazy Sunday wear when all I want to do is sit in my rocking chair and knit or crochet with a cup of tea! I can imagine wearing it out on a walk too, when I am on the hunt for discarded rusty items to use when rust dyeing! It's definitely a make reserved for my days off! I'll have to try out the gable top sometime soon as I only have one top that goes nicely with this pinafore! The gable top has a high neckline, which works well with this style of pinafore. Looks like I will be getting the walking foot and ball point needles out very soon!
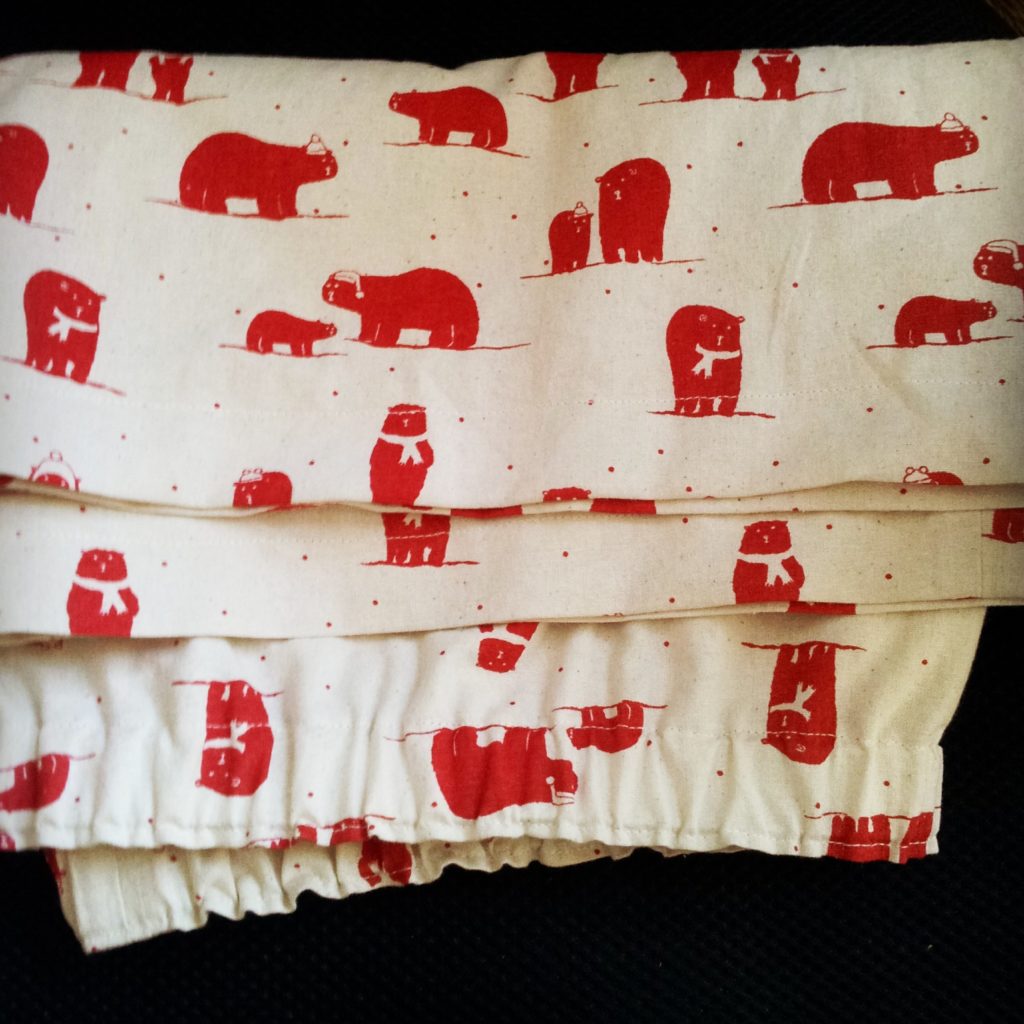
I don't make a lot clothes-wise for my boyfriend... the thought of making a shirt is quite daunting (he has a lot too). The only item I have made in ten years is a onesie funnily enough, which I made the day before Christmas Eve manically on my mum's sewing machine. It is the biggest gift I've made him, and it would be more impressive garment I've made... if I hadn't cut half the pieces the wrong way round on the fleece! Making pyjamas for him has been on my list for a while. However, I found this lovely bear print woven fabric at the stitching, sewing and hobbycrafts show last month which I knew he would like, so I decided that it was time to get this gift idea off the list. The main issue with making clothes for someone else even - even when you are making something quite simple like elasticated pj bottoms - is making sure they fit right. Fortunately I knew the inner leg measurement from trouser shopping in the past, but it was tricky to gauge the waist measurement beyond requesting a tactical hug! Even with the leg length, I ended up making them a little longer out of fear that if they were too short, I couldn't remedy that scenario as easily as if they ended up too long. I cut the fabric one afternoon and began stitching the first couple of stages, but had to shut myself away to finish them off the next day. It was good to have a short time frame to be able to make them as it meant I spent less time worrying and more time making. I found and bought a suitable top to match on this occasion. They were well received and I enjoyed making him something practical. next time, I think I will try out a summer set (at least leg length isn't required for shorts which eliminates one issue) and perhaps by then I will be confident enough with knits to make the top too!
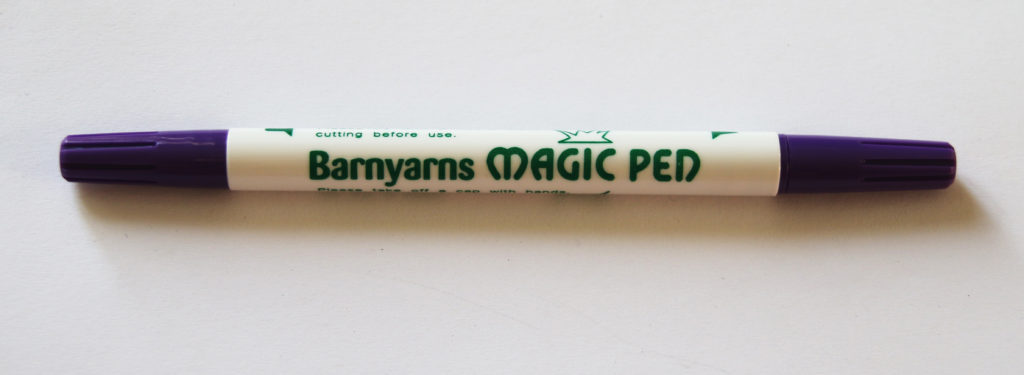
At the end of September, I bought my first air erasable pen and thought I'd share my first few weeks' experience with it. The air erasable pen I got at the the stitching, sewing and hobbycrafts show at Westpoint, Exeter, was from Barn Yarns. As you can see from the images, there are two ends to this pen. There is a fine point and a thicker nib. the difference between these two nibs can be seen in the image below: I like the use of two different thicknesses because it suits the purposes I use it for very well. I can use the finer point to create much more precision on intricate machine embroidery designs which need to be mapped out on the material before stitching. However, the thicker nib is useful for making marks dressmaking as it show up better and doesn't disappear quite so quickly! However, I have used it for larger embroidery designs. For example, I have begun making some new tote bag designs for Christmas which include larger stitched words than I normally produce. I write with the machine freehand in general, but as the words are a lot bigger than I'm comfortable with, it was good to use the thick nib of the pen to draft it out before I began. The directions for this pen advise that the markings will disappear between 24-48 hours in general, but it depends on the location. Humidity plays a factor, and I found that the stag design markings with the fine point disappeared within 24 hours. Cornwall is quite humid, so I expect that other locations may find the markings last longer! I think it depends on the fabric too. The time it takes to disappear can be an advantage and disadvantage. For me, it's great for a project I am going to make straight away, as the markings are there for as long as I need, and will disappear on their own without the need of water, which removes the risk of shrinking the fabric (if it gets to wet) or causing the thread to run. However, it would not be so good if you used it for a dressmaking project which you could not complete within a weekend, as there's a good chance your markings will disappear if you take too long! In this instance, I'd probably stick to the water soluble pen variety, which tends to last much longer in my experience. Overall though, this pen has improved the way I make certain items and I have used it a lot in a short space of time. It will be interesting to see how long it lasts before I need to purchase a new one!