DIY Rudolf brooch/badge with light up nose

Hello!  Today I am back after a very long break to share a project which I made a couple of Christmases ago.  Unfortunately, time has flown, and I haven’t been able to share it with you until now.  I’m glad to say that I have finally edited it and I hope you enjoy it. So, one autumn, I decided it would be fun to make a Christmas brooch.  While Christmas jumpers are great, sometimes it’s much easier to wear an accessory to make any outfit festive.  I was getting into wearable electronics as well, and this seemed like a nice straightforward project for anyone wishing to learn a bit more about this as well.The design I am sharing with you is a reindeer badge.  It is made from two colours of felt, sewn together with embroidery floss, though I do use some glue as well.  It uses a small sew-on red LED light, secured to the coin battery pack on the back with some conductive thread.  The coin battery pack was purchased from Pi Hut and allows you to select a flashing or constant light option.I encourage you to have a go at designing your brooch design but if you like my reindeer, you can download a template off my website for free with the option to make a payment if you wish.Now, I mentioned that this tutorial has been long in the making.  I made a slightly different version the year before which used a rechargeable battery which was sewn into the head of the reindeer.  It used a more complex electronics design as well.  However, I felt the coin battery design was much simpler and more effective. What you need First, I will run through the resources you’ll need to make this brooch.Felt in the colours you wish to use for the face and antlers of your reindeerEmbroidery flossRed LED light - I got them from the pihutCoin battery power supply - I used one from the pihutA wire stripper toolTweezers are optional but can be useful for manipulating the coin battery wires which can be fiddlySwe-on brooch/badge backGlue that can attach plastic to the felt (I used rapid epoxy adhesive)Conductive thread - I got this from the pihutPermanent adhesive spray suitable for fabric - mine is from HobbycraftOptional: fray checkThe brooch templateFabric pen, tailor’s chalk or pencil for tracingBulldog clip or something to help with gluing the coin battery to the felt (you can always check this step to see what I mean)The template 1. Cut out the felt pieces First, I used the template to trace around the reindeer’s face to create two reindeer heads.  These were then cut out.Next, I used a white fabric pen to trace around the whole reindeer template onto the antler felt colour and cut this out.I have used a fabric pen to trace but you could use a pencil.Use spray adhesive to stick the antler coloured piece to another bit of the same coloured felt to create a thicker section…
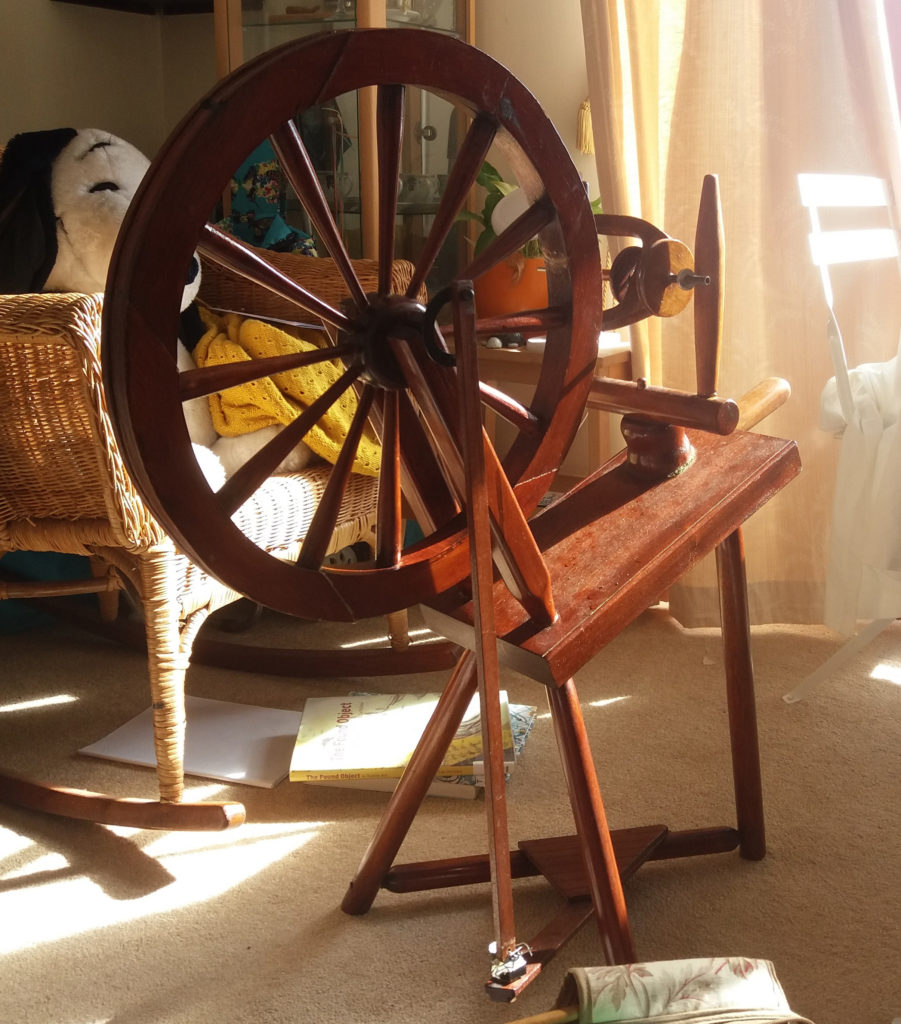
Continue ReadingDIY Rudolf brooch/badge with light up nose

Sew a Wheat Warmer

I had some lovely leftover fleece from making one of my niece’s a leopard print cape last Christmas, so I decided to use it to make some lavender wheat warmers for myself and others. I find wheat warmers are really useful when you feel a bit sore or stiff and I had been using a very old shop bought one for years to manage my chronic health symptoms before getting round to making this one. Once you have made it, all you need to do is pop it in the microwave for up to 120 seconds if less than 800 Watt, or up to 100 seconds if your microwave is 800-1000 Watt.  It can help to put a small mug filled with water in the microwave at the same time to provide a bit of moisture (just in the microwave with it, not poured over it!) What you need What you need: 45 x 29 cm (18 x 11.5 inches) fabric - I used fleece 750g of dried wheat 2 tablespoons of dried lavender In addition to the usual sewing items, you will need a funnel or something similar to fill the warmer with wheat (I used the cardboard in the middle of a finished toilet roll) as well as a bowl and scales to mix the dry ingredients. 1. Fold and pin the fabric Fold your fabric in half lengthways, right sides together, so that the long ends meet. Pin or peg along the raw edges. 2. Sew together the sides and ends of the wheat warmer With a 1cm (1/2 inch) seam allowance, stitch around the three open sides, leaving a gap at one of the short ends for turning right side out/ stuffing. 3. Trim and turn right sides out Trim the corners slightly and turn right side out. 4. Mark a line in the middle of the wheat warmer With a few pins, mark a line in the middle of the wheat warmer which is parallel to the long sides of the warmer. You may find it easier to then tack the line in place, especially when using a bulky fabric like fleece. 5. Stitch centre line Stitch along the marked line, starting and ending about 7.5cm (3 inches) from the short ends of the warmer. 6. Prepare the filling Mix around 750g of wheat with 2 tablespoons of dried lavender in a bowl. 7. Fill the wheat warmer Using a funnel and spoon, gradually fill the warmer with the mix. 8. Sew up the opening Slip stitch the opening closed. Variations: Vary the size and shape depending on how you wish to use the warmer – you may wish to make it circular or thinner – just remember to scale the amount of dry ingredients! These instructions include adding a line of stitching in the middle of the length of the warmer, but you could leave this step out. Alternatively, you could add another line or two of stitching or stitch lines the other way…

Continue ReadingSew a Wheat Warmer

Sew your own dishcloths

Recently, my mum got into making her own dishcloths to be a bit more sustainable.  Also, they’re great for using up scraps of fabric you have left from other projects!This dishcloth is simple to make.  It uses a bit of hessian (burlap) for one side for when you need a more abrasive side which won’t damage any non-stick surfaces.  The softer side is simply cotton, and can be made from any of your favourite remnants.To make them as sustainable as possible, you need to use 100% natural fibre fabrics and thread.  This will ensure that the dishcloth can biodegrade.  Here, I have used cotton fabric as I have loads of remnants of this, but another natural fibre such as linen would work just as well.If you’d like to make a few dishcloths, either for yourself or to gift to others, I’d recommend making a cardboard template to make it easier to cut out a batch. What you need The following would make a 9cm x 14cm dishcloth11cm x 16cm remnant of hessian / burlap fabric (for the non-scratch scourer side)11cm x 16cm remnant of 100% plain cotton (for the middle of the cloth)11cm x 16cm remnant of 100% cotton fabric (for one side of the dishcloth)100% cotton threadSeam allowances are 1cm 1. Layer the fabrics Place the fabric you wish to have as the soft side of your dishcloth right side down onto the piece of hessian.Next, place the plain piece of fabric you wish to use for the middle of the dishcloth on top so that the main cotton piece is now sandwiched between the plain cotton fabric and hessian.Pin or peg the pieces together. 2. Sew the layers together Leaving a large enough gap for turning right side out, sew all three layers together using a 1cm seam allowance. 3. Clip corners and turn right side out Clip the corners to reduce seam bulk, and then turn right side out, ensuring the corners are pushed out. 4. Top-stitch Sew two lines of topstitching.  Stitch one line close to the edge – this will mean that you won’t have to slip stitch the opening shut.  The second line of stitching can be parallel to this line, furth in from the edge. 5. Add a couple (or more!) lines of stitching across the cloth To keep the three layers secure in the middle, sew a couple of lines of stitching in whatever pattern you would like. Watch it on the Vlog I've linked my video for this tutorial below:https://youtu.be/jwKo74zz7uA

Continue ReadingSew your own dishcloths

Tutorial: Waterproof Sitting Mat

I haven't sewn a lot recently but this project had been on my mind for about a year, and I finally made it happen recently! I expect it was inspired by all the outdoor catch ups during the pandemic.  However, I thought it's still a useful item to make for yourself or a great and fairly simple gift to make for someone else. What you need 1/2 metre Main fabric for the top - a sturdy fabric like cotton duck 1/2 metre Insulated wadding - to help provide some insulation 1/2 metre waterproof fabric for the base - I chose a 600 dernier canvas-like fabric as I hope it will provide some longevity 30cm of strap - I used herringbone twill tape as I had it to hand, but webbing might be more robust.  If you have neither, you could make a strap from leftover fabric Matching thread A quilting foot and temporary fabric spray are useful for the quilting stage but not essential. 1. Make your template I've popped down how I made my template but you could make it another shape, such as a circle! Draw out a 42cm by 42cm square on paper. Use a side plate to curve the corners. Cut out. 2. Cut out your pieces Now you have your template, you need to cut out: 1x top piece 1x of waterproof fabric for the base piece Once the top piece is cut out, either attach it to your wadding with pins or temporary adhesive spray and cut out. 3. Quilt the top layer to the wadding Mark out a quilting pattern of your choice depending on the fabric and stitch the two layers together. You may find a quilting foot handy for this step. 4. Attach the strap Once quilted, position the webbing on one side overlapping the edge slightly, about 11cm down from the top. Stitch to secure just within the 1cm seam allowance. 5. Stitch the front and back pieces together Place the front and back right sides together and sew around the edges, leaving a 10cm opening on one side. Trim the seam allowance on the corners (or use pinking shears) and turn right side out. Hand stitch the opening closed with slip stitch. With the top side on the top, carefully press with an iron. 6. Topstitch around the edge Top stitch around 1cm from the edge all the way around. 7. Finish the raw edge of the strap and add the snap fastener To make the strap, fold the mat in two with the base on the inside, and so the bottom meets the top edge. Starting from the side without the strap, roll the mat up, and then wrap the webbing around to see where you would like to add the fastening. For me, I chose the tie to be 25cm in length. To reinforce and hide the raw edge, I cut the webbing 4cm longer than I wanted the tie. I folded up the end by 2cm…

Continue ReadingTutorial: Waterproof Sitting Mat

Welcome to the Clobber Creations YouTube Channel!

Many people find it hard to listen to themselves on a recording and I definitely fit into that category!  Unfortunately, I was never any good at acting at school, and even when I worked in a call centre, my supervisor used to mark my calls down for being flat!  It used to be awful listening back to calls with customers, but at least there were no graphics to accompany the awkward voice.

Youtube is a different matter!  While I’m intrigued by the background elements – setting up the microphone, lighting, focusing the camera… I try to avoid talking or appearing on it.  However, I’ve reached a point where a few busy projects have come to an end and my partner is nudging me in the direction of video. (more…)

Continue ReadingWelcome to the Clobber Creations YouTube Channel!

15 minutes closer to goals

Sometimes, I get home and sewing is the last thing on my mind.  I'm still struggling to unwind from the day's activities, I know I have day-to-day tasks in the periphery of my mind, calling for my attention, and my energy levels are usually right down. My initial thoughts are to resist the chores, eventually do them and then go to bed zombified! However, I know that my hobbies are important to me.  in the past, I've come straight home from work wolfed down dinner and then sat obediently with my knitting project for a good few hours before opting for sleep.  Admittedly, i wasn't struggling with chronic fatigue at the time, but it was my main goal at the end of a hard day's work. Over the last few weeks, 15 minutes has been my target.  15 minutes of knitting or sewing, but I strive to complete 15 minutes of each.  I can be reluctant to begin, but I invariably go beyond the timer.  There are times when I do 15 minutes and I am ready to stop when the timer goes off as well.  Sometimes, you need to ease a habit back into your life when your energy levels are taking over your day to day lifestyle too much. I gave this approach a go when I read Scavenger Annie's post on 'Sewing for pleasure, sewing for pain'.  I admired her decision to take her time making the Tilly and the Buttons' Coco top by setting aside 20 minutes a day over 2 weeks.  I have a different chronic illness, and I often find it affects my energy levels.  Setting a timed session helps me to stop before I get too tired. 15 minutes doesn't feel like that much, but with 15 minutes, I have completed a short sleeved knitted cardigan I have avoided for years.  I have returned to another knitted project.  Admittedly, I had to unravel a few days of knitting last night when I realised why the sleeves were coming out too long (I'd read the wrong increase pattern for the size I was making) but it still feels like progress.  It feels like an element of control has been reigned back after a couple of bumpy years. Elise Joy Daily Goal Tracker It's only been a couple of months, but I've achieved a fair amount in knitting, sewing, yoga and reading.  While the 15 minute timer has worked wonders for a threshold, one other strategy has helped and it's Elise Joy's Daily Goal Tracker. I am a big fan of the Elise Gets Crafty Podcast, and was intrigued when she offered a free downloadable daily year tracker for 2017 in her newsletter.  Her tracker is great because it is a simple indication of the days where you did or did not complete or do part of a goal. All of my trackers (yep I went with 4!) are general habits I wish to develop this year.  They do link to goals, but they are…

Continue Reading15 minutes closer to goals