Here is a simple way to make your own laundry bags/pouches. They are useful for providing a bit of extra protection for items in the washing machine.
What you need
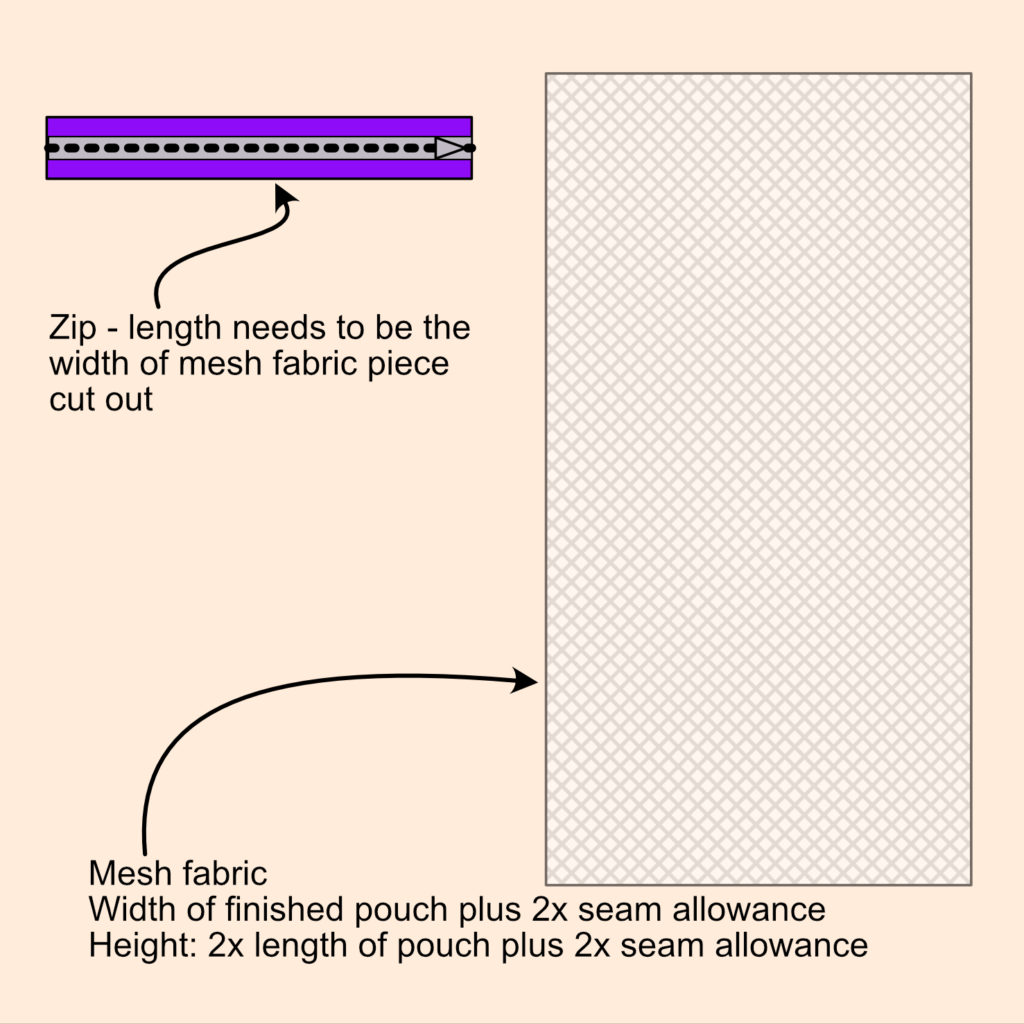
- Mesh fabric – you could combine this with a regular cotton fabric if you do not have much mesh fabric, but part of the bag will need to be mesh to allow any items in it to wash well in the machine
- The fabric will need to be twice the length of how tall you would like it to end up with seam allowances added for attaching to the zip
- The width needs to be as wide as you would like it with enough seam allowance for French seams if desired (I added 2cm to either side so an additional 4cm in total)
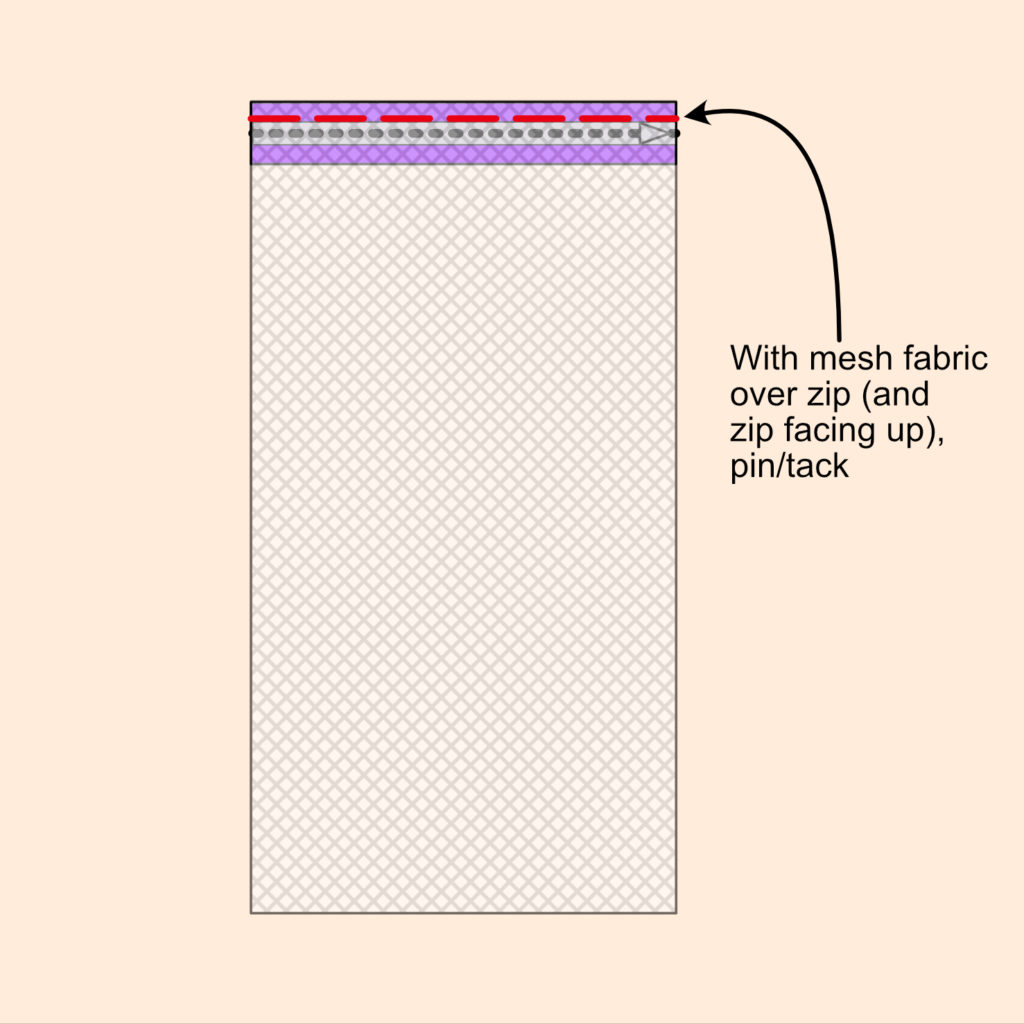
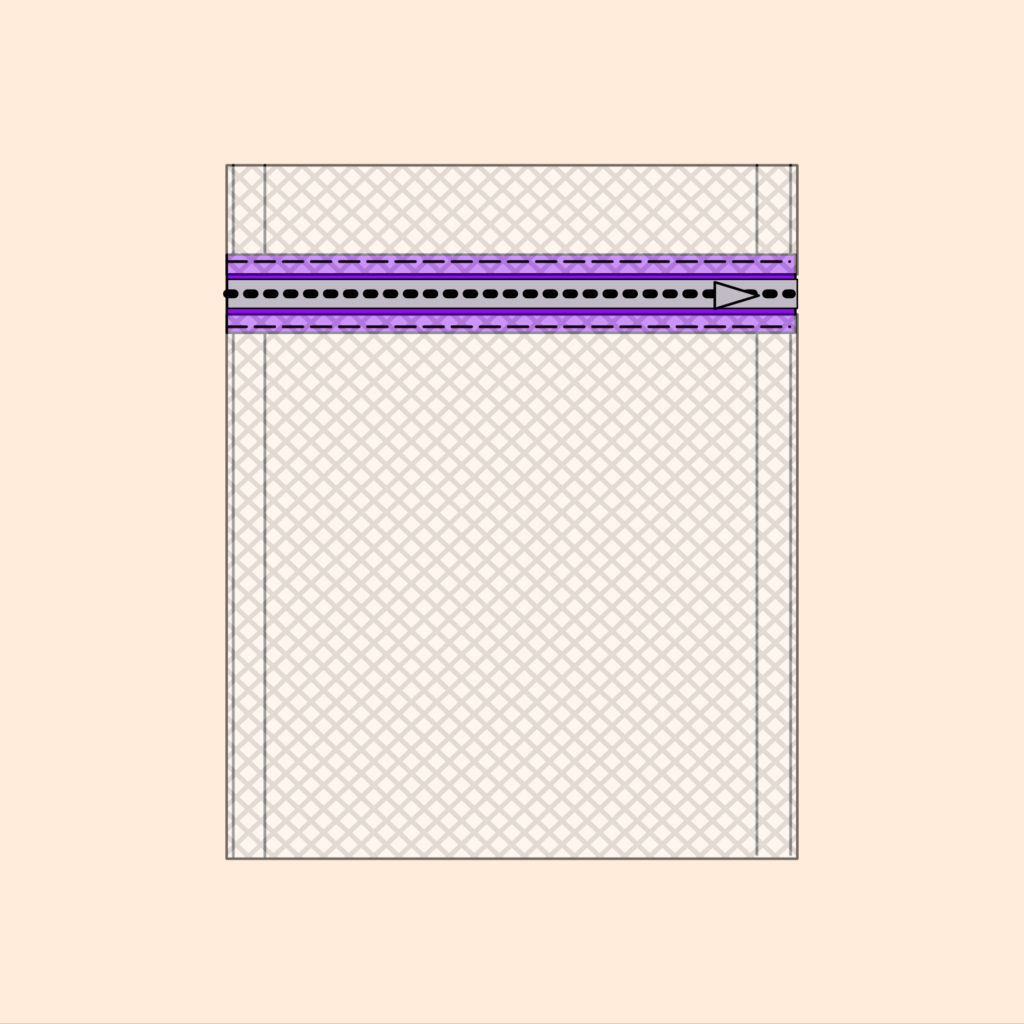
1.Stitch one edge of the mesh fabric to the zip
Place one short end of the mesh fabric over the zip (with the zip facing upwards) and line the edges to meet each other. Pin in place and stitch together using a zipper foot.
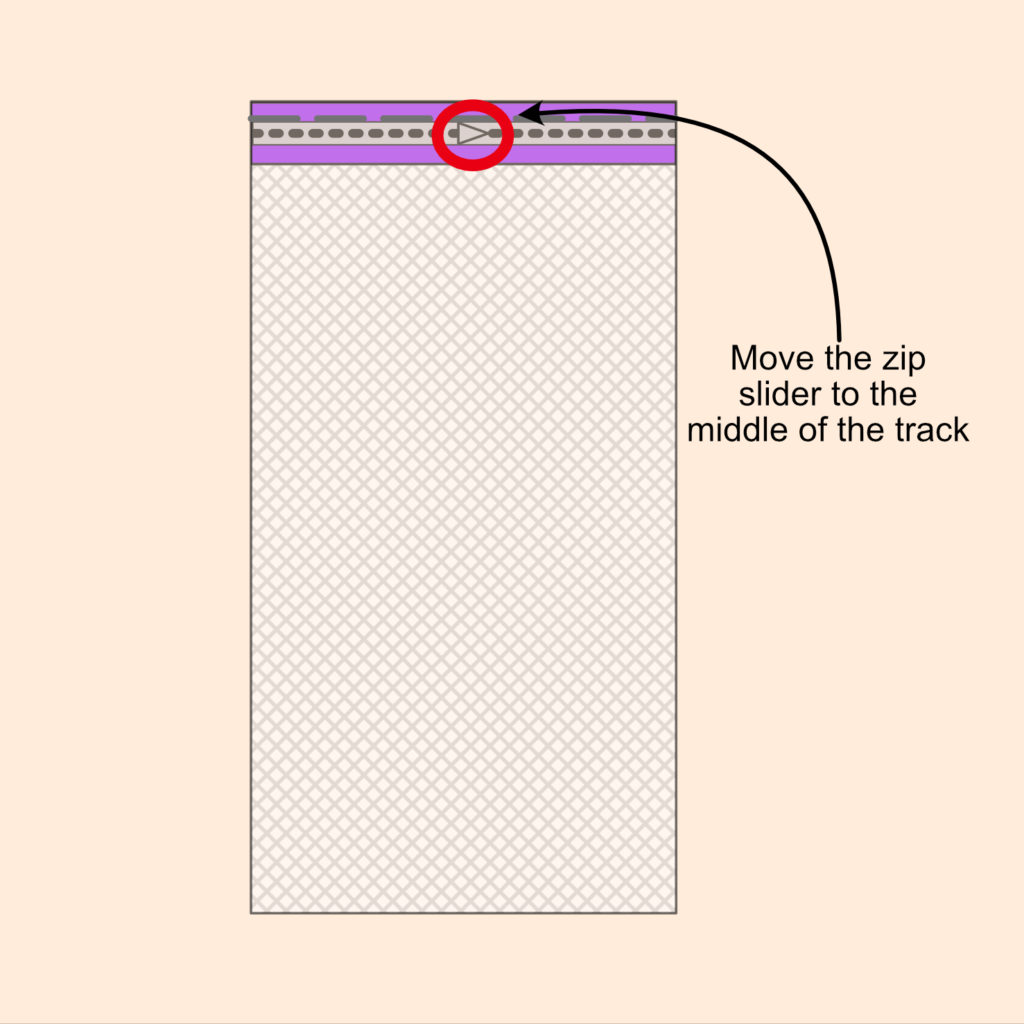
Place the zip slider in the middle of the track. When you get close to the slider, move the machine needle to the down position. Move the slider past the needle towards the section already stitched by moving the presser foot up. Once the slider is out of the way, place the presser foot back down and continue to stitch the rest of the line.
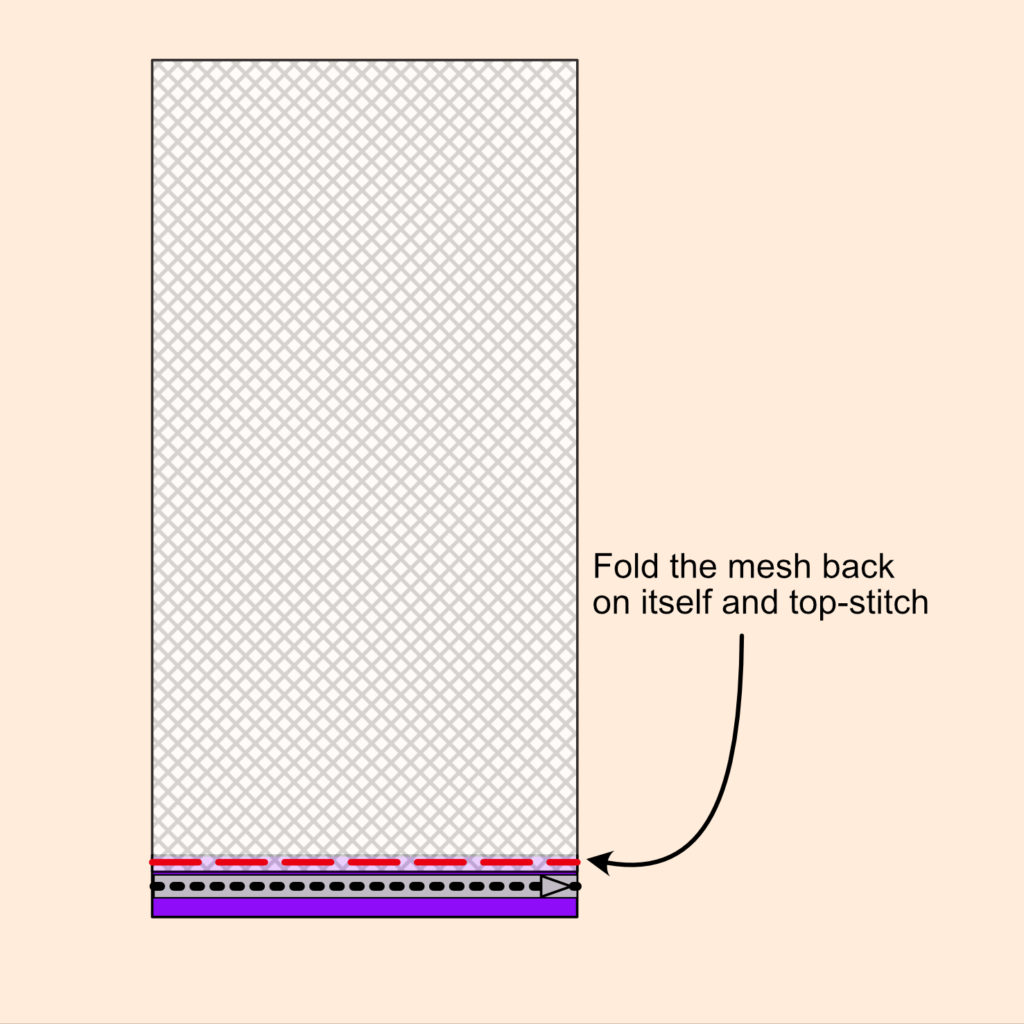
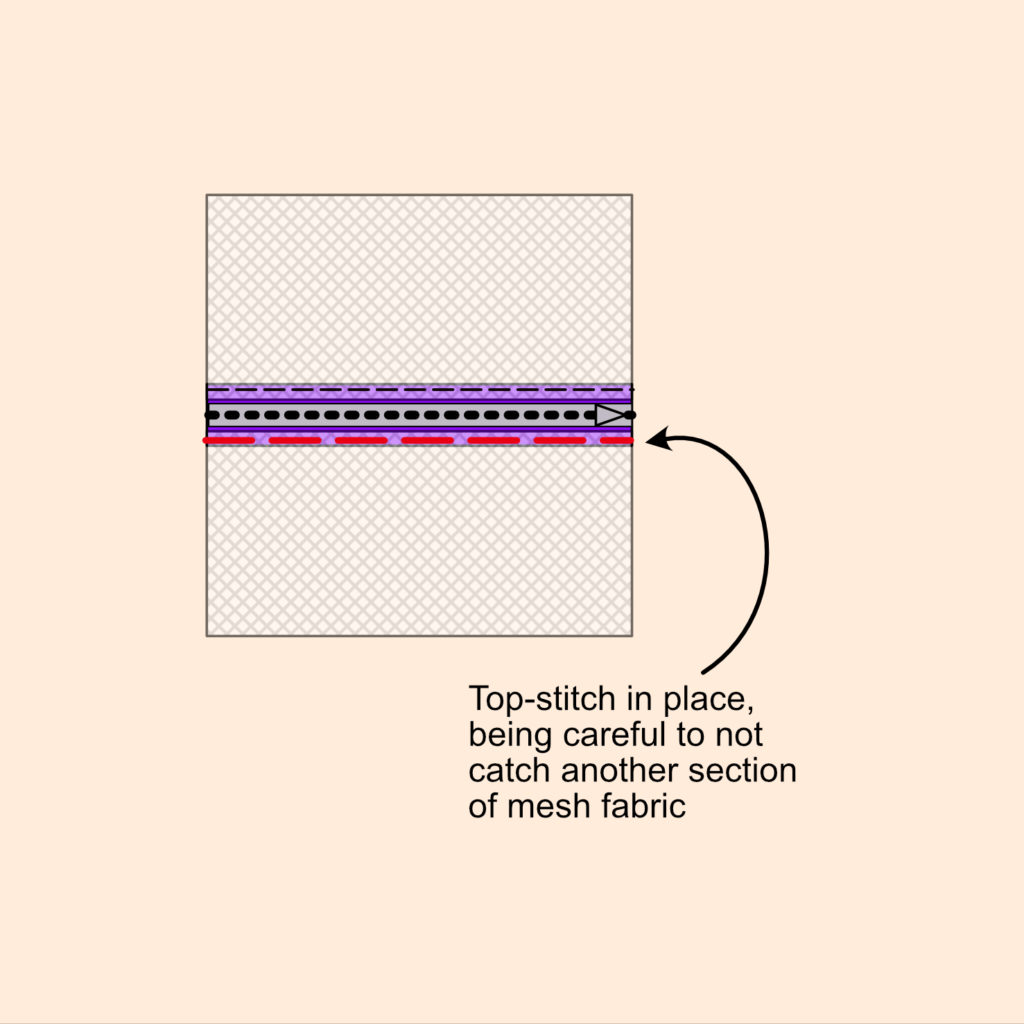
2.Top-stitch the mesh to the zip
Press the fabric back on itself at the stitched line so that it is no longer covering the zip track. Using a regular machine foot, stitch a straight line of topstitching to keep the mesh fabric away from the zip section.
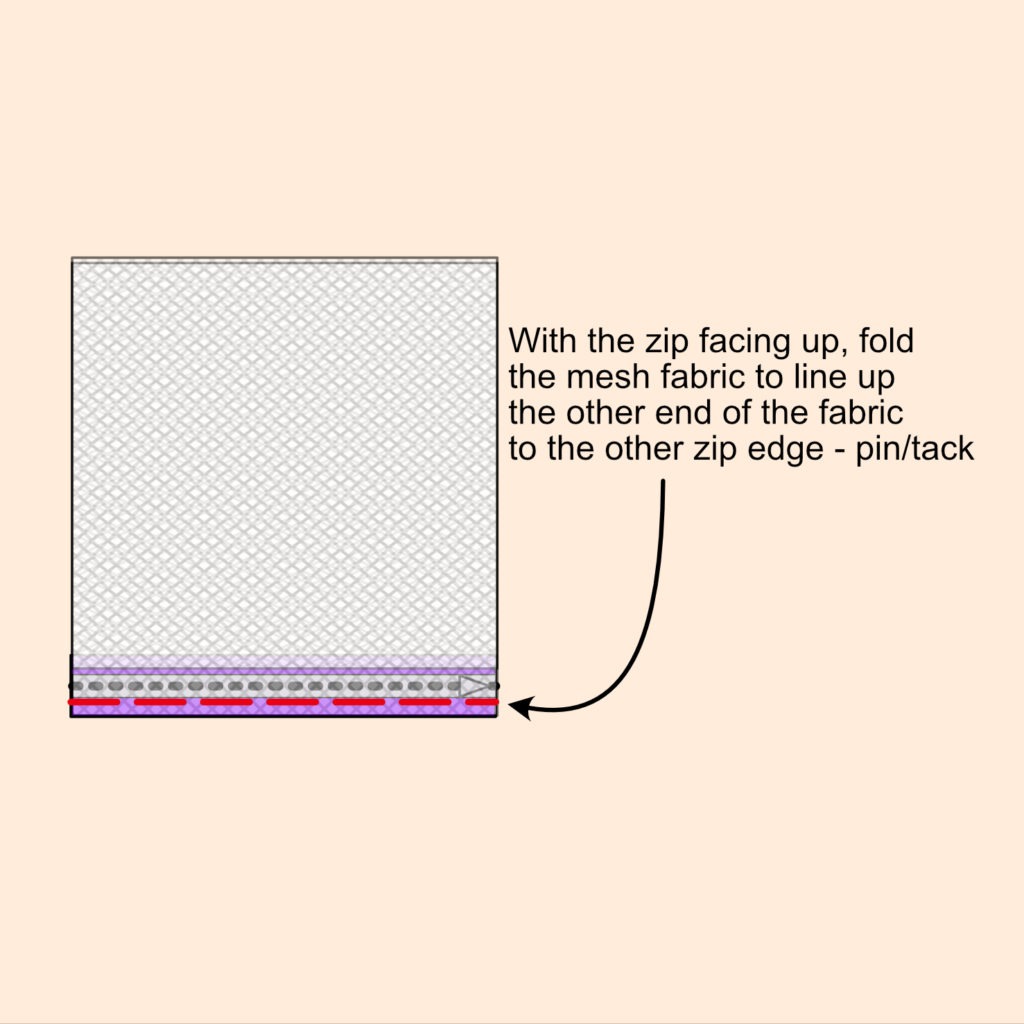
3.Stitch the other end of the mesh fabric to the zip and top-stitch
Place the zip back down with the zip facing up again. Without twisting the fabric, bring the other short end of the mesh fabric over the zip and line up with the other edge of the zip. Stitch in place as before with a zip foot and then topstitch with a regular machine foot. You may need to be careful that you do not accidentally stitch any other part of the mesh fabric to the zip section at this stage.
You now have a loop of mesh fabric attached to a zip.
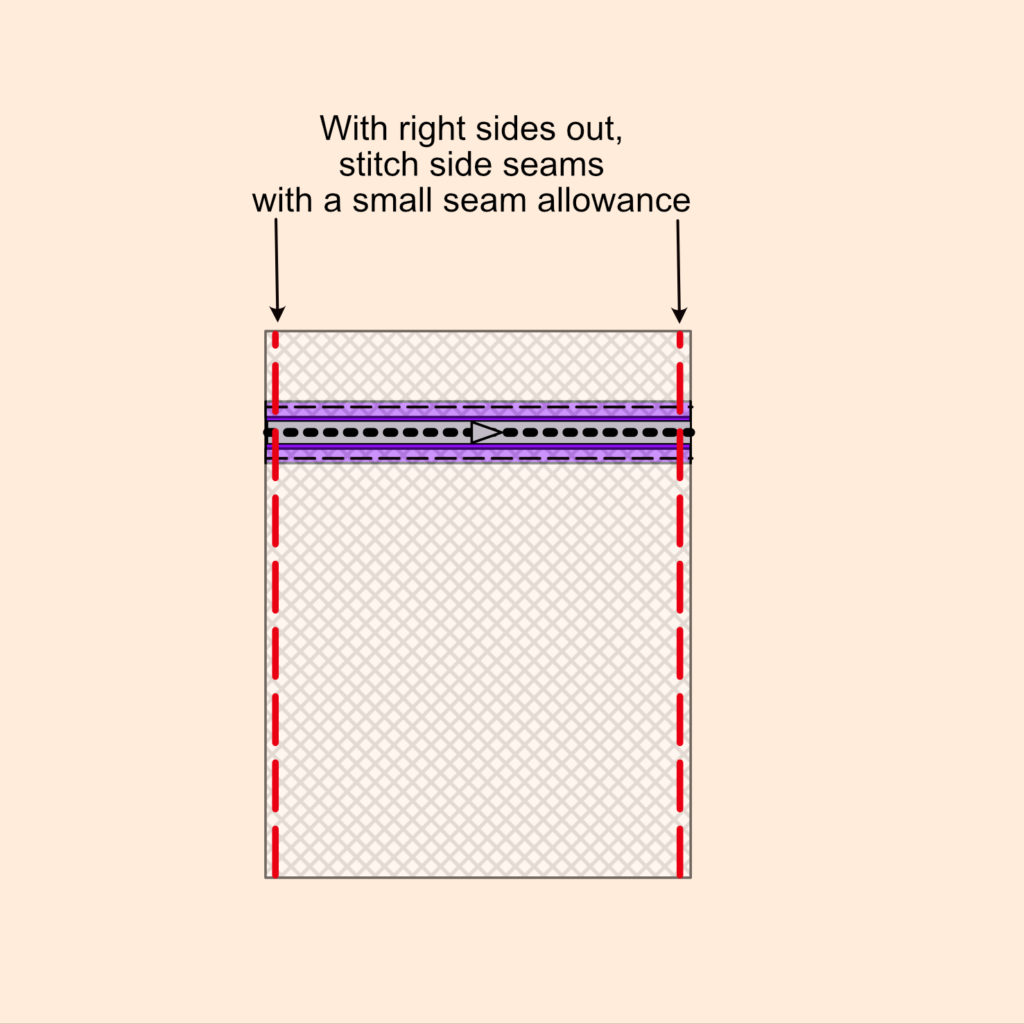
4. Stitch the side seams in place with a small seam right side out (first line of stitching for French seams)
For the side seams, I have used a French seam.
With the zip right side out, decide where you would like your zip to appear on the front of the bag, and adjust the loop of fabric accordingly. For the larger bag, I placed the top of the zip tape edge 5cm below the top of the bag. Pin in place on both side seams and ensure that your zip is halfway open so you can turn the item out.
Stitch both side seams. I used the edge of the regular presser foot to gauge the seam allowance to be a bit under 1cm.
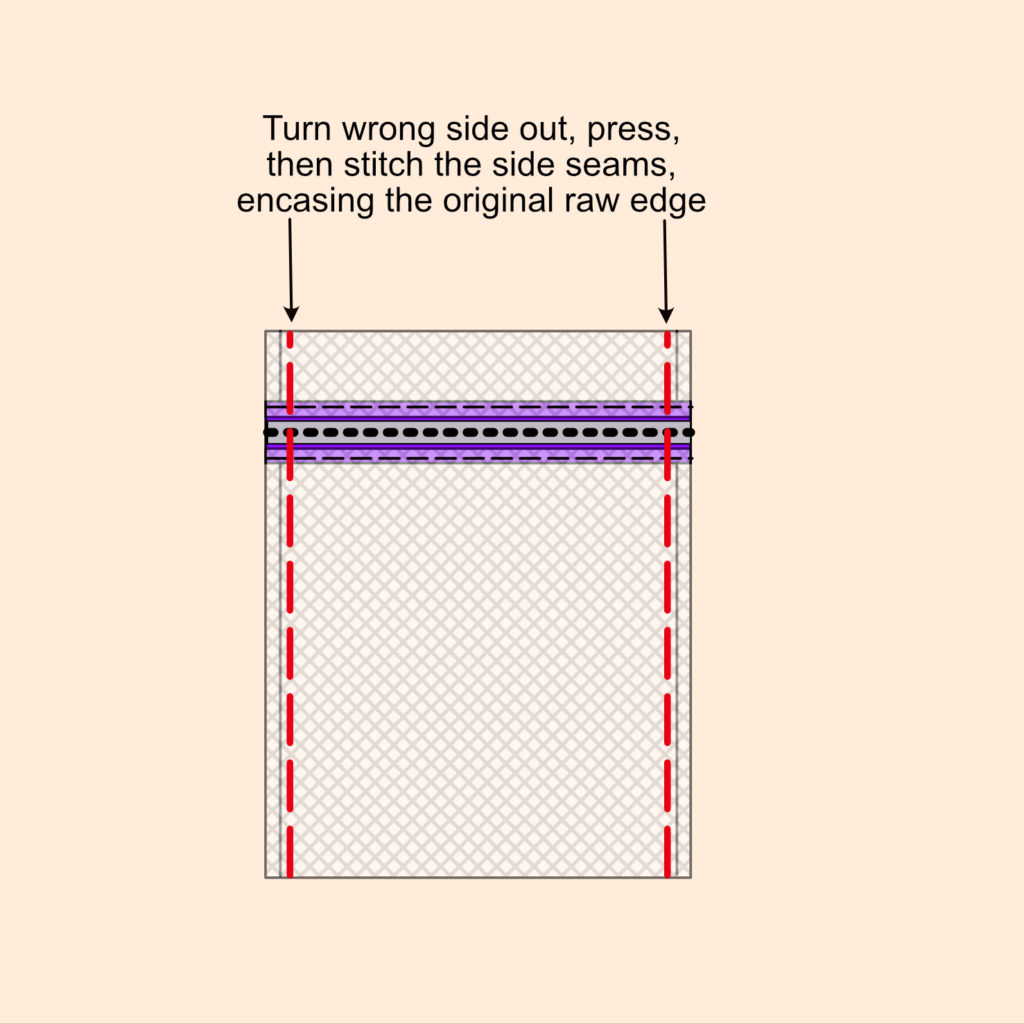
5. Turn wrong side out, press and stitch side seams (second line of stitching for French seams)
Turn the mesh back wrong sides out and carefully press with an iron to get sharp edges. You might need to use a pressing cloth to avoid melting your zip.
Pin and stitch the side seams once more using a 1cm seam allowance.
6.Turn out, press, and it's finished!
Turn right sides out and press once more.
If you would like to add any additional flourishes, you could add a bit of cotton tape or ribbon to the slider.
Watch it on the Vlog
I’ve linked my video for this tutorial below: