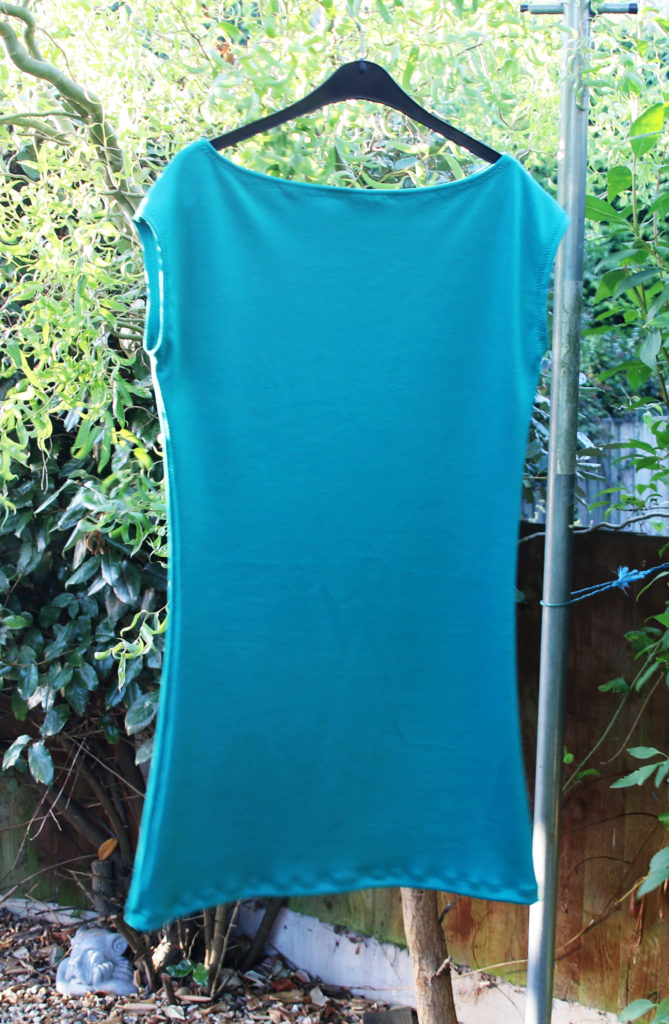
Polka Dot Shift Dress
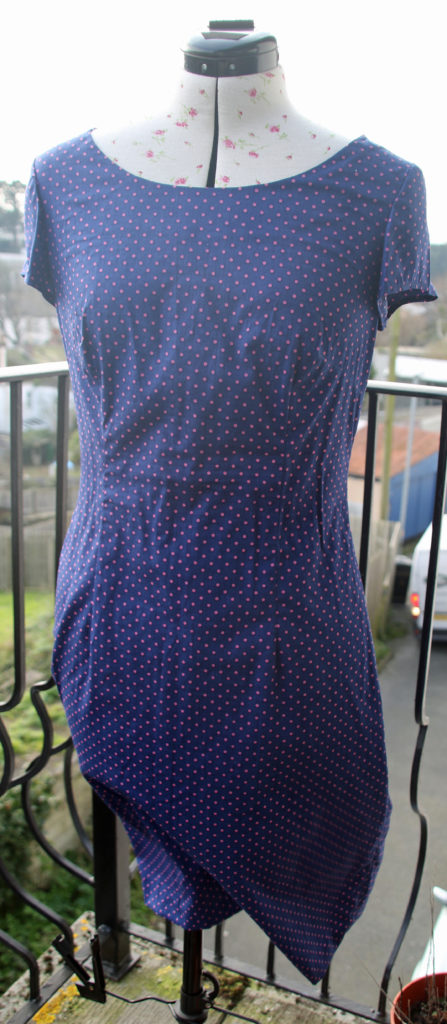
For the last few weeks, I have been going to some dressmaking classes nearby. I thought it might be useful for learning how to adjust and adapt patterns, as this is something I don’t do very much of. (more…)
For the last few weeks, I have been going to some dressmaking classes nearby. I thought it might be useful for learning how to adjust and adapt patterns, as this is something I don’t do very much of. (more…)
Recently I attended a day workshop on how to build your own frames. It’s not something that is necessarily feasible for me at the moment, but it’s definitely something I would like to try in the future. (more…)
Here is my first make as part of project #sewmystyle The first pattern was toaster sweater 2 by Sew House Seven. This is not a pattern I would automatically choose myself. However, the whole point of completing this challenge is to move out of my comfort zone! I chose a red jersey fabric from a local haberdashery. This fabric was sturdy, which works well to maintain the neck collar. The instructions are detailed well. I used the pdf version to save money and found that using a guillotine sped along the cut and stick stage! Another new product I tested with this make is using carbon paper, which revolutionised the cutting stage! It is much faster as I did not have to trace my size and then cut it out before pinning it on. Tilly and the Buttons have a great tutorial on how to use it here. This was my third attempt with knit fabrics and I decided to use my overlocker for the seams round the shoulders and down the sides. I was quite nervous using it as it trims at the same time, leaving little margin of error! However, it does a great job as it feels less like you are going to stretch the garment out of shape! It's very quick too. The main issue I had was with using a twin needle. I adjusted the tension and used knit hemming tape alongside a walking foot, but I think that a stretch or ball point twin needle was needed. I wasn't sure about the dropped hem at the back, but now it's made, I like this feature. Overall, it was a great make and I look forward to starting February's garment; the fabrics ready and waiting!
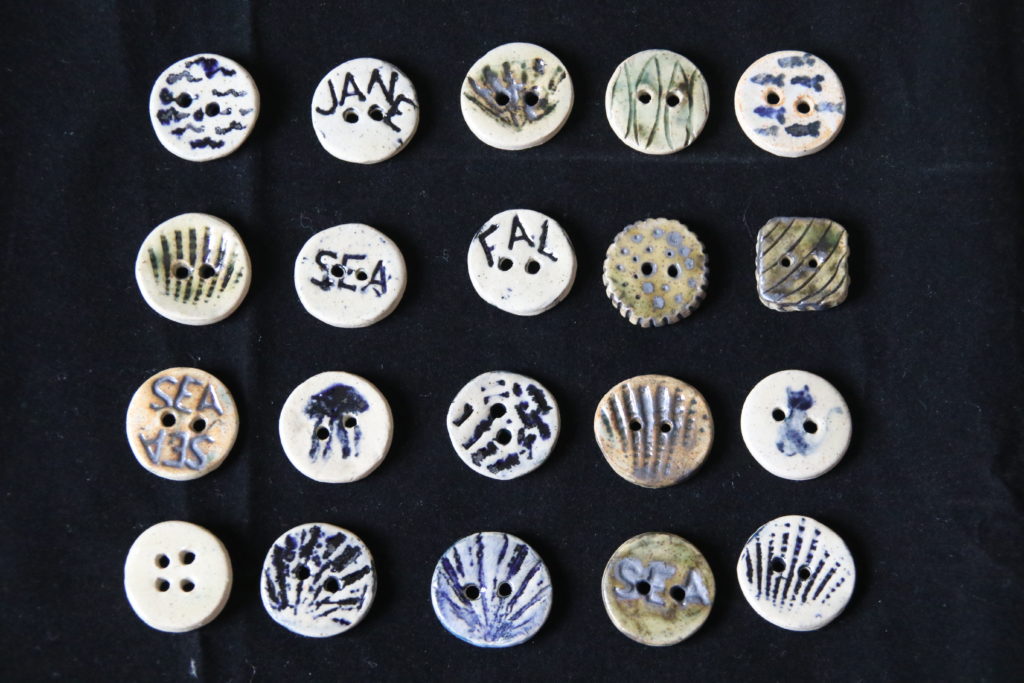
For the last two years, I have been going to evening classes to learn more about the challenging skill of ceramics. Ceramics does not come easily to me, but perhaps this is why I'm drawn to it. I struggle to roll out coils for hand building with any consistency, my slabs seem to come out lopsided even when I use guides, I glaze unevenly which causes crazing, and I grapple with the wheel on most occasions. But there is something so absorbing in the processes involved in ceramics, and when one item comes out better than expected among the multitude of items which are deemed as "lessons for next time," it can be fulfilling. I have veered away from "traditional" ceramics. By this, I mean the classic goal to make either wares for your kitchen or dining, or even sculptures. I have made the odd item such as an oven dish and a mug, but they both crazed. I've managed to make some small bowls on the wheel - some of which have even sides - but they have ended up storing bobbins, pattern weights and sewing machine feet invariably as a lot of them are made from porous earthenware (which is easier to use on the wheel - for me anyway). It seems I am naturally drawn to making ceramic wares which I can use with my other hobbies. In my first year of learning ceramics, I plucked up the courage to ask my tutor whether I could make a yarn bowl. Once the tutor knew what I meant by this, I was able to set off and make a yarn bowl from coil construction. It took many weeks to complete (which is why yarn bowls for sale are made on the wheel - not hand built) but I was delighted to have a practical item which I could use. Following the success of the yarn bowl, I set about creating matching accessories. I created a set of needle and crochet hook holders. I even made a pin dish, replicating a family heirloom version. It wasn't until more recently that I discovered the joy of making my own buttons. I began using stoneware, but also had the opportunity to make some white stoneware ones too (which looks a bit like porcelain and can be rolled out thinner), which I haven't been able to part with! If I think about it, I think part of the reason I haven't made "traditional" ceramic items is due to that awful tendency to compare your own work to others. Everyone else in the class was making mugs and bowls, and many of them were amazing, which can subconsciously affect your own choices. No one else was making yarn bowls or buttons, so I couldn't compare! However, everyone has their own style and skill development, and this shouldn't be a reason to avoid certain makes or opportunities. Moving into my third year of learning ceramics, I've decided I will try to make a few…
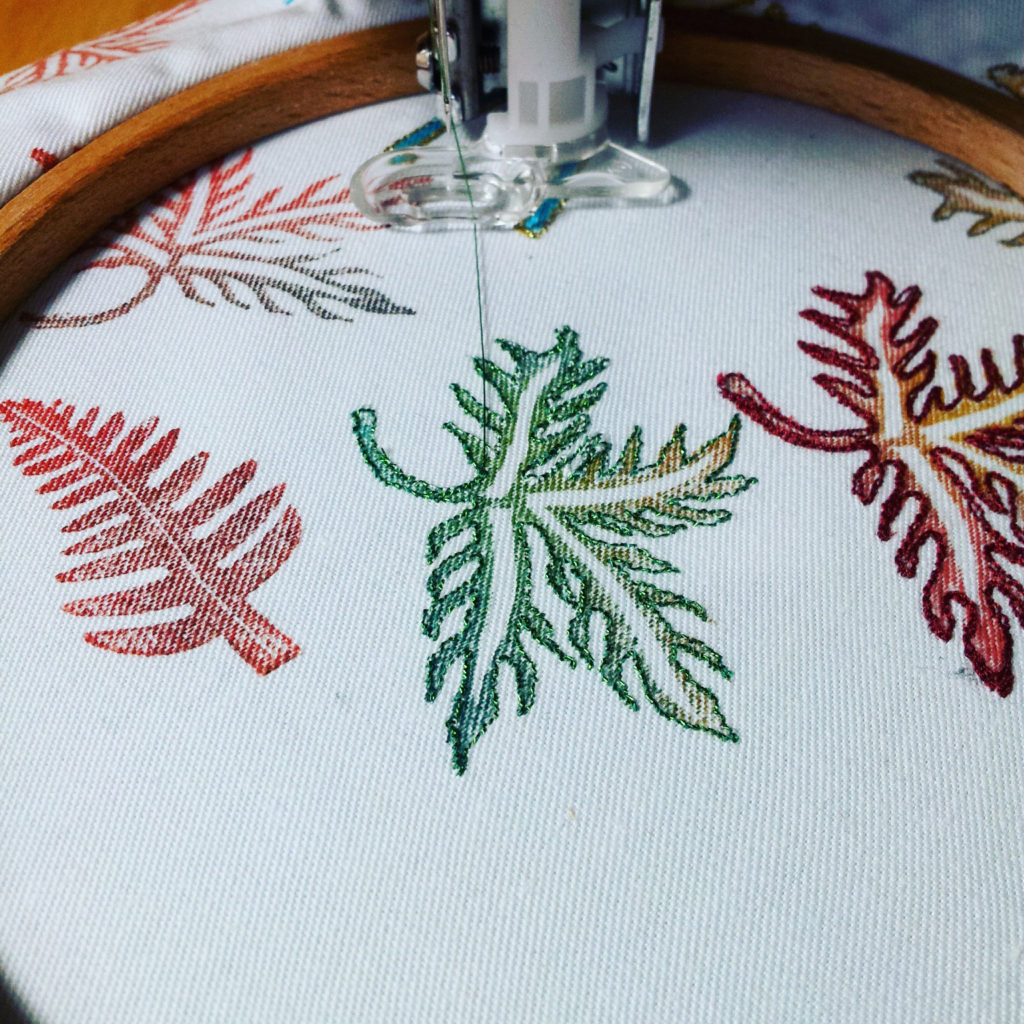
I mentioned in my post on the stitching, sewing and hobbycrafts show about my purchases for block printing and I thought I'd review the tools purchased. I bought two blocks from The arty crafty place stall at the show. Also, I picked up some leaf shapes from another stall which I felt could be used for block printing. I didn't buy the tempting starter kit, as I felt i had enough tools at home. I have fabric paints which I was inspired to buy from taking a textiles class last spring, and I have tray from a lino printing kit. I found a foam sheet to place beneath the fabric and sacrificed a new washing up sponge for the activity too. Using a tray is beneficial as you can mix your colours to produce new colours or you can create blends as you print. below is a selection of samples I produced from the blocks. I hate to waste samples though, and I ended up transforming this sample into a birthday card. As I hadn't intended to turn it into a card originally, I had to think about where to cut the piece. I decided to use free machine embroidery to stitch around the shapes. I began using metallic threads and then tried some others to create a bit more definition. Naturally, the blocks from The arty crafty shop worked better and were easier to use than the cheaper leaves I bought, but they both proved to be effective with practice. The arty crafty shop have so many lovely designs and I could have easily chosen many more, but I feel that the two selected will be versatile for a range of uses.
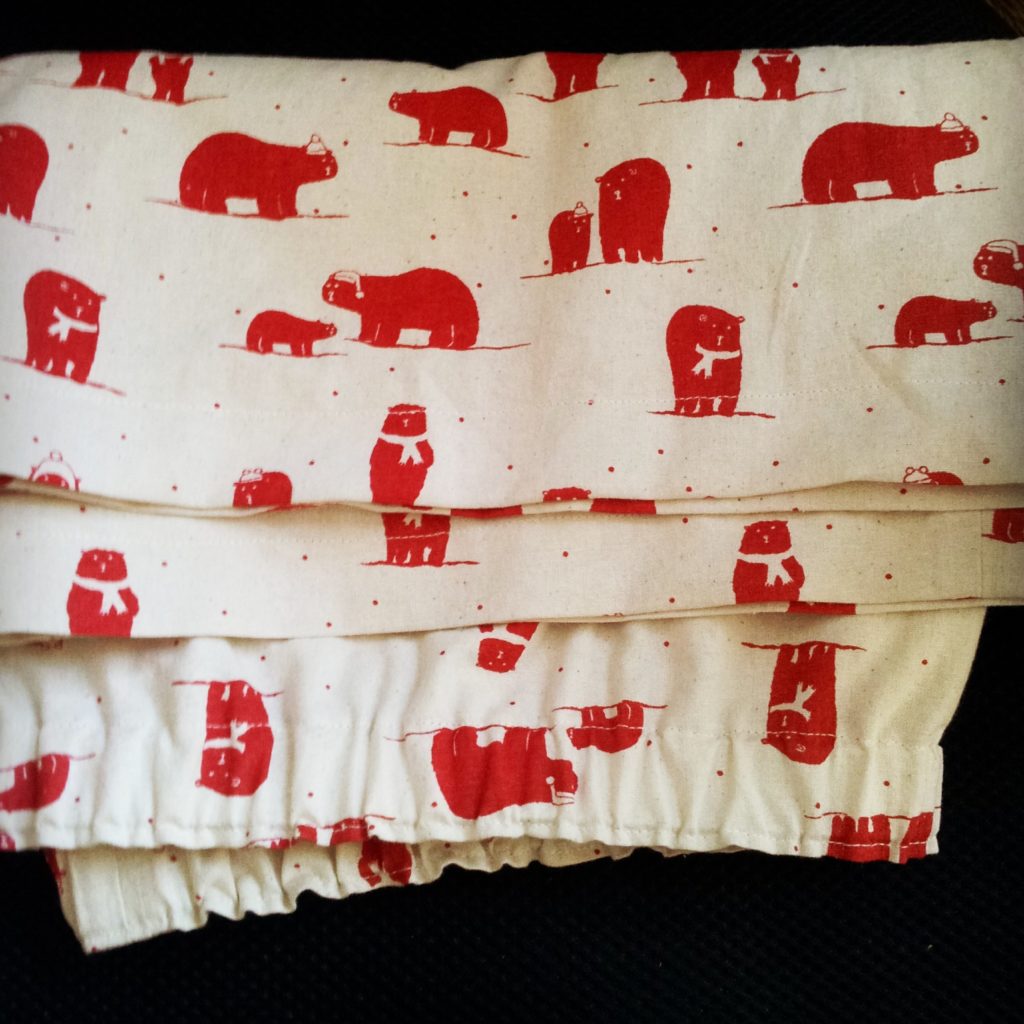
I don't make a lot clothes-wise for my boyfriend... the thought of making a shirt is quite daunting (he has a lot too). The only item I have made in ten years is a onesie funnily enough, which I made the day before Christmas Eve manically on my mum's sewing machine. It is the biggest gift I've made him, and it would be more impressive garment I've made... if I hadn't cut half the pieces the wrong way round on the fleece! Making pyjamas for him has been on my list for a while. However, I found this lovely bear print woven fabric at the stitching, sewing and hobbycrafts show last month which I knew he would like, so I decided that it was time to get this gift idea off the list. The main issue with making clothes for someone else even - even when you are making something quite simple like elasticated pj bottoms - is making sure they fit right. Fortunately I knew the inner leg measurement from trouser shopping in the past, but it was tricky to gauge the waist measurement beyond requesting a tactical hug! Even with the leg length, I ended up making them a little longer out of fear that if they were too short, I couldn't remedy that scenario as easily as if they ended up too long. I cut the fabric one afternoon and began stitching the first couple of stages, but had to shut myself away to finish them off the next day. It was good to have a short time frame to be able to make them as it meant I spent less time worrying and more time making. I found and bought a suitable top to match on this occasion. They were well received and I enjoyed making him something practical. next time, I think I will try out a summer set (at least leg length isn't required for shorts which eliminates one issue) and perhaps by then I will be confident enough with knits to make the top too!
While on a bit of a dressmaking roll, I decided to delve back into the realm of knit fabrics. Having only made one successful garment with knit, I decided that I wanted to keep the pattern as simple as possible. The simple question for this project was The Walkley Dress by Wendy Ward MIY. This pattern requires two pieces to be cut out of your fabric, and they come from the same template. If you're lucky enough to have 150cm wide fabric, you only need a metre! In this instance, I already had some fabric ready and waiting - a remnant from a fabric shop! Setting up the machine proved the most difficult part. It's been about six months since I last tried a stretch pattern, and it was a challenge to set up my machine. Following the advice from the pattern, I opted for the small zigzag stitch for the seams, and the three stitch zigzag for the hems. In addition, I attached a walking foot to my machine and loosened the pressure of the presser foot; without these adjustments, my machine did not want to stitch! Originally, I planned to try a twin needle on the hems, but I managed to break my stretch needle one a while ago and haven't replaced it yet. It turns out that I keep loosening the needle whenever I attach the walking foot to my machine! I didn't colour match the thread for this garment as I had recently acquired a set of threads in different colours (none of which were a perfect match) and I didn't want to go out and buy more supplies on this occasion. The downside to this is that the hemming is a lot more noticeable than it would have been. Also, I stretched the hem a bit while stitching (I did the hem before the neck and armholes). I didn't have any stay tape or stabiliser, which could have helped to prevent this, but I did adjust my stitching technique to decrease the amount of stretching after noticing the issue on the hem. The neckline is quite wide (though this could be in part due to my stitching ability!) but it's really comfy and it is definitely a pattern which provides you with fast results which are satisfying! It's a brilliant 'first knit' pattern too as there aren't too many steps or seams to stitch which means you can focus on working carefully with the knit medium. I think next time I use this pattern, I will definitely try out some knit stay tape to ensure that the garment lasts a long time. Also, I think I may opt for a patterned material. I think I will give this pattern another go with the lessons learnt from this occasion in mind! As it only requires a metre of fabric to create a whole dress, and can be made in less time than a lot of the other patterns I have, I think another one will be made! As…
When I took part in the #miymarch16 instagram challenge, I put down this dungarees pattern as my sewing ambition (new Burda 3779). I bought the pattern from a charity shop for £2 just over a year ago because I loved the idea of making some, and bought some denim shortly after. However, the amount of pieces in the pattern felt overwhelming, and I couldn't get started. A couple of months ago, I asked my mum if I could bring along the pattern and fabric when I visited her to see if she could encourage me to get started. Over the weekend, I managed to trace the pattern, pin it onto the fabric, and then cut it out. One of my main worries was altering the pattern to my size. However, we decided that as it was designed to be very loose fitting, I could cut it a size smaller than usual, which would ensure that the bottom half would not be too baggy! I didn't manage to pick it up again for about a month after this visit! Feeling that I still needed a boost, I went back to my mum's for a crafty retreat to get the pattern finished. It wasn't as bad as I thought it would be. When I attached the bib section to the shorts, it didn't provide a completely sealed finish, but I think I might have misread it. I would plan to take steps to create a better finish next time. Also, the inner sides of the bib are tacked in place and then secured by edge stitching and top stitching. However, I decided to slip stitch it in place by hand to secure it before the two rows of machine stitching. The braces were simple to attach. The buttons have to be hammered on, but in my view, this is much easier than stitching button holes and working out where to place the buttons on the straps! There's the added benefit that you can adjust it to size. The pleats on the front were also a worry, but turned out to be really simple to complete. They were more like tucks. The denim material is so sturdy that it was easy to tack in place and press well at every step. I think these may become my 'uniform' for craft days! I think I will have to make a trouser version for the winter though (I'm already imagining some navy polka dot material which could be used for the second pair...)Harry did become jealous of the sewing project during its production, and kept sitting or laying on the instructions. When I moved the instructions out of the way so he couldn't make any further holes in it with his claws, he decided to settle on the garment instead!
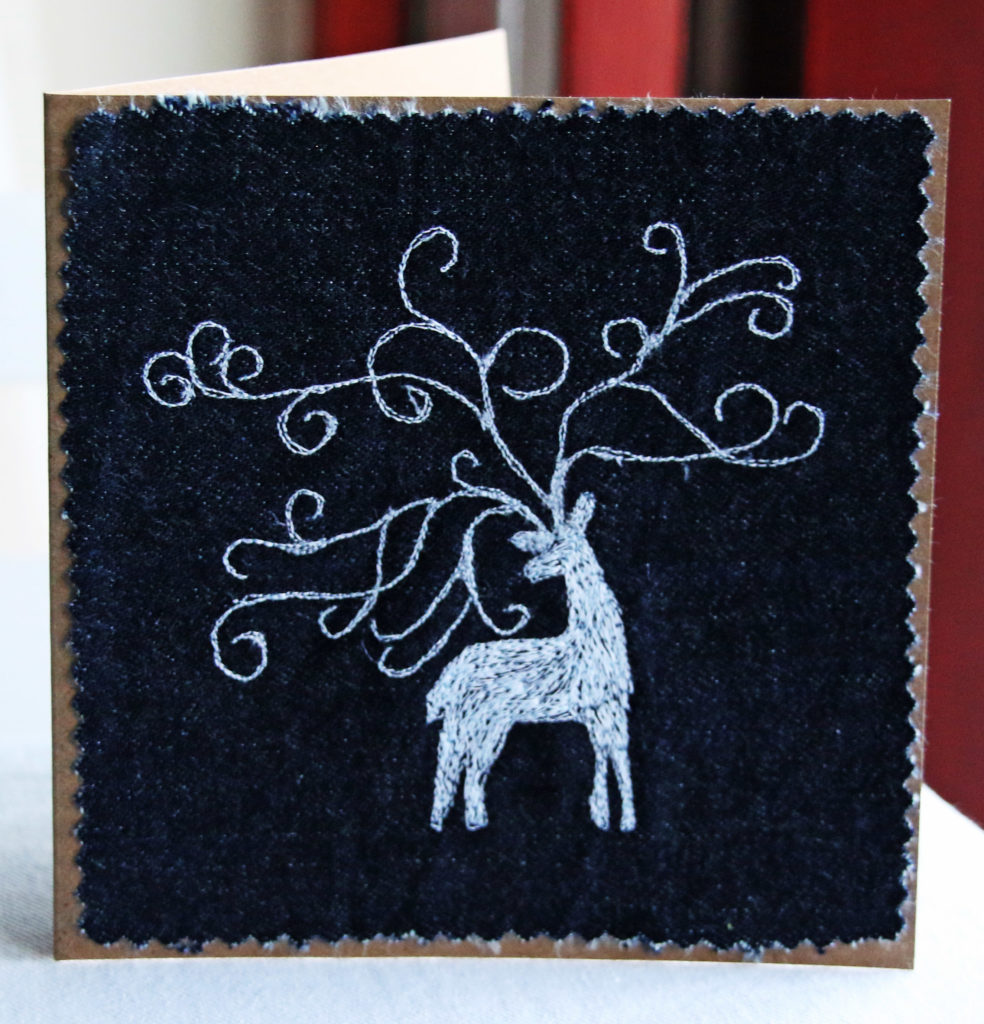
This week I've been quite industrious (well, more than I have been anyway!) and have managed to complete quite a few things for Clobber Creations ranging from fruit protectors to bath hats! However, I want to reflect on the process of recording my free machine embroidery. I find recordings of free machine embroidery quite mesmerising, and I'd voiced an interest in having a go at some point. My dad pointed out that my camera could record video as well as take pictures, so the lack of video camera was not an issue. I just needed to think about what I wanted to record and when to do it. I thought that this aspiration was something I would play around with in September. However, I began to put a Christmas card design into practice this week and thought, "why not record it?" Fortunately, I have a tripod, which meant I could set up the camera behind me to one side. I began with a full recording of the design make, from tracing the design to stitch 'n' tear, to colouring in. However, I noticed the image was quite far away, so I had a go at recording zoomed in too. A few things I learnt from this experience: Manual focus. I thought that I would want my camera to do auto focus, but for the close up version, it kept focusing on my hands instead of the design. manual focus meant that the camera stayed focused on the area surrounding the machine's needle. Time Stretch. This is what it's called in Adobe Premier Elements. I wanted the clips to fit into the length of a song and my free machining speed is not quite on par with this! Using time stretch helped. The close up video was sped up by 250%, which is a nice speed (and meant that people didn't believe it was sped up), but the main video had to be sped up by 600%, which is a bit jarring... Public domain music. I figured that most people wouldn't want to hear the loud thuds coming from my sewing machine, so I searched for music which I could use for free, which I found at Free Music Archive. I was surprised and delighted to find songs which were appropriate. It is very early for Christmas but I couldn't resist publishing the videos and card straight away. You can view the close up and start to finish stag videos on youtube. The card is available on etsy.
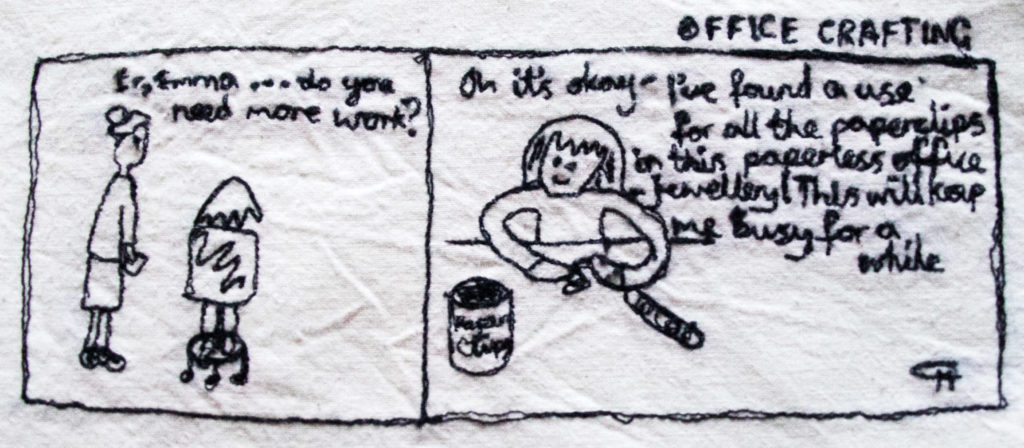
Recently I decided to revisit my doodles through free motion stitching. Doodling can happen in all sorts of circumstances. You could be on hold chasing up an order over the phone (or in the case of my first job, being the advisor on the other side of the line), waiting for a meeting to commence, sitting in the audience of a presentation or passing the time on the train. Sometimes the doodling is abstract, and sometimes it turns into a miniature piece of artwork. Many of the doodles I made when I worked as a customer advisor in a call centre focused on the more abstract sketches of wiggly lines and rough shading, punctuated by the odd cartoon cat. We had green paper to use to make notes while we were on the phone, which we had to throw away as confidential waste at the end of our shift, so I don't have any of those scribbles anymore, and I doubt there were many of interest from that job either! However, I have kept some of the sketches I've made over the years. I decided to use these to practise my free machine embroidery. I used a water soluble fabric pen to trace the whole design onto my scrap piece of calico. However, I found that once I got a gauge of the letter sizing, I began to ignore the template. I was concerned about writing with stitch so small, but it worked out well in the end. I probably wouldn’t attempt it when I’m tired though! Overall, it was an interesting stitch. I find that I prefer joining up letters when I stitch, whereas I found it difficult to allow the writing to be joined up, possibly due to the style and format you normally see comics portrayed in! I have some more comic strip ideas drafted, including a short series based on being a graduate and job interviews, which I will use to practise my machine embroidery skills with as well!