100 Day Project

100 Day Project completed

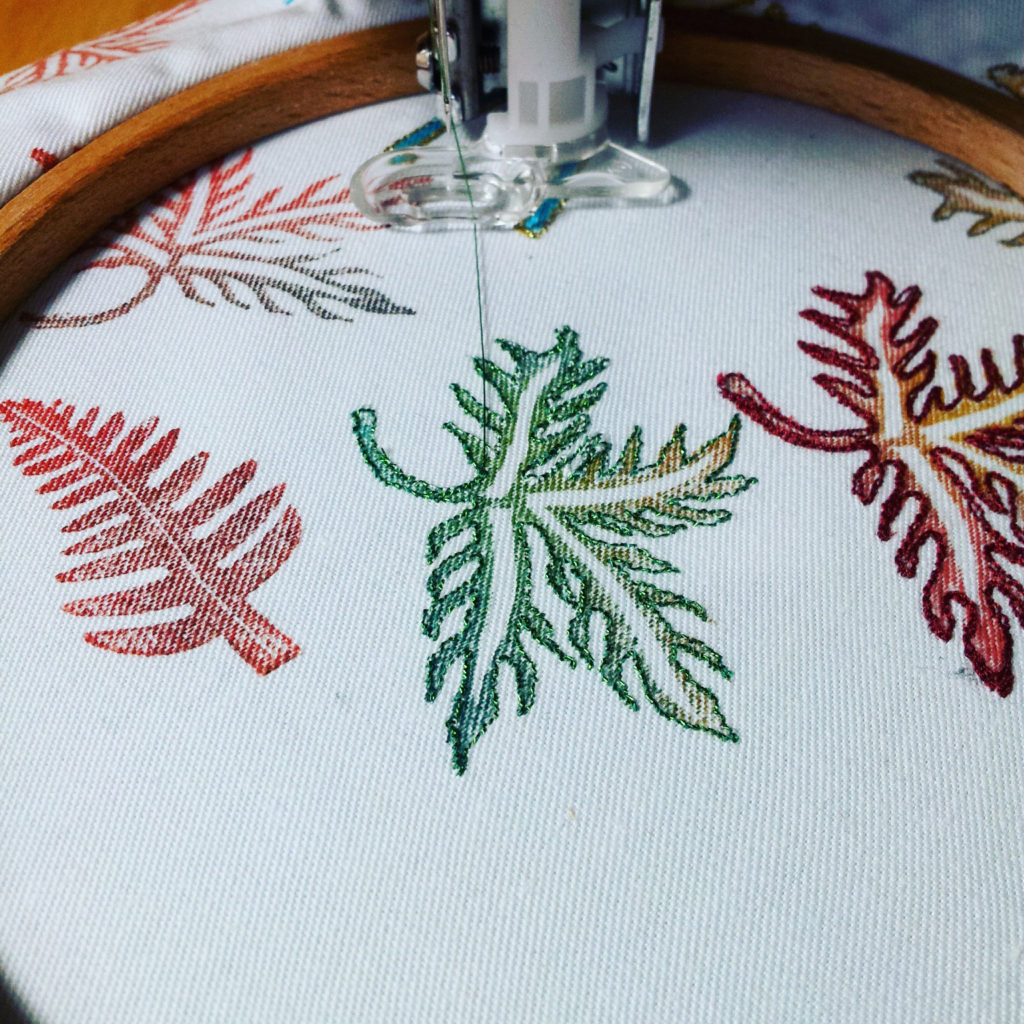
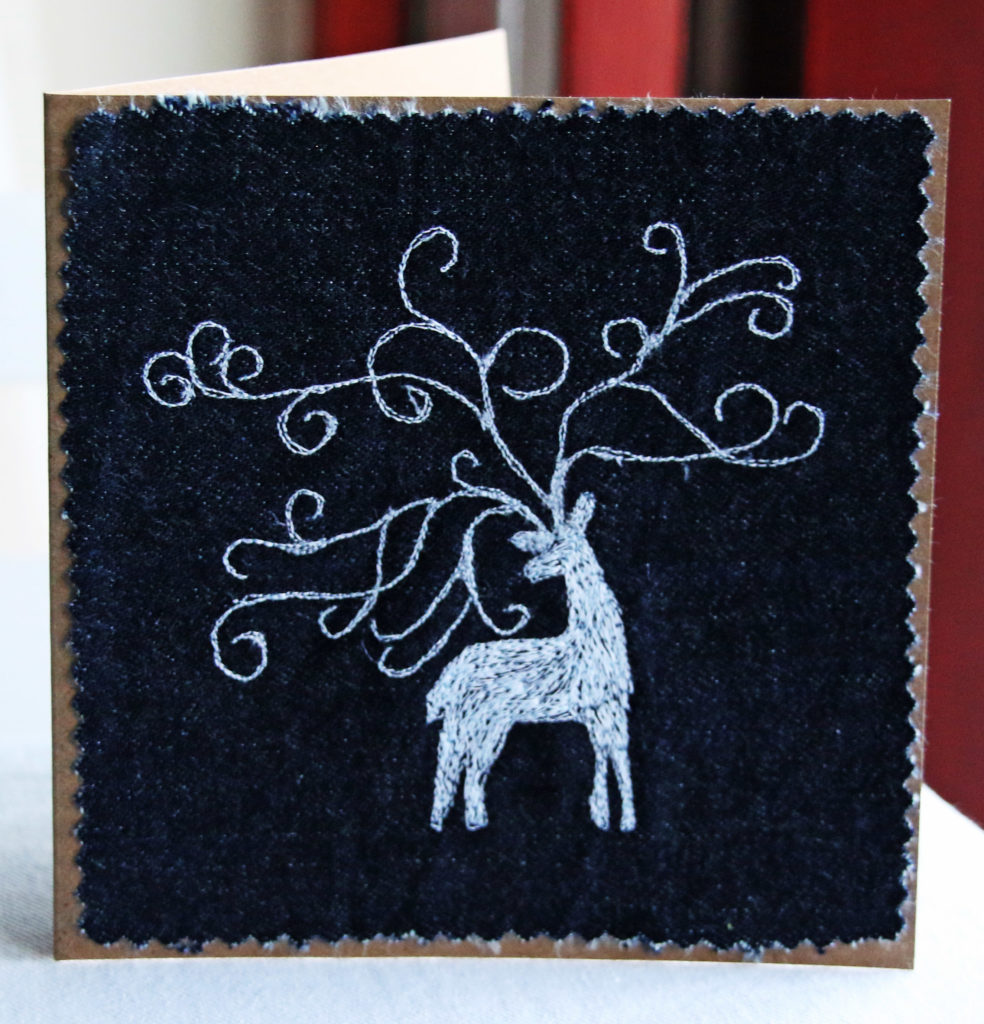
One of my achievements in 2020 was completing the 100 day project.

The 100 Day Project is a challenge I had my eye on for a few years, but while the UK was in lockdown, it seemed the best opportunity I would get to complete it, particularly when I intended to use the sewing machine.

As the project pans over 3.5 months, it tends to be best to pick a challenge which you can achieve no matter your travel plans.  Naturally, lockdown removed this potential issue!  While I don’t travel on holiday much, I do normally visit relatives, and they all live a decent distance away.  I don’t usually pack a sewing machine unless an intentional sewing weekend has been planned!

Free machine embroidery is something I learned at my local adult education centre here in Cornwall.  I was drawn to stitching animals during this introduction.  Nevertheless, I had never concentrated too much on this theme beyond the odd birthday card.


100 day project - Day 24 Giraffe
Hundred Day Project - Day 94 Red Panda

What I learned from The 100 Day Project

Despite being really challenging, it was worth learning the following:

  • If you show up every day and spend 30 minutes on a project, it builds up into something substantial
  • If you repeat something regularly, you become more confident and knowledgeable in what you are doing (e.g. for me in this challenge – have I added enough detail on the animal? By the end, I queried this a lot less)
  • Just start.  Some days, I dragged my heels and other days I woke up and got on with it.  The animal was still completed but I saved much more time when I got on with it.
  • Some days you won’t want to show up.  There were days when I wondered why I was adding this project to my list at a particularly challenging time.  However, this feeling did not last long, and it was the best year to complete the challenge.
  • Make time to do what you enjoy.  Since the project, I took a break from free machine embroidery and sewing in general.  However, I see how valuable taking the time to craft is in my day and how it boosts other areas of my life such as work and family.  It is important to have different areas of your life to focus on so that when things are challenging or not working out in one remit, you have the others the bolster you.
Machine Embroidery Sea Turtle

Planning and Preparation

I knew that one of the potential pitfalls of the challenge was getting caught up in which animal to create each day, and making sure I did not repeat them.  Therefore, I did some research in advance, selected 100 animals and wrote them down on scrap pieces of paper, folded them up and popped them in a box.

I had wanted to research all the animals in advance as well to save time on the day, but I ran out of time, and in a way, doing the research bit by bit helped to make the challenge more manageable.

Day by Day: learning and evolving

It is worth noting that while completing the project, I had a couple of other priorities:

  • Starting a new job
  • Finishing two adult education courses

While I was saving time not having to commute to work, I was adapting to a new role and trying to complete work on a couple of classes I started.  I found it easiest to complete the challenge early in the morning, aiming to complete most of it before I began work, and finishing off the rest after I finished work.  I had added the extra challenge of recording all the animals and posting a video on Youtube, which made it more time intensive.  However, some days, I managed to research the animal, stitch it, photograph, edit the footage and schedule all before work, which was a great accomplishment.

Hundred Day Project - Day 92 Peacock
Hundred Day Project - Day 43 Lobster
Continue Reading100 Day Project

Birthday card: Dog themed

Recently, I shared a birthday card where a ginger tabby cat was the theme of the image.  This time, I’m sharing a dog themed birthday card – a Jack Russell themes one to be precise.

I was fortunate to find many real life dog photos of Jack Russells being dressed up for the birthday spirit, so it wasn’t difficult for me to picture one with a birthday hat and a party horn!  Based off these photos, I drew the outline of the illustration.

For this design, I used an air erasable pen to trace my design onto the calico I was using as the base.  I used black thread to create all the outlines as well as the facial features.  For the hat, I used a simple orange for the circles, and a multi-coloured thread for the background hat colour.  The party horn was coloured in blue.

For the markings on the dog, I used a brown thread and kept using a straight stitch.  However, I moved the fabric faster to create larger stitches to create a fur-like shading.

Finally, I attached to the card template with spray mount.

Watch it on the Vlog!

I made a timelapse of stitching this card which you can view in the video below:

Play Video
Continue ReadingBirthday card: Dog themed

Block printing

I mentioned in my post on the stitching, sewing and hobbycrafts show about my purchases for block printing and I thought I’d review the tools purchased.

I bought two blocks from The arty crafty place stall at the show.  Also, I picked up some leaf shapes from another stall which I felt could be used for block printing.

I didn’t buy the tempting starter kit, as I felt i had enough tools at home.  I have fabric paints which I was inspired to buy from taking a textiles class last spring, and I have tray from a lino printing kit.  I found a foam sheet to place beneath the fabric and sacrificed a new washing up sponge for the activity too.

Using a tray is beneficial as you can mix your colours to produce new colours or you can create blends as you print. below is a selection of samples I produced from the blocks.

blocks_tested

I hate to waste samples though, and I ended up transforming this sample into a birthday card.  As I hadn’t intended to turn it into a card originally, I had to think about where to cut the piece.

stitching_leaves

I decided to use free machine embroidery to stitch around the shapes.  I began using metallic threads and then tried some others to create a bit more definition.

Naturally, the blocks from The arty crafty shop worked better and were easier to use than the cheaper leaves I bought, but they both proved to be effective with practice.  The arty crafty shop have so many lovely designs and I could have easily chosen many more, but I feel that the two selected will be versatile for a range of uses.

leaves_card


Continue ReadingBlock printing

The air erasable pen

At the end of September, I bought my first air erasable pen and thought I’d share my first few weeks’ experience with it.

The air erasable pen I got at the  the stitching, sewing and hobbycrafts show at Westpoint, Exeter, was from Barn Yarns.

As you can see from the images, there are two ends to this pen.  There is a fine point and a thicker nib.  the difference between these two nibs can be seen in the image below:

fine_and_thick_point

I like the use of two different thicknesses because it suits the purposes I use it for very well.  I can use the finer point to create much more precision on intricate machine embroidery designs which need to be mapped out on the material before stitching.  However, the thicker nib is useful for making marks dressmaking as it show up better and doesn’t disappear quite so quickly!  However, I have used it for larger embroidery designs.  For example, I have begun making some new tote bag designs for Christmas which include larger stitched words than I normally produce.  I write with the machine freehand in general, but as the words are a lot bigger than I’m comfortable with, it was good to use the thick nib of the pen to draft it out before I began.

The directions for this pen advise that the markings will disappear between 24-48 hours in general, but it depends on the location.  Humidity plays a factor, and I found that the stag design markings with the fine point disappeared within 24 hours.  Cornwall is quite humid, so I expect that other locations may find the markings last longer!  I think it depends on the fabric too.

The time it takes to disappear can be an advantage and disadvantage.  For me, it’s great for a project I am going to make straight away, as the markings are there for as long as I need, and will disappear on their own without the need of water, which removes the risk of shrinking the fabric (if it gets to wet) or causing the thread to run.  However, it would not be so good if you used it for a dressmaking project which you could not complete within a weekend, as there’s a good chance your markings will disappear if you take too long!  In this instance, I’d probably stick to the water soluble pen variety, which tends to last much longer in my experience.

Overall though, this pen has improved the way I make certain items and I have used it a lot in a short space of time.  It will be interesting to see how long it lasts before I need to purchase a new one!

stag_stitched

Continue ReadingThe air erasable pen

#pic2stitch #1 The Man Engine

For my first #pic2stitch challenge, I decided to focus on The man Engine.

For anyone who missed it, The Man Engine is a mechanical puppet of a miner which is 4.5 metres tall when crawling and 10 metres tall when standing.

We were lucky to be able to travel to St Austell during one of the puppet’s transformations.  There was a big crowd, so we couldn’t see at first, but the organisers were really good in encouraging the crowd to keep moving to let people further back view it too.  Phill managed to take some pictures and it was from one of these pictures that I decided to create my first picture to stitch transformation.

cropped and smart fix

I wanted to create more of an outline of the Man Engine, so i used Photoshop Elements to edit the picture.  I erased a lot of the background data to make it easier to work out which parts were Man Engine and which weren’t!

I quite liked the image on the left, where I’ve used the water paper effect after deleting most of the background.  However, I stuck with my original plan, and used the photocopy effect to create a black and white version of the photo.

IMG_20160810_112805

As this was a big project with much detail, I decided to use a water soluble pen to mark out the details on the edited photograph.  With the pen and a window, I traced the design onto calico.

The photo selection, editing and then transfer to calico took around 3 hours.  In the afternoon, I began to stitch the design, which took around 4 hours, including short breaks to relax my eyes and wrists! I took a couple of hours to decide how to frame it, looking at different frames online and trialing the design in ones I had at home already.  In the end I went for the box frame below, which is a 3D frame, but is the perfect size for it.

IMG_20160811_095417

Here is the end result.  I was considering using some embroidery strands to highlight the puppet’s ropes, but in the end I decided to leave it how it was.  I did add its name, the year and my initials – I can’t seem to resist a bit of freehand writing with stitch!

I really enjoyed this make.  It was nice to spend the day on it and finish with a completed piece.

If you would like to view how I made this finished piece, I did record the machine embroidery section and have uploaded it onto youtube here.  I will warn you that it’s quite a long video despite speeding it up to ten times the actual time it took me!

For more information about the Man Engine, there is a useful article on the BBC website.  There was a website set up for the Men Engine’s tour but it now advises to check Facebook and Twitter for an update on what’s next for it.  There’s also the Cornish Mining Heritage website, who funded the project.

Continue Reading#pic2stitch #1 The Man Engine

Recording a card design – the stag card

This week I’ve been quite industrious (well, more than I have been anyway!) and have managed to complete quite a few things for Clobber Creations ranging from fruit protectors to bath hats!  However, I want to reflect on the process of recording my free machine embroidery.

I find recordings of free machine embroidery quite mesmerising, and I’d voiced an interest in having a go at some point.  My dad pointed out that my camera could record video as well as take pictures, so the lack of video camera was not an issue.  I just needed to think about what I wanted to record and when to do it.

I thought that this aspiration was something I would play around with in September.  However, I began to put a Christmas card design into practice this week and thought, “why not record it?”

Fortunately, I have a tripod, which meant I could set up the camera behind me to one side.  I began with a full recording of the design make, from tracing the design to stitch ‘n’ tear, to colouring in.  However, I noticed the image was quite far away, so I had a go at recording zoomed in too.

A few things I learnt from this experience:

  1. Manual focus.  I thought that I would want my camera to do auto focus, but for the close up version, it kept focusing on my hands instead of the design.  manual focus meant that the camera stayed focused on the area surrounding the machine’s needle.
  2. Time Stretch.  This is what it’s called in Adobe Premier Elements.  I wanted the clips to fit into the length of a song and my free machining speed is not quite on par with this!  Using time stretch helped.  The close up video was sped up by 250%, which is a nice speed (and meant that people didn’t believe it was sped up), but the main video had to be sped up by 600%, which is a bit jarring…
  3. Public domain music.  I figured that most people wouldn’t want to hear the loud thuds coming from my sewing machine, so I searched for music which I could use for free, which I found at Free Music Archive.  I was surprised and delighted to find songs which were appropriate.

This slideshow requires JavaScript.

It is very early for Christmas but I couldn’t resist publishing the videos and card straight away.  You can view the close up and start to finish stag videos on youtube.  The card is available on etsy.

Continue ReadingRecording a card design – the stag card

Comic Strip Stitched

Recently I decided to revisit my doodles through free motion stitching.

Doodling can happen in all sorts of circumstances.  You could be on hold chasing up an order over the phone (or in the case of my first job, being the advisor on the other side of the line), waiting for a meeting to commence, sitting in the audience of a presentation or passing the time on the train.  Sometimes the doodling is abstract, and sometimes it turns into a miniature piece of artwork.

Many of the doodles I made when I worked as a customer advisor in a call centre focused on the more abstract sketches of wiggly lines and rough shading, punctuated by the odd cartoon cat.  We had green paper to use to make notes while we were on the phone, which we had to throw away as confidential waste at the end of our shift, so I don’t have any of those scribbles anymore, and I doubt there were many of interest from that job either!

design

However, I have kept some of the sketches I’ve made over the years.  I decided to use these to practise my free machine embroidery.

I used a water soluble fabric pen to trace the whole design onto my scrap piece of calico.  However, I found that once I got a gauge of the letter sizing, I began to ignore the template.  I was concerned about writing with stitch so small, but it worked out well in the end.  I probably wouldn’t attempt it when I’m tired though!

finished office crafting

Overall, it was an interesting stitch.  I find that I prefer joining up letters when I stitch, whereas I found it difficult to allow the writing to be joined up, possibly due to the style  and format you normally see comics portrayed in!

I have some more comic strip ideas drafted, including a short series based on being a graduate and job interviews, which I will use to practise my machine embroidery skills with as well!

Continue ReadingComic Strip Stitched