Birthday card: Dog themed
Today I am sharing a recent card I made for someone's birthday which features a Jack Russell.
Today I am sharing a recent card I made for someone's birthday which features a Jack Russell.
Today I'm sharing a recent machine embroidered card design I made.
Here is my 7 point checklist to setting yourself up for free machine embroidery.
Recently, I moved into a new flat. It has meant that I’ve got a pile of picture frames waiting to be put somewhere on the wall. This weekend, I started resolving this. Here’s a few points I have learned from this experience.
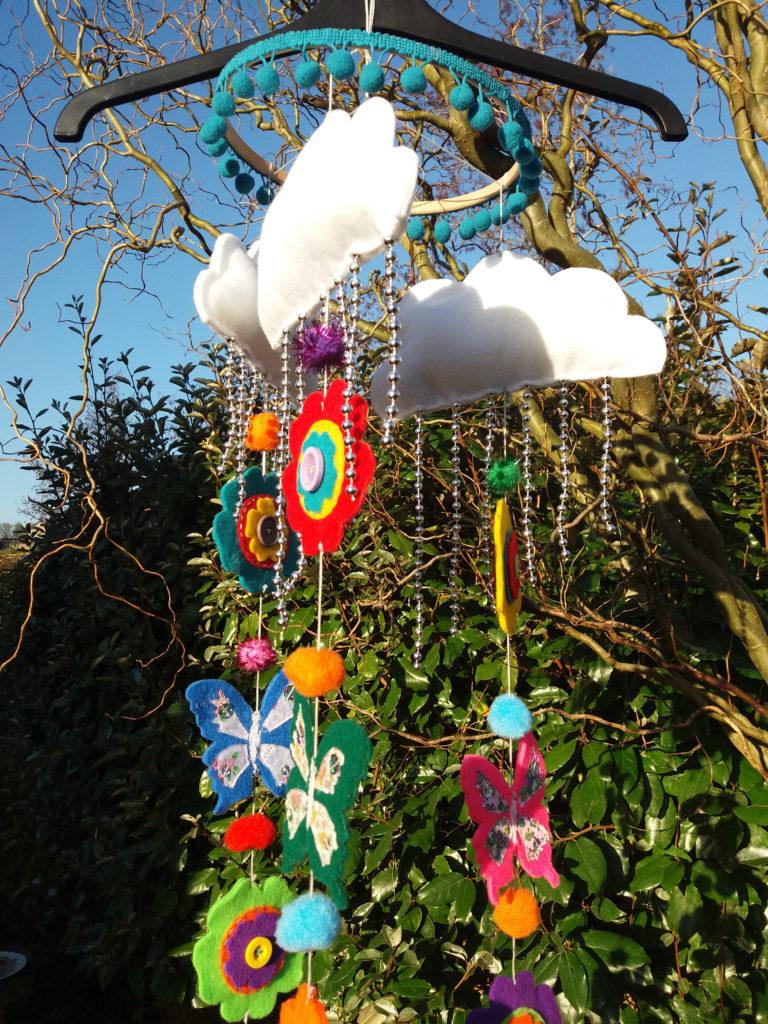
Just a quick post to reflect on some of the makes I have made this year for Christmas! There are a few which have been good or challenging which I wanted to share. The upcycled t shirt cushions My dad suggested that his old Hard Rock cafe tshirts should be transformed into cushions about two years ago but I wasn't convinced and didn't do it until this month. They have come out much better than I expected! I was worried that they were too faded, but I simply cut out the designs and appliqued them onto calico and created envelope cushions! The 1940s tapestry bag and purse This is another gift which had been on my mind for years but I had never got round to creating. However, I finally created it this year, even having time to create the matching purse (from Making Vintage Bags). Hare bag I wasn't intending on making a hare bag this year, but when I clapped eyes on the fabric, I had to make something with it for one of Phill's relatives who loves hares. I followed a free pattern online but I was a bit disappointed with the depth of the bag, which I would have preferred to have been a bit deeper, but I added a magnetic clasp to it to make it more like a shoulder bag. I did find a preferred tote bag pattern but I don't have a photo of it yet so will write about it another time. Oscar glasses case This personalised glasses case was fun to make as well to add to my grandad's collection of Schnauzer based gifts over the years. Baby Showers Mobile My biggest challenge was making this mobile for my niece! I gave my sister the choice of patterns for a baby mobile, and halfway through making this mobile I felt a bit of regret at doing that! However, it was a great challenge and pushed me much further than the other choices (and it looks much more impressive too)! I adapted the pattern from Chloe Owens (All Sewn Up) to what I had available, using Christmas tree decorations for the raindrops instead of jewellery chain. Glittery sequins were attached to the butterflies, which make light bounce off it. I could not follow the pattern precisely as I could not get a needle through the fabric flowers when assembling as the fabric glue made it too hard. Instead, the embroidery floss was attached securely either side of the flowers. I greatly underestimated the many stages to this mobile! I would recommend starting far in advance to ensure you make this in time to avoid the last minute stresses of making gifts! Fortunately, my mum helped ensure the clouds were sewn securely and to help with the final construction stage.
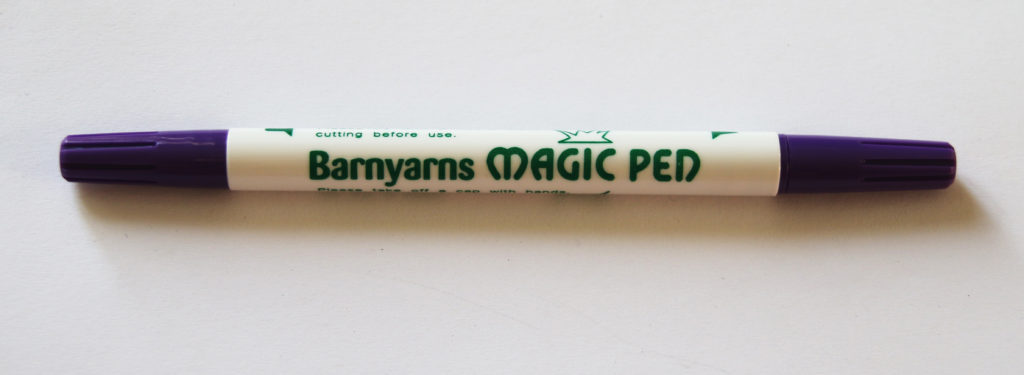
At the end of September, I bought my first air erasable pen and thought I'd share my first few weeks' experience with it. The air erasable pen I got at the the stitching, sewing and hobbycrafts show at Westpoint, Exeter, was from Barn Yarns. As you can see from the images, there are two ends to this pen. There is a fine point and a thicker nib. the difference between these two nibs can be seen in the image below: I like the use of two different thicknesses because it suits the purposes I use it for very well. I can use the finer point to create much more precision on intricate machine embroidery designs which need to be mapped out on the material before stitching. However, the thicker nib is useful for making marks dressmaking as it show up better and doesn't disappear quite so quickly! However, I have used it for larger embroidery designs. For example, I have begun making some new tote bag designs for Christmas which include larger stitched words than I normally produce. I write with the machine freehand in general, but as the words are a lot bigger than I'm comfortable with, it was good to use the thick nib of the pen to draft it out before I began. The directions for this pen advise that the markings will disappear between 24-48 hours in general, but it depends on the location. Humidity plays a factor, and I found that the stag design markings with the fine point disappeared within 24 hours. Cornwall is quite humid, so I expect that other locations may find the markings last longer! I think it depends on the fabric too. The time it takes to disappear can be an advantage and disadvantage. For me, it's great for a project I am going to make straight away, as the markings are there for as long as I need, and will disappear on their own without the need of water, which removes the risk of shrinking the fabric (if it gets to wet) or causing the thread to run. However, it would not be so good if you used it for a dressmaking project which you could not complete within a weekend, as there's a good chance your markings will disappear if you take too long! In this instance, I'd probably stick to the water soluble pen variety, which tends to last much longer in my experience. Overall though, this pen has improved the way I make certain items and I have used it a lot in a short space of time. It will be interesting to see how long it lasts before I need to purchase a new one!