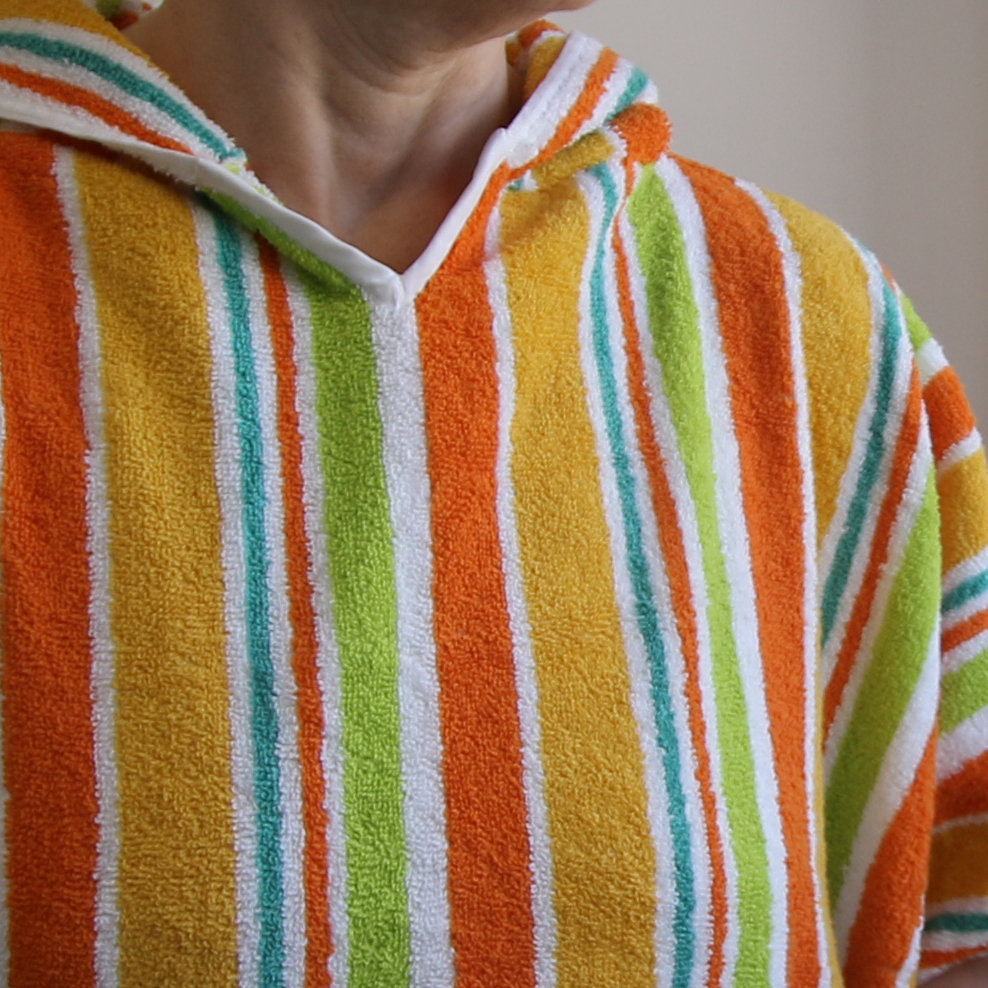
I’m excited to share with you something I made with my mum a few months ago – the beach towel poncho!
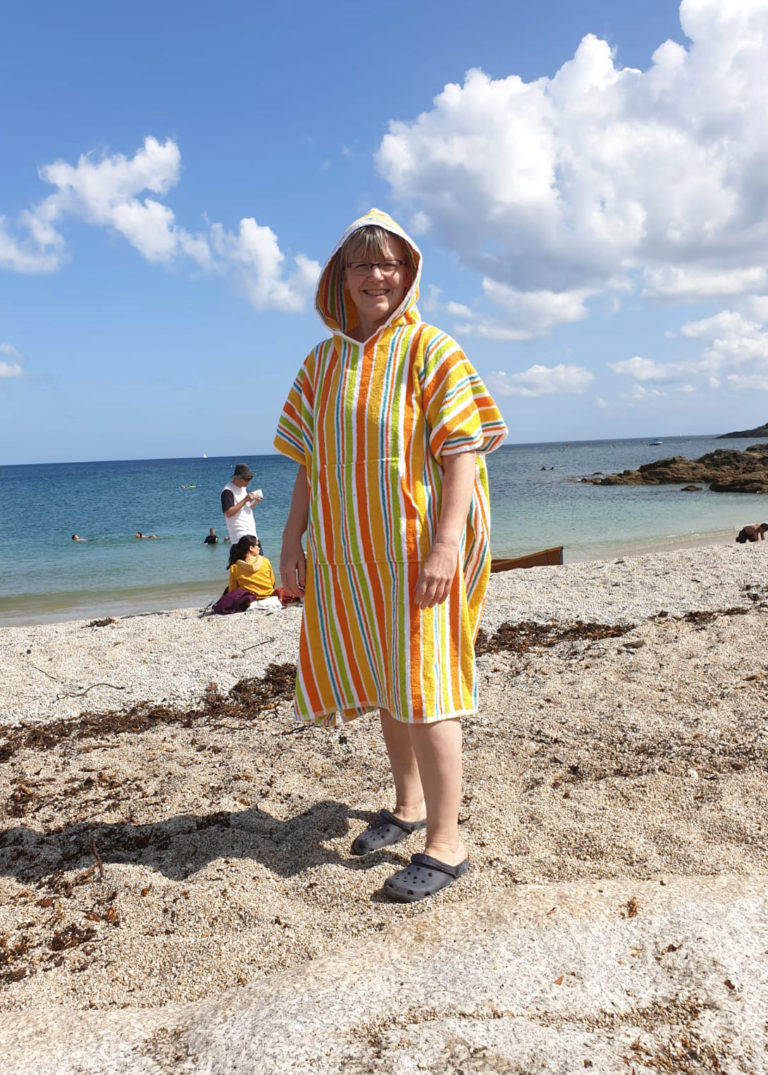
Pictured above is my mum showcasing our efforts on the beach!
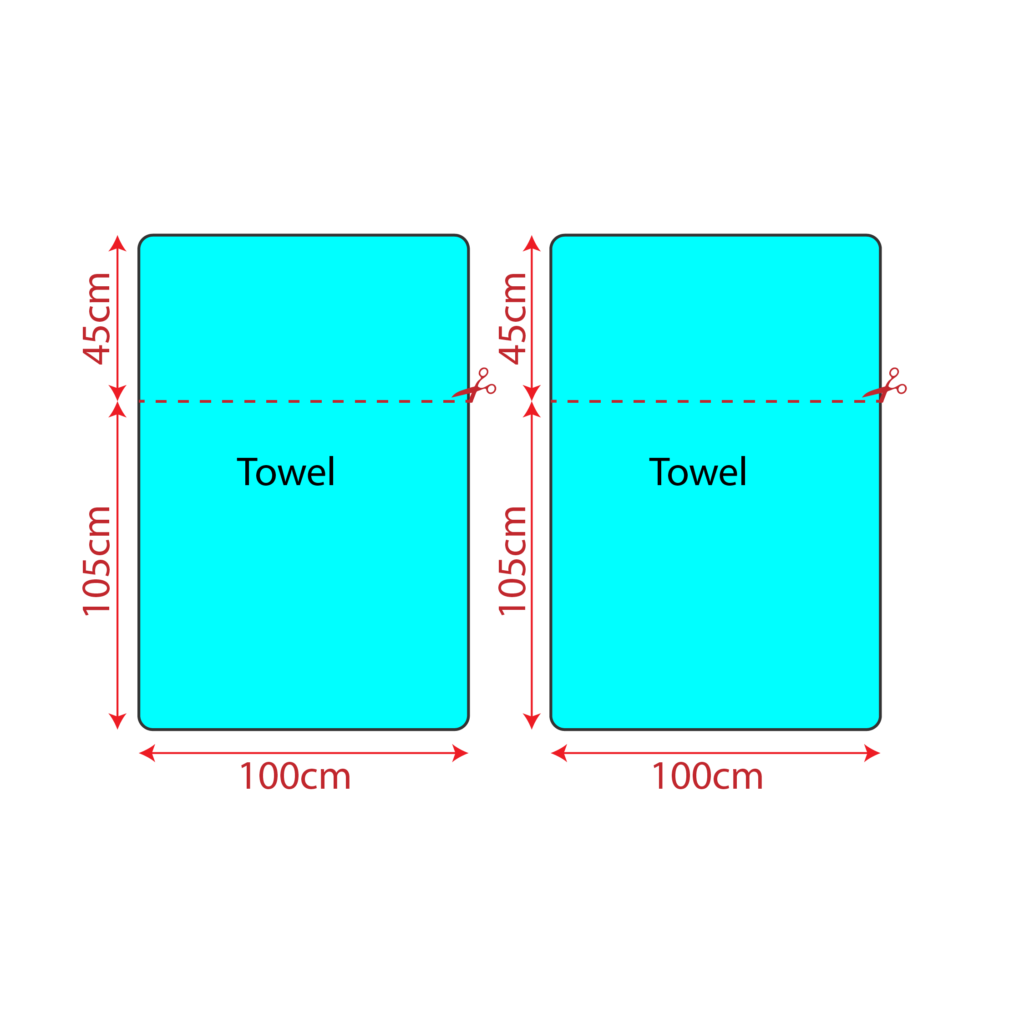
If you fancy making a similar poncho, you will need two towels measuring 100cm by 150cm and a small amount of bias binding.
Rough Guide on making the beach towel poncho
Cutting your towels
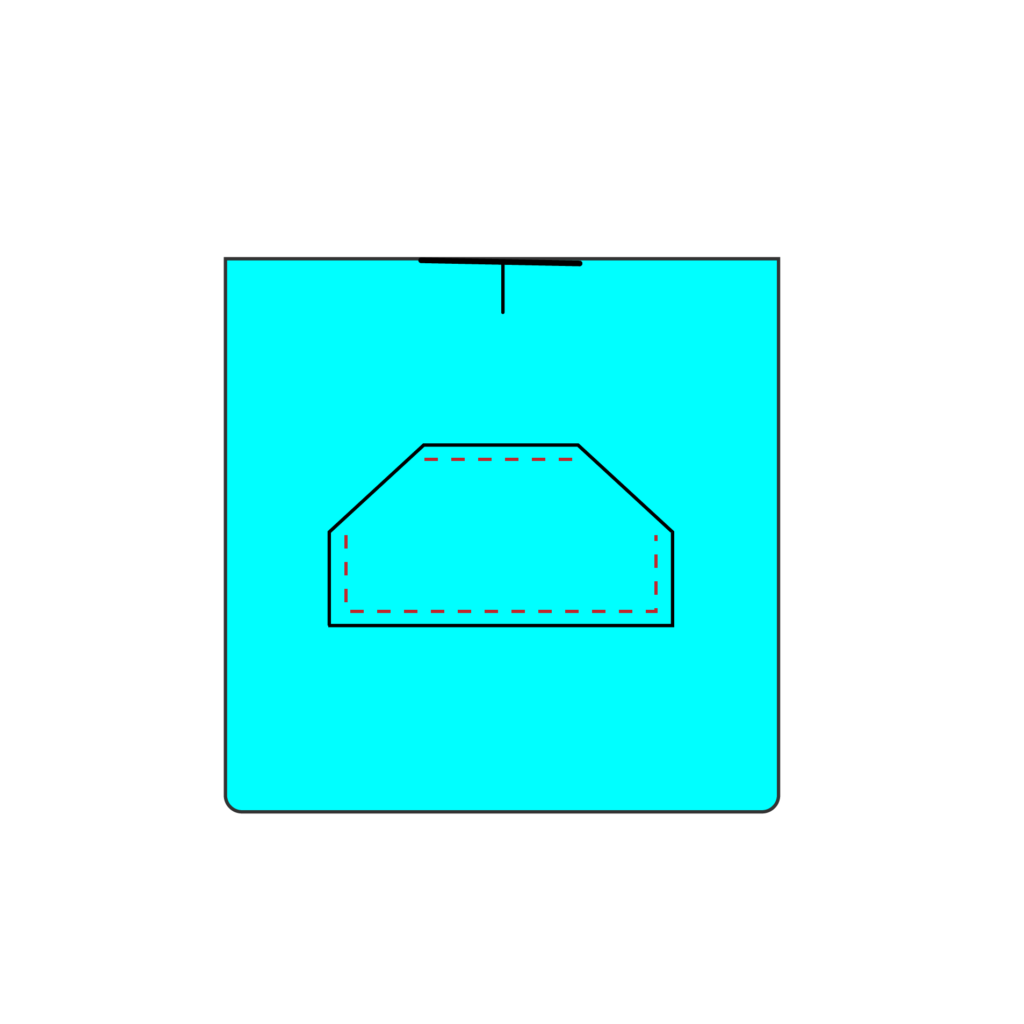
First, you will need to cut your towels as shown in the diagram so that you end up with two pieces measuring 100cm by 45cm each, and two pieces measuring 100cm by 105cm each.
The larger pieces will become the main poncho front and back, and the smaller pieces will be used to make the hood and pocket.
mark the front neck opening
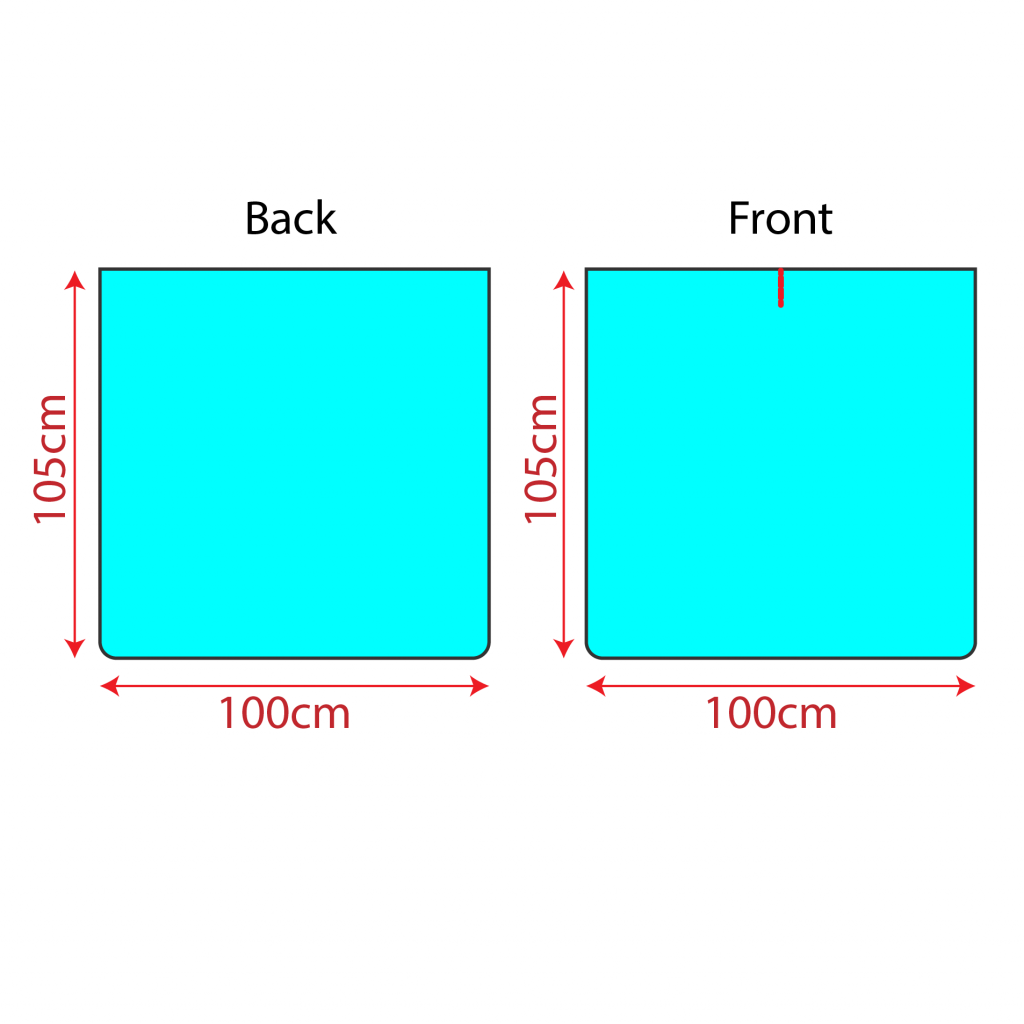
Tack the shoulder and side seams and try it on. Make a mark how far you want the front neck opening slit to be. We marked where the collar bone was. Cut a line to this point.
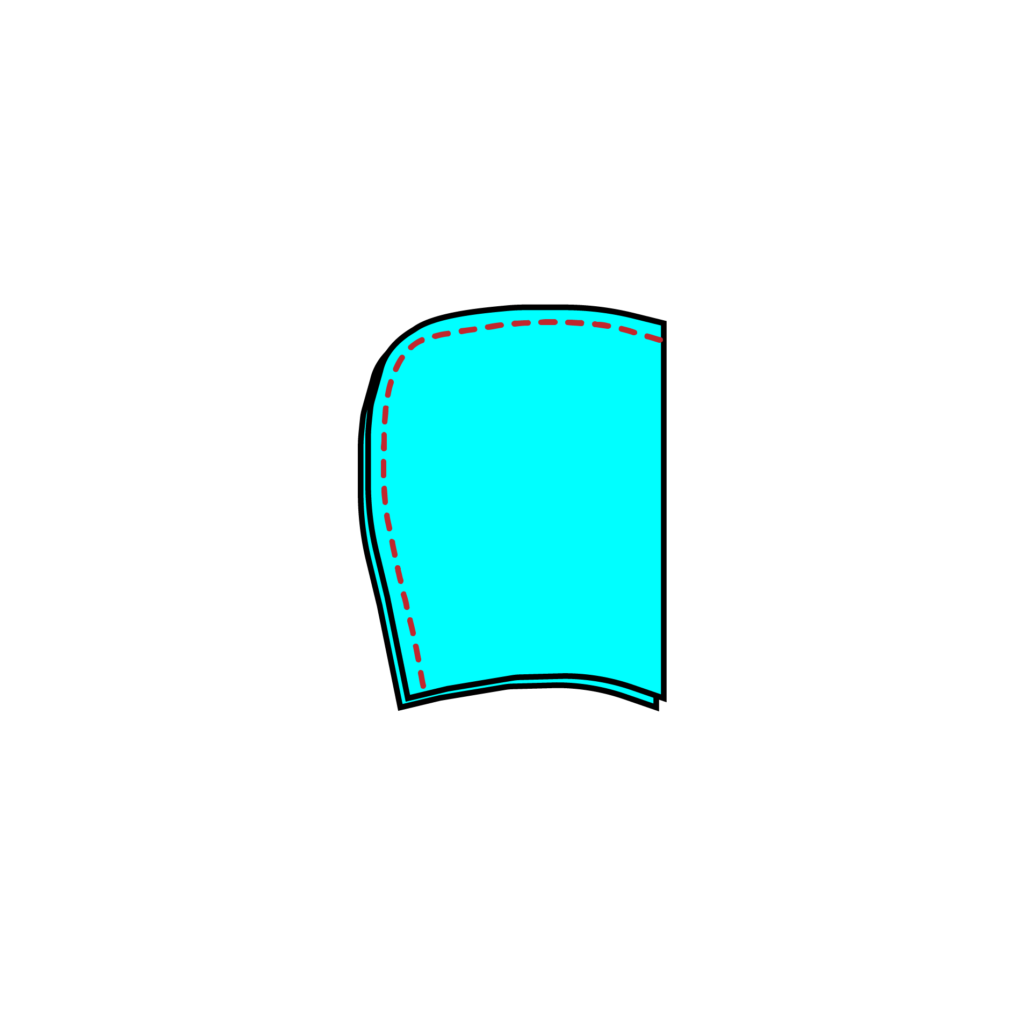
Create your hood pattern piece. Cut out two pieces and stitch them together.
It’s a good idea to find a simple hood you can adapt from your own wardrobe for this. You can watch how we did it in the video I made below.
Ideally, you want a simple hood which is only two pieces. We cut our pieces on the towel selvedge so that we didn’t need to neaten the raw edge of the hood edge.
Stitch the two pieces together down the centre back seam (the long curved edge).
Mark the neck opening and then stitch the shoulder seams.
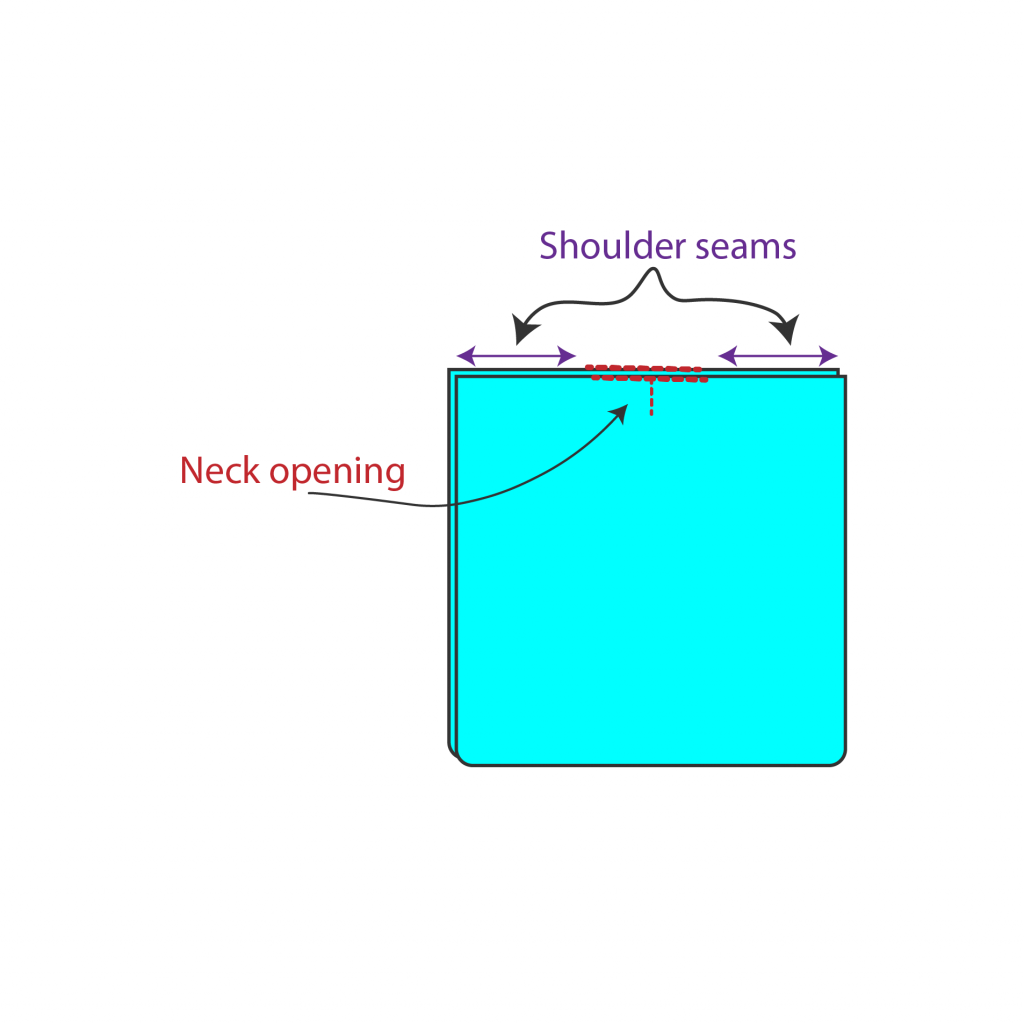
Now you have your hood, you can mark the neck opening and find out where you will need to sew the shoulder seams.
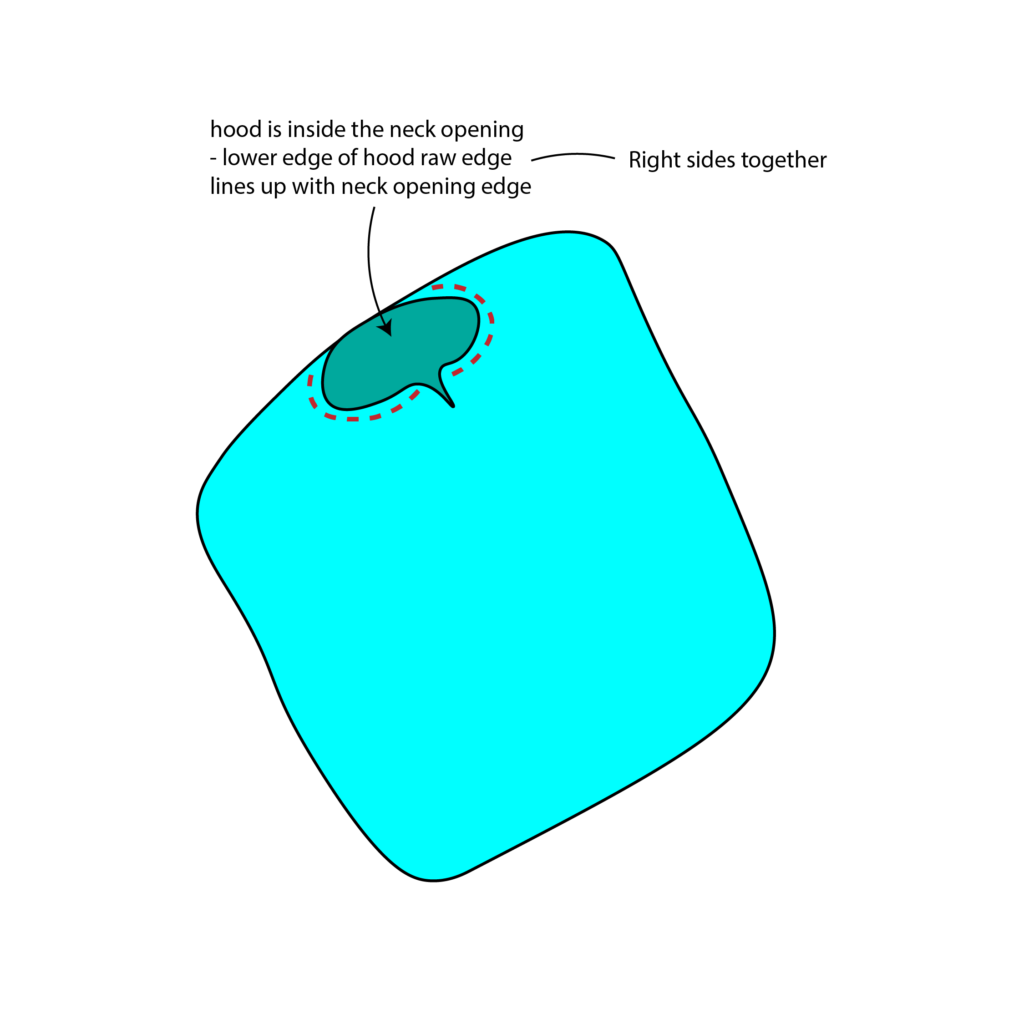
Fold the hood so that the front lower corners meet in the middle. Line this mid point with the neck opening slit on the front piece. The outer edges of the hood piece will provide an idea of where you will need to sew your shoulder seams up to.
Stitch the shoulder seams
Sew your hood onto the neck opening
Pin, tack and then sew on the hood to the neck opening, right sides together, and then neaten edges (if not using an overlocker).
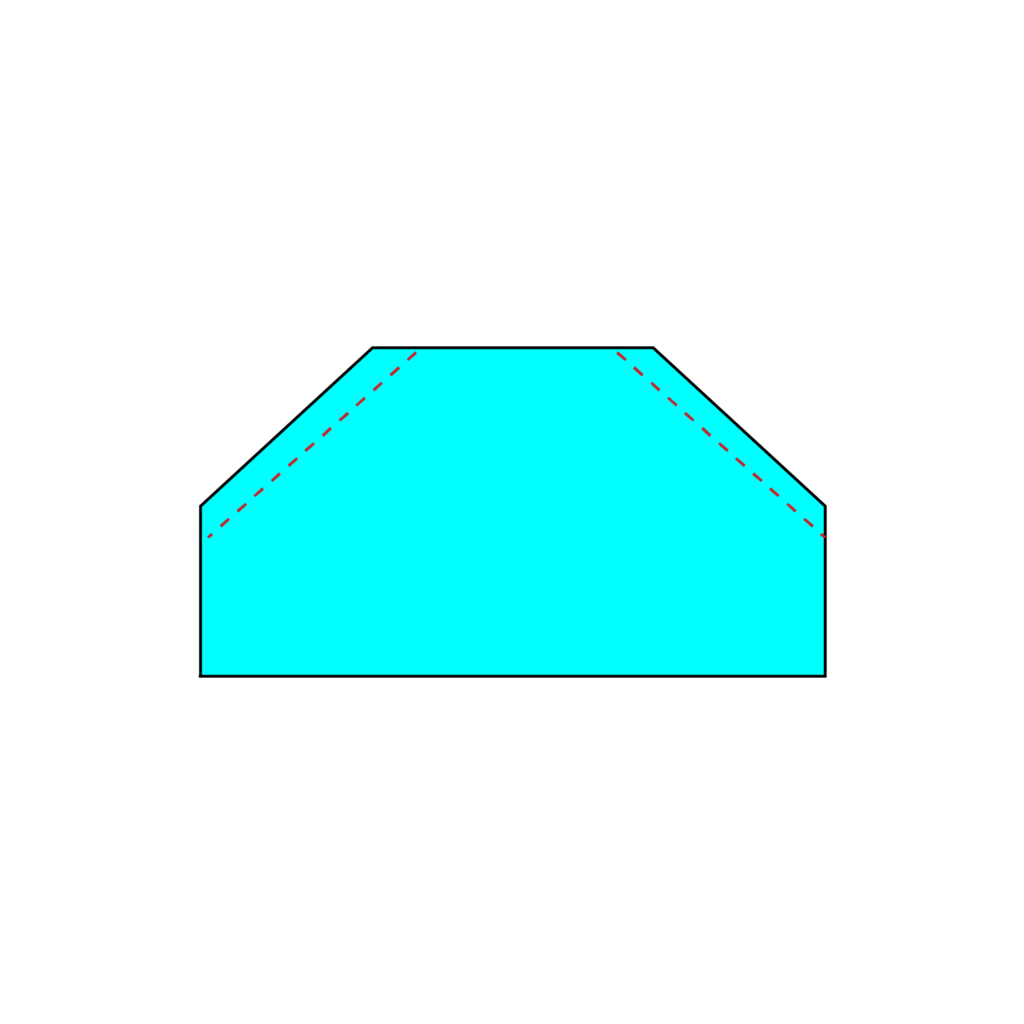
Create a kangaroo pouch pocket
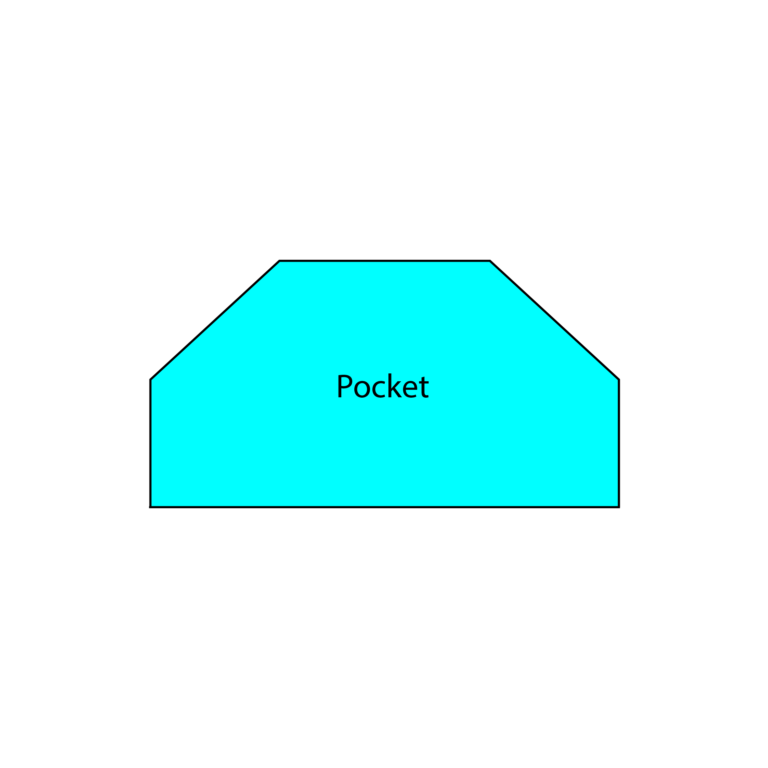
In order to make the pocket, we did another test fit and took measurements on how big we wanted the pocket to be. We then drew it out onto paper.
Fold and tack the seam allowance of the pocket
Depending on the seam allowance you allowed in your pocket pattern piece (we did 1.5cm for this part), you will need to fold it down so that it is on the wrong side. Pin and then tack in place.
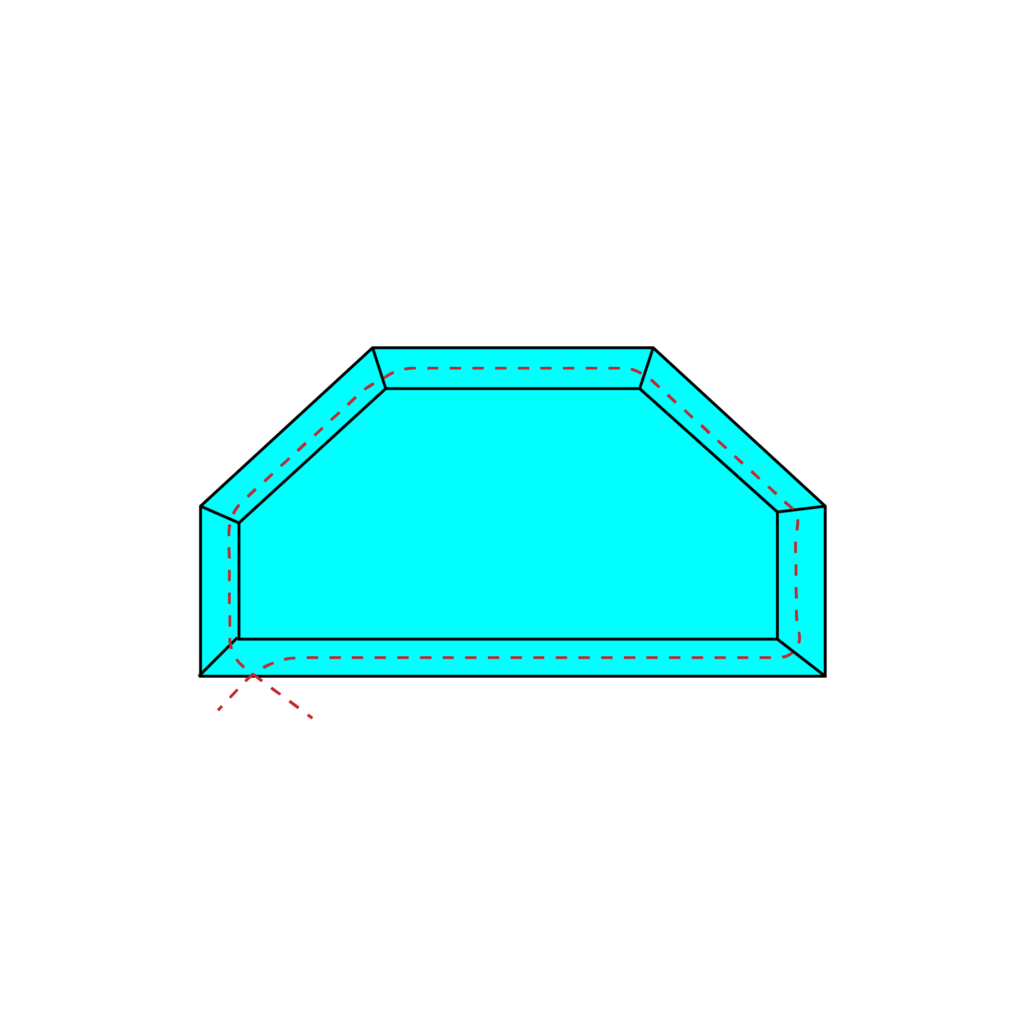
Sew the pocket opening edges
Stitch the seam allowance on the diagonal sections (where your hands will enter the pocket) in place.
Pin, tack and sew the pocket onto the front of the poncho
Pin, tack and sew the pocket onto the front of the poncho. I would recommend trying the poncho on to check that the pocket is positioned in the best place for you.
Stitch the side seams
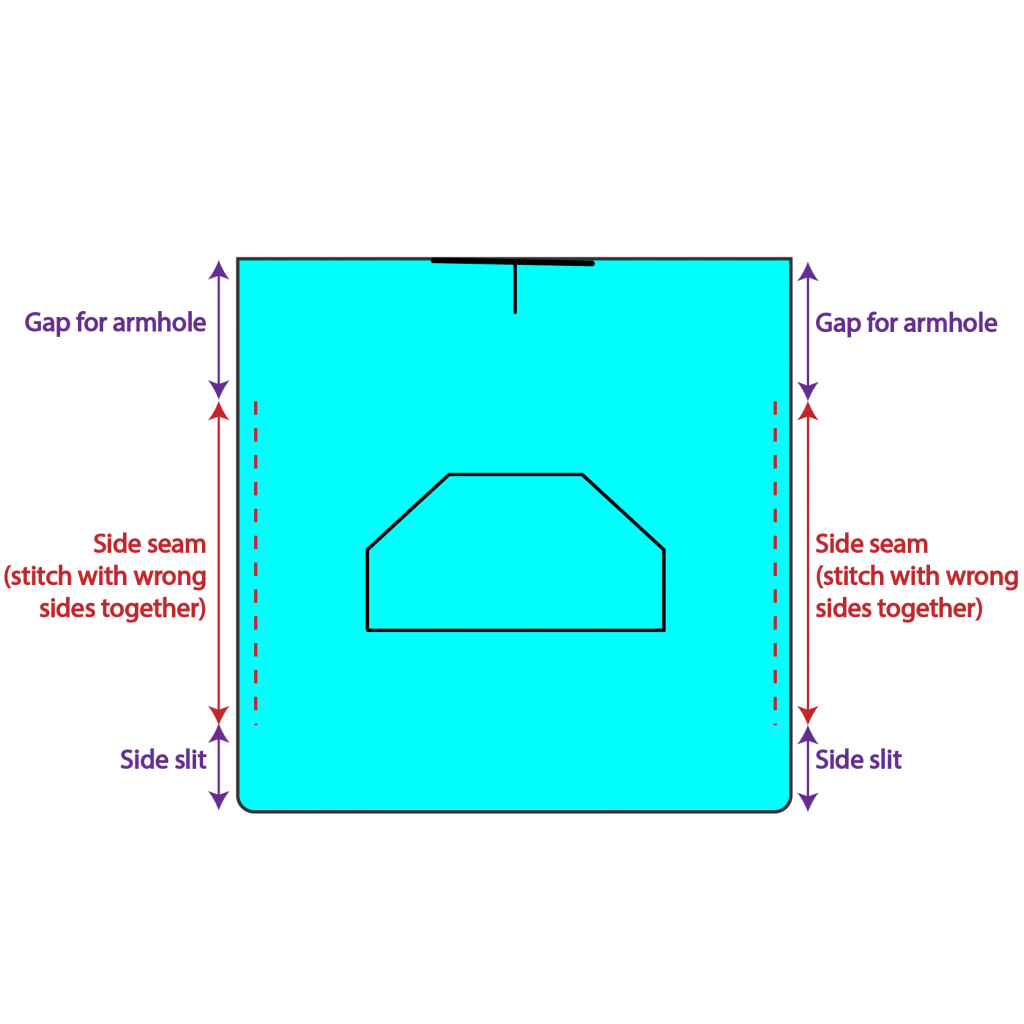
Try the poncho on to determine how big you want the armholes to be. Mark with a pin.
We added a side slit at the bottom side edges. Place a pin where you would like this side slit to begin.
Stitch the side seams close to the edges of the towel, wrong sides together.
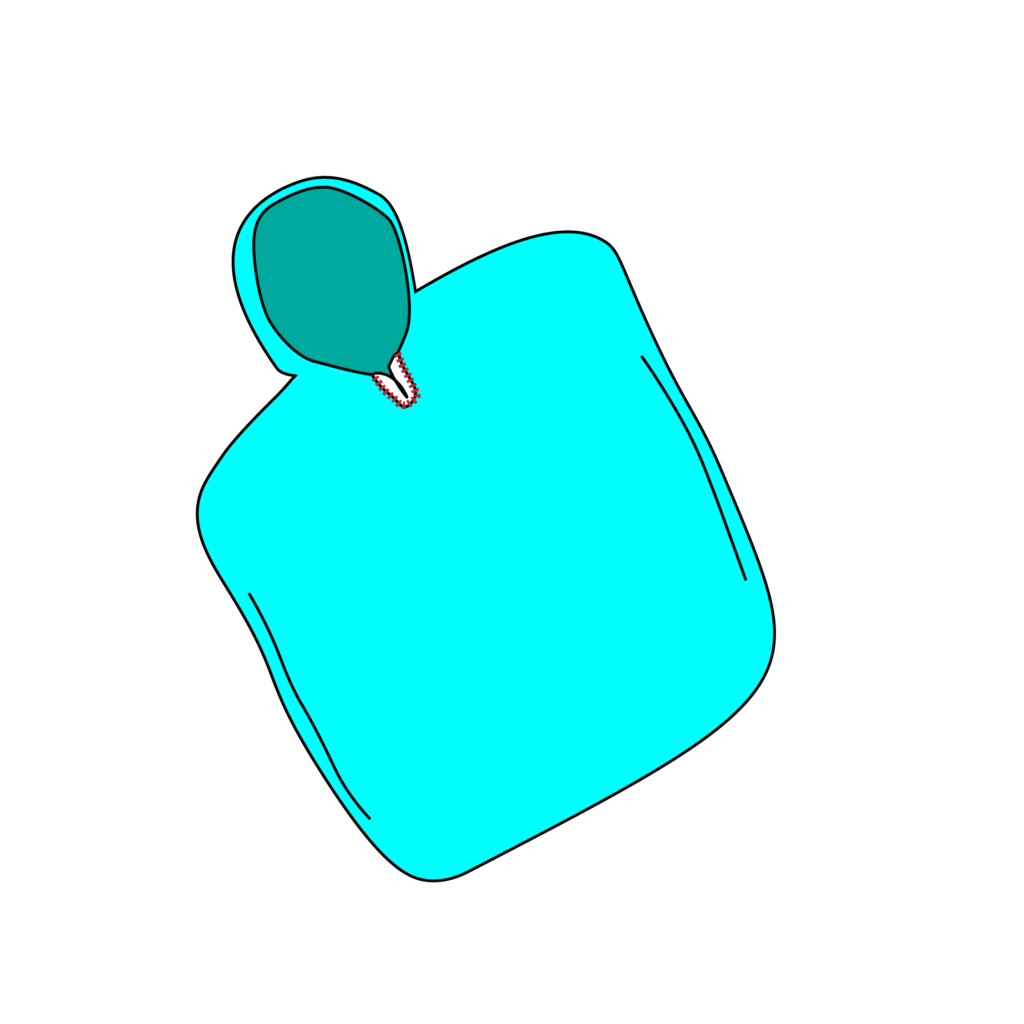
Attach bias binding to the raw edges at the neck opening
To conceal the remaining raw edges on the neck opening slit, use your piece of bias binding. If you did not cut your hood pieces on a towel edge, you will need to apply bias binding to the whole of the hood edge as well.
And there you have it! A practical beachwear item to chuck on after a dip in the sea.
Watch it on the Vlog
You can find the related video from my vlog below, which may explain some of the steps I have outlined a little better:
Fabulous
Thank you!!1
I love it! Thank you!
Hi There, this is great! What are the pocket dimensions please?
Hello,
The bottom of the pocket is 35cm.
The height of the pocket is 25cm.
The top of the pocket is 22cm. (Parallel to the bottom line and centred)
The left and right sides at the bottom measure 8cm each. I then drew a diagonal line up to the top line either side.
Then I added a seam allowance on all sides of the shape. I hope this helps!
Thank you! It does ✂️
Thank for such a clear step by step guide. As a novice this was easy to follow and perfect for what I was making!
Thank you! Glad you found it useful.
Many many thanks!!! Greatly appreciated!!!
Yippee! Just what I needed, Thankyou so much
Maisiequilts
Brilliant and thanks. Made one this week but used older, worn towels from op shop because here in Australia a lighter beachjacket is more appropriate due to the heat.
Great idea!
Hi
This is a great pattern and tutorial. I’m a bit confused as to how to determine the lower edge size of hood and how much opening to leave. Also there is a curve to the edge of your hood piece — how do we know how much of a curve to use. Do you have pattern pieces available? And the bias tape on the cut opening.. so you’re using that to finish the edge — would you finish the cut part of neck before you put the hood on if you’re not using bias tape on the entire edge of hood? It seems that would be the way to do it so that the ends of the bias tape are hidden in the seam attaching hood to main piece
Thanks
Hello, thanks for the comment and good questions.
I still have the old templates we drew out as I made a couple recently, and I remember planning to digitise them to make the templates a download. I have just checked and it looks like I did digitise it but I need to double check the dimensions and finalise it to pop on this website. I will look into this at the weekend and see whether I can get it up soon as I don’t think it will take too long. It’s a copy of an old hood from a hoodie I have, which you can see us trace in the youtube video, so if you have a nice hood on something at home, you may want to use that instead. If you do, I would recommend making up the hood and then pinning it from the cut opening to the main piece to see how far to stitch your shoulder seams as may vary depending on the hood. The distance between the cut opening and one of the shoulder seams on the one I made is 13cm.
(On a side note if you do use the templates when uploaded: I made two of these in the last couple of months, and while the hood is sufficient for what I needed, I think some people may prefer it a bit bigger)
For the bias tape on the front opening – I would do this after stitching on the hood. You can fold the raw end of the bias tape in on itself and just finish it where it needs to cover. I think I do it this way to reduce bulk and to prevent the bias tape being in the seam where the hood attaches to the main part but you could do it before attaching the hood as well.
Thanks so much. I did find something that I am trying although it is tricky trying to ensure the edge of hood will match the neck opening which it seems you are saying as well. If it’s a lot of trouble don’t worry about the digital version. Thanks so much for the response
This absolutely awesome! Such a fantastic guide, love it!
Believe it or not in the 70s I had a robe just like the one in your picture, I 🤎loved it so much that I totally wore it 😄 go figure
I have made robes like this one with my mother when I was a teenager