Picnic Blanket Workshop
My recent sewing was at a local free workshop and consisted of making a picnic blanket.
My recent sewing was at a local free workshop and consisted of making a picnic blanket.
I had some lovely leftover fleece from making one of my niece’s a leopard print cape last Christmas, so I decided to use it to make some lavender wheat warmers for myself and others. I find wheat warmers are really useful when you feel a bit sore or stiff and I had been using a very old shop bought one for years to manage my chronic health symptoms before getting round to making this one. Once you have made it, all you need to do is pop it in the microwave for up to 120 seconds if less than 800 Watt, or up to 100 seconds if your microwave is 800-1000 Watt. It can help to put a small mug filled with water in the microwave at the same time to provide a bit of moisture (just in the microwave with it, not poured over it!) What you need What you need: 45 x 29 cm (18 x 11.5 inches) fabric - I used fleece 750g of dried wheat 2 tablespoons of dried lavender In addition to the usual sewing items, you will need a funnel or something similar to fill the warmer with wheat (I used the cardboard in the middle of a finished toilet roll) as well as a bowl and scales to mix the dry ingredients. 1. Fold and pin the fabric Fold your fabric in half lengthways, right sides together, so that the long ends meet. Pin or peg along the raw edges. 2. Sew together the sides and ends of the wheat warmer With a 1cm (1/2 inch) seam allowance, stitch around the three open sides, leaving a gap at one of the short ends for turning right side out/ stuffing. 3. Trim and turn right sides out Trim the corners slightly and turn right side out. 4. Mark a line in the middle of the wheat warmer With a few pins, mark a line in the middle of the wheat warmer which is parallel to the long sides of the warmer. You may find it easier to then tack the line in place, especially when using a bulky fabric like fleece. 5. Stitch centre line Stitch along the marked line, starting and ending about 7.5cm (3 inches) from the short ends of the warmer. 6. Prepare the filling Mix around 750g of wheat with 2 tablespoons of dried lavender in a bowl. 7. Fill the wheat warmer Using a funnel and spoon, gradually fill the warmer with the mix. 8. Sew up the opening Slip stitch the opening closed. Variations: Vary the size and shape depending on how you wish to use the warmer – you may wish to make it circular or thinner – just remember to scale the amount of dry ingredients! These instructions include adding a line of stitching in the middle of the length of the warmer, but you could leave this step out. Alternatively, you could add another line or two of stitching or stitch lines the other way…
Recently, my mum got into making her own dishcloths to be a bit more sustainable. Also, they’re great for using up scraps of fabric you have left from other projects!This dishcloth is simple to make. It uses a bit of hessian (burlap) for one side for when you need a more abrasive side which won’t damage any non-stick surfaces. The softer side is simply cotton, and can be made from any of your favourite remnants.To make them as sustainable as possible, you need to use 100% natural fibre fabrics and thread. This will ensure that the dishcloth can biodegrade. Here, I have used cotton fabric as I have loads of remnants of this, but another natural fibre such as linen would work just as well.If you’d like to make a few dishcloths, either for yourself or to gift to others, I’d recommend making a cardboard template to make it easier to cut out a batch. What you need The following would make a 9cm x 14cm dishcloth11cm x 16cm remnant of hessian / burlap fabric (for the non-scratch scourer side)11cm x 16cm remnant of 100% plain cotton (for the middle of the cloth)11cm x 16cm remnant of 100% cotton fabric (for one side of the dishcloth)100% cotton threadSeam allowances are 1cm 1. Layer the fabrics Place the fabric you wish to have as the soft side of your dishcloth right side down onto the piece of hessian.Next, place the plain piece of fabric you wish to use for the middle of the dishcloth on top so that the main cotton piece is now sandwiched between the plain cotton fabric and hessian.Pin or peg the pieces together. 2. Sew the layers together Leaving a large enough gap for turning right side out, sew all three layers together using a 1cm seam allowance. 3. Clip corners and turn right side out Clip the corners to reduce seam bulk, and then turn right side out, ensuring the corners are pushed out. 4. Top-stitch Sew two lines of topstitching. Stitch one line close to the edge – this will mean that you won’t have to slip stitch the opening shut. The second line of stitching can be parallel to this line, furth in from the edge. 5. Add a couple (or more!) lines of stitching across the cloth To keep the three layers secure in the middle, sew a couple of lines of stitching in whatever pattern you would like. Watch it on the Vlog I've linked my video for this tutorial below:https://youtu.be/jwKo74zz7uA
I haven't sewn a lot recently but this project had been on my mind for about a year, and I finally made it happen recently! I expect it was inspired by all the outdoor catch ups during the pandemic. However, I thought it's still a useful item to make for yourself or a great and fairly simple gift to make for someone else. What you need 1/2 metre Main fabric for the top - a sturdy fabric like cotton duck 1/2 metre Insulated wadding - to help provide some insulation 1/2 metre waterproof fabric for the base - I chose a 600 dernier canvas-like fabric as I hope it will provide some longevity 30cm of strap - I used herringbone twill tape as I had it to hand, but webbing might be more robust. If you have neither, you could make a strap from leftover fabric Matching thread A quilting foot and temporary fabric spray are useful for the quilting stage but not essential. 1. Make your template I've popped down how I made my template but you could make it another shape, such as a circle! Draw out a 42cm by 42cm square on paper. Use a side plate to curve the corners. Cut out. 2. Cut out your pieces Now you have your template, you need to cut out: 1x top piece 1x of waterproof fabric for the base piece Once the top piece is cut out, either attach it to your wadding with pins or temporary adhesive spray and cut out. 3. Quilt the top layer to the wadding Mark out a quilting pattern of your choice depending on the fabric and stitch the two layers together. You may find a quilting foot handy for this step. 4. Attach the strap Once quilted, position the webbing on one side overlapping the edge slightly, about 11cm down from the top. Stitch to secure just within the 1cm seam allowance. 5. Stitch the front and back pieces together Place the front and back right sides together and sew around the edges, leaving a 10cm opening on one side. Trim the seam allowance on the corners (or use pinking shears) and turn right side out. Hand stitch the opening closed with slip stitch. With the top side on the top, carefully press with an iron. 6. Topstitch around the edge Top stitch around 1cm from the edge all the way around. 7. Finish the raw edge of the strap and add the snap fastener To make the strap, fold the mat in two with the base on the inside, and so the bottom meets the top edge. Starting from the side without the strap, roll the mat up, and then wrap the webbing around to see where you would like to add the fastening. For me, I chose the tie to be 25cm in length. To reinforce and hide the raw edge, I cut the webbing 4cm longer than I wanted the tie. I folded up the end by 2cm…
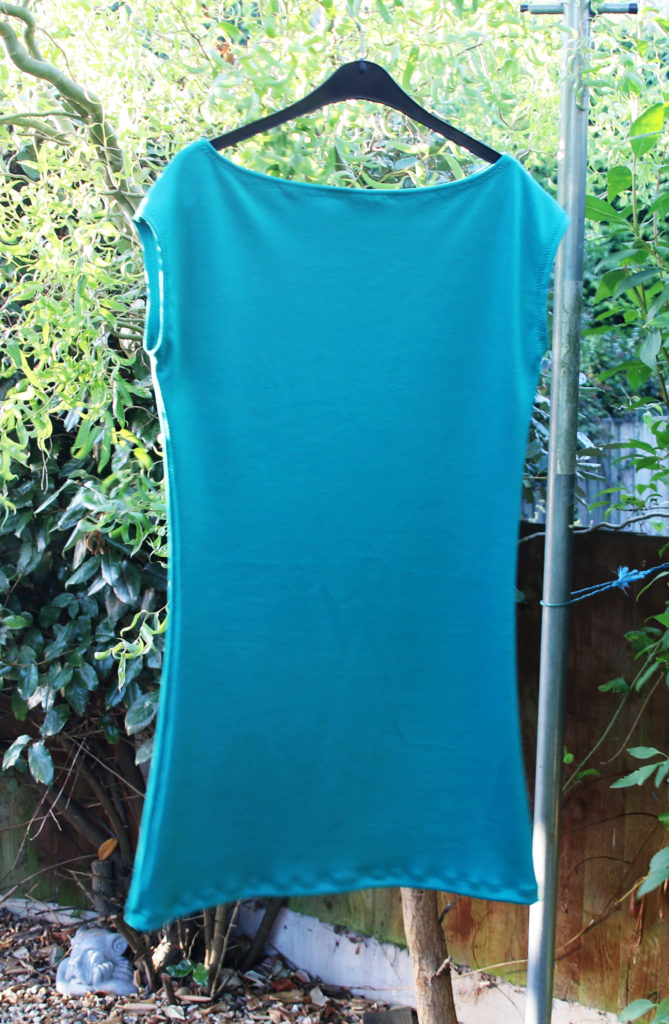
While on a bit of a dressmaking roll, I decided to delve back into the realm of knit fabrics. Having only made one successful garment with knit, I decided that I wanted to keep the pattern as simple as possible. The simple question for this project was The Walkley Dress by Wendy Ward MIY. This pattern requires two pieces to be cut out of your fabric, and they come from the same template. If you're lucky enough to have 150cm wide fabric, you only need a metre! In this instance, I already had some fabric ready and waiting - a remnant from a fabric shop! Setting up the machine proved the most difficult part. It's been about six months since I last tried a stretch pattern, and it was a challenge to set up my machine. Following the advice from the pattern, I opted for the small zigzag stitch for the seams, and the three stitch zigzag for the hems. In addition, I attached a walking foot to my machine and loosened the pressure of the presser foot; without these adjustments, my machine did not want to stitch! Originally, I planned to try a twin needle on the hems, but I managed to break my stretch needle one a while ago and haven't replaced it yet. It turns out that I keep loosening the needle whenever I attach the walking foot to my machine! I didn't colour match the thread for this garment as I had recently acquired a set of threads in different colours (none of which were a perfect match) and I didn't want to go out and buy more supplies on this occasion. The downside to this is that the hemming is a lot more noticeable than it would have been. Also, I stretched the hem a bit while stitching (I did the hem before the neck and armholes). I didn't have any stay tape or stabiliser, which could have helped to prevent this, but I did adjust my stitching technique to decrease the amount of stretching after noticing the issue on the hem. The neckline is quite wide (though this could be in part due to my stitching ability!) but it's really comfy and it is definitely a pattern which provides you with fast results which are satisfying! It's a brilliant 'first knit' pattern too as there aren't too many steps or seams to stitch which means you can focus on working carefully with the knit medium. I think next time I use this pattern, I will definitely try out some knit stay tape to ensure that the garment lasts a long time. Also, I think I may opt for a patterned material. I think I will give this pattern another go with the lessons learnt from this occasion in mind! As it only requires a metre of fabric to create a whole dress, and can be made in less time than a lot of the other patterns I have, I think another one will be made! As…
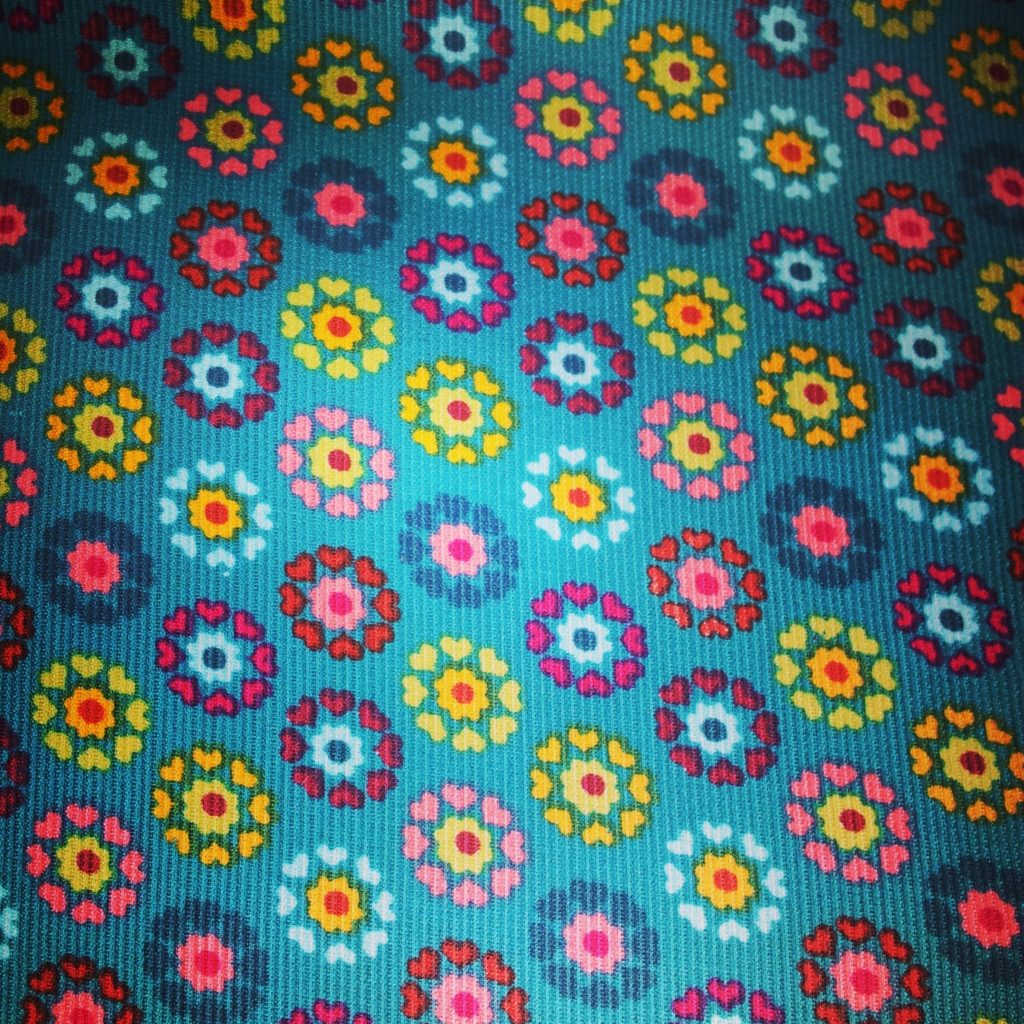
Last Saturday, I went to the stitching, sewing and hobbycrafts show at Westpoint, Exeter, UK! My friend and I went as part of a day coach trip to avoid the prospect of driving. Unfortunately, the pick up point was not in our town, so we had to get a lift to Truro. When we arrived, there was a queue which wandered around the building! Once in, we decided to dive into the middle aisle which seemed quieter as others opted to choose to tackle the show from one end to the other. The first fabric shop we saw was Fabrcis Galore, which contained an array of wonderful fabrics. After deliberation, i went back later to buy some printed corduroy, which will be perfect for a project I have in mind to make after all the Christmas gifts are made (so probably January)! Also I picked up a lovely polar bear print from another fabric shop, which will be used in a gift I need to make very soon (currently being prewashed so no photo)! My very first purchase was this fleece. As the nights draw in, I think I will turn to practising spinning with my drop spindle once more, and I like to pick up small amounts of fleece for this purpose. I'm not a fast spinner, so this bag is a suitable size. We managed to sign up to a wonderful glass workshop with The Glass Garden Studio where we learned the basics in stained glass construction. I took home this angel that I made. Tactile Treasures was another stall I was particularly interested in. Now I have a niece, I am interested in making toys which will be perfect for her learning and development. this stall sold all sorts of attachments which are teething friendly and different stitchable surfaces, such as this mirror, which can be cut, stuck and appliqued onto items. I bought some rattle inserts too which will be great to use, and received excellent tips from the owners of the business on ensuring that the toys you make a safe and meet safety standards. I came across an air erasable pen, which is something I have been looking out for having read about them. I've been having a bit of trouble with water erasable pens, which have at times caused the thread to run onto the background fabric. I'm not sure they this has happened as the thread should be colour fast, but I am intrigued to find out whether the use of an air erasable pen would be safer. I plan to review this in the coming month. The block printing stall from The Arty Crafty place was lovely as well. When we finally managed to get up to the front and admire the blocks, we were very tempted with their £30 starter pack. However, I decided to select a couple of small blocks. They were packaged in a beautiful drawstring bag. We also found some simple leaf shapes for £1 on another stall, which we…
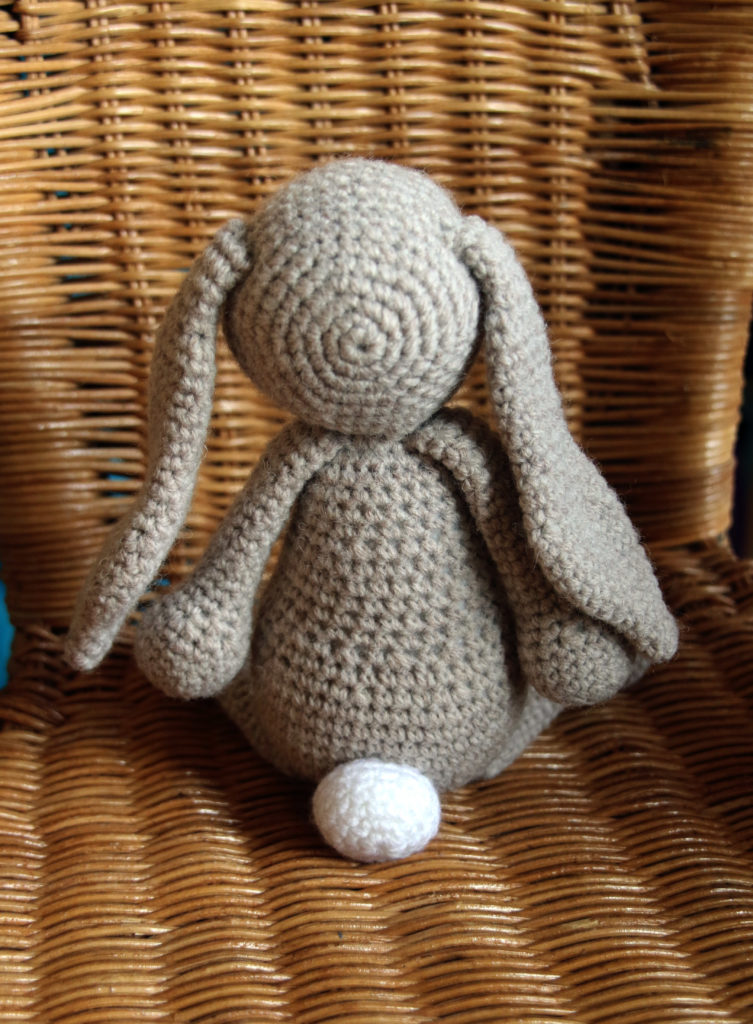
I haven't done a lot of crocheting beyond the string bags I make for the Etsy shop. However, this bunny pattern has been a project I've been looking forward to making for a long time. Published in Simply Crochet magazine, this bunny originates from a lovely looking book called Edward's Menagerie by Kerry Lord. I made this bunny with Sirdar Country Style yarn, which meant it had a bit of wool content but would still be easy to wash (which I felt the parents of the owner of this bunny would appreciate)! The bunny is advised to be made in alpaca wool, but I opted for a wool blend to comprimise on price/budget and yarn content. I am slightly gutted to have since discovered an alpaca wool blend wool in a shop near my mum's which would have worked well for this knit and was a reasonable price! This pattern was fun to make. I would have appreciated more pictures or directions on sewing it up, but the actual pattern in the book may have more guidance on this than the magazine version. Also, I guess it means that your finished toy will be unique according to how you decide to finish it off.
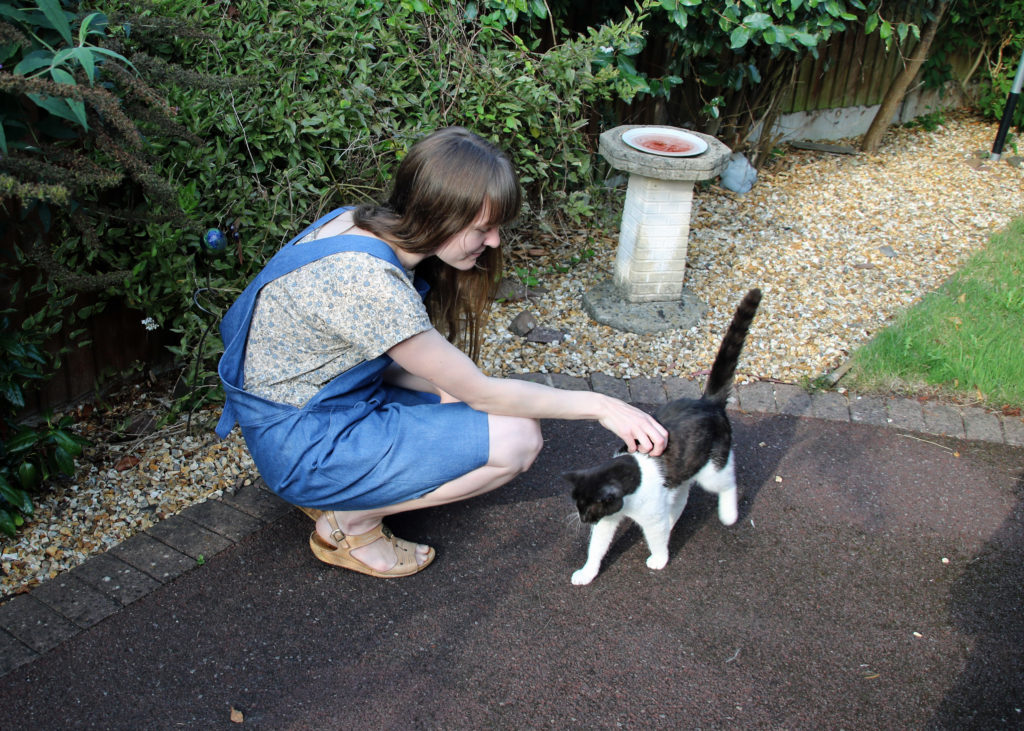
When I took part in the #miymarch16 instagram challenge, I put down this dungarees pattern as my sewing ambition (new Burda 3779). I bought the pattern from a charity shop for £2 just over a year ago because I loved the idea of making some, and bought some denim shortly after. However, the amount of pieces in the pattern felt overwhelming, and I couldn't get started. A couple of months ago, I asked my mum if I could bring along the pattern and fabric when I visited her to see if she could encourage me to get started. Over the weekend, I managed to trace the pattern, pin it onto the fabric, and then cut it out. One of my main worries was altering the pattern to my size. However, we decided that as it was designed to be very loose fitting, I could cut it a size smaller than usual, which would ensure that the bottom half would not be too baggy! I didn't manage to pick it up again for about a month after this visit! Feeling that I still needed a boost, I went back to my mum's for a crafty retreat to get the pattern finished. It wasn't as bad as I thought it would be. When I attached the bib section to the shorts, it didn't provide a completely sealed finish, but I think I might have misread it. I would plan to take steps to create a better finish next time. Also, the inner sides of the bib are tacked in place and then secured by edge stitching and top stitching. However, I decided to slip stitch it in place by hand to secure it before the two rows of machine stitching. The braces were simple to attach. The buttons have to be hammered on, but in my view, this is much easier than stitching button holes and working out where to place the buttons on the straps! There's the added benefit that you can adjust it to size. The pleats on the front were also a worry, but turned out to be really simple to complete. They were more like tucks. The denim material is so sturdy that it was easy to tack in place and press well at every step. I think these may become my 'uniform' for craft days! I think I will have to make a trouser version for the winter though (I'm already imagining some navy polka dot material which could be used for the second pair...)Harry did become jealous of the sewing project during its production, and kept sitting or laying on the instructions. When I moved the instructions out of the way so he couldn't make any further holes in it with his claws, he decided to settle on the garment instead!
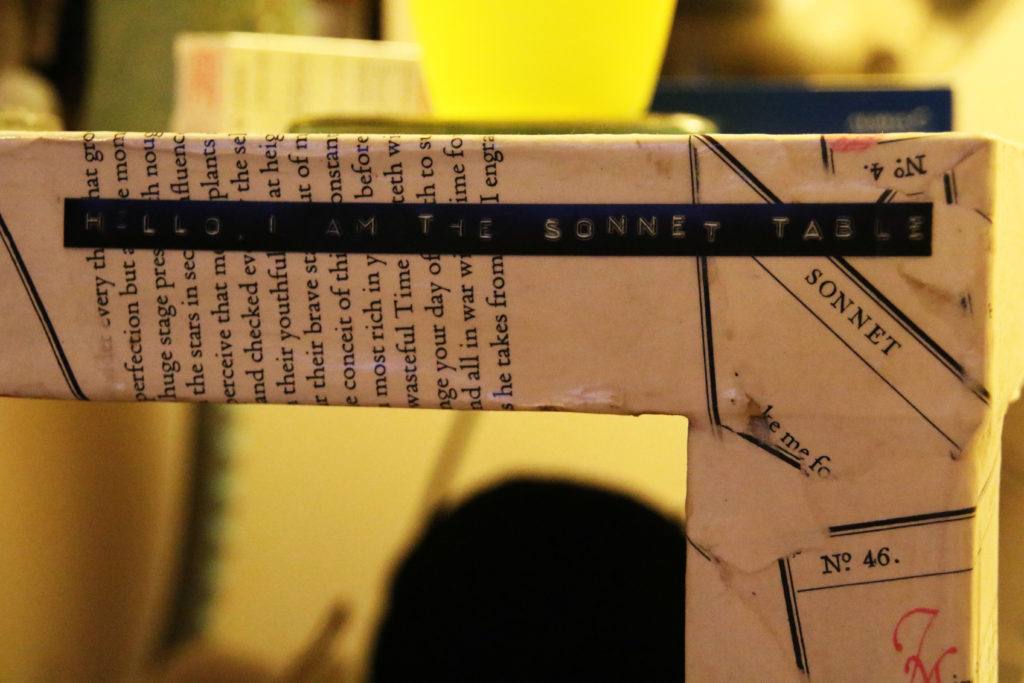
Wabi Sabi – the Japanese art of embracing the beauty of natural imperfections – is something I’ve stumbled across this month. Wabi Sabi in craft terms appears to be finding the beauty in the handmade elements. I wish I’d discovered this art while I was learning ceramics earlier in the year as I could have defended my wobbly pots when compared to the much more symmetrical looking results from other students in the class! It’s nice to know there is a philosophy which prizes the uneven glazing, wall thickness and overall performance of the complex ceramic process. I’ve also explored glass fusing this year, and in this class we embraced the imperfections of our pieces as we understood how these elements distinguished them from a production line. For example, bubbles within a piece can be seen as inaccuracy, but they make a piece individual. I will reflect on this philosophy as I complete my next set of projects. For example, I have almost completed all of the pieces to create a crocheted bunny toy. Instead of avoiding the construction process, which I don’t enjoy very much in knitting/crochet, I will remind myself that it doesn’t need to be sewn in exactly the right place as you might expect from purchasing one from a shop. It just needs to be completed so that it can become a cherished, handmade toy. Reflecting on the Whole Living article on wabi sabi in the home, I realise that I incorporate this into my home already. The furniture we have is predominantly hand-downs from family members who no longer want them or need them. The table I use for sewing is my grandparent’s old kitchen table. We have a table in the lounge which we bought from a café in Southampton when it was closing down and they were selling them for £10. They had covered it in pages from a book of Shakespeare’s sonnets and there’s a slight tear on the lower self where a customer must have brushed their shoe on it. In the kitchen hardly any of our cookery items and chinaware matches. They’re not handmade but they’ve turned into something individual and imperfect through time. Wabi sabi seems to me to encourage you to stop and appreciate what you have rather than seek something newer or more pristine. However, it doesn’t If you would like to look at techniques in which you can embrace Wabi Sabi to let go of some of your perfectionist tendencies, the Whole Living website has a useful article on how you can abandon perfect to enhance everyday life.