Crocheted Bunny

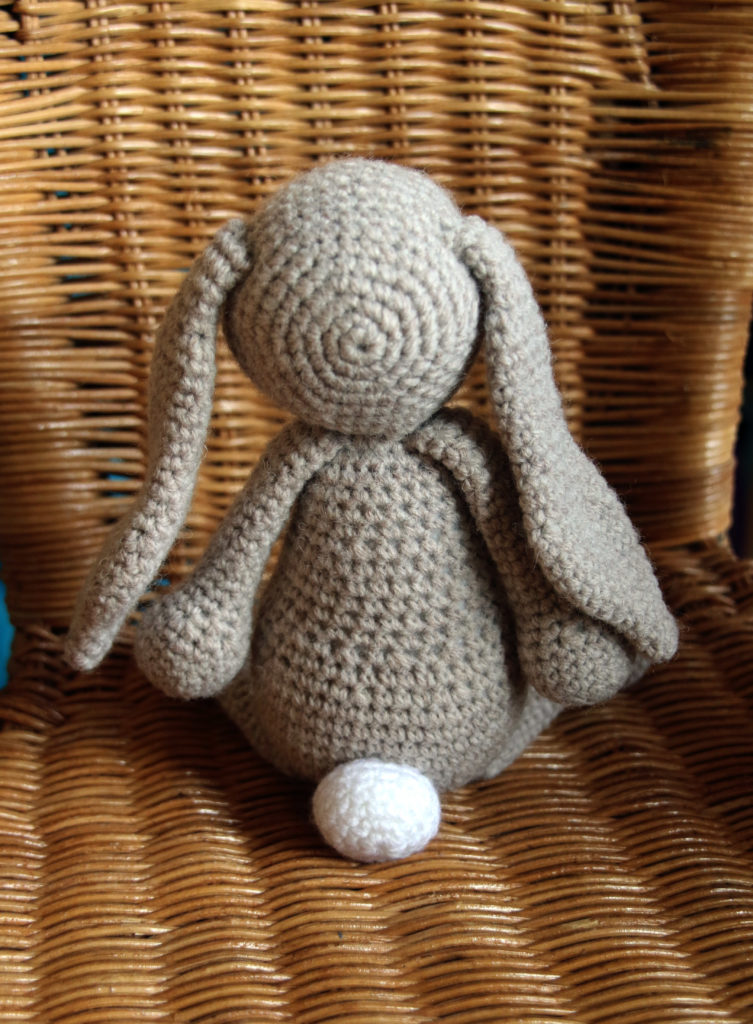
I haven’t done a lot of crocheting beyond the string bags I make for the Etsy shop.  However, this bunny pattern has been a project I’ve been looking forward to making for a long time.

Published in Simply Crochet magazine, this bunny originates from a lovely looking book called Edward’s Menagerie by Kerry Lord.

I made this bunny with Sirdar Country Style yarn, which meant it had a bit of wool content but would still be easy to wash (which I felt the parents of the owner of this bunny would appreciate)!  The bunny is advised to be made in alpaca wool, but I opted for a wool blend to comprimise on price/budget and yarn content.  I am slightly gutted to have since discovered an alpaca wool blend wool in a shop near my mum’s which would have worked well for this knit and was a reasonable price!

This pattern was fun to make.  I would have appreciated more pictures or directions on sewing it up, but the actual pattern in the book may have more guidance on this than the magazine version.  Also, I guess it means that your finished toy will be unique according to how you decide to finish it off.

Continue ReadingCrocheted Bunny

Stitching Cats

I haven’t made a lot recently, as I have been finishing up a couple of craft courses I took this year.  However, I have got around to practising free machine embroidery again.

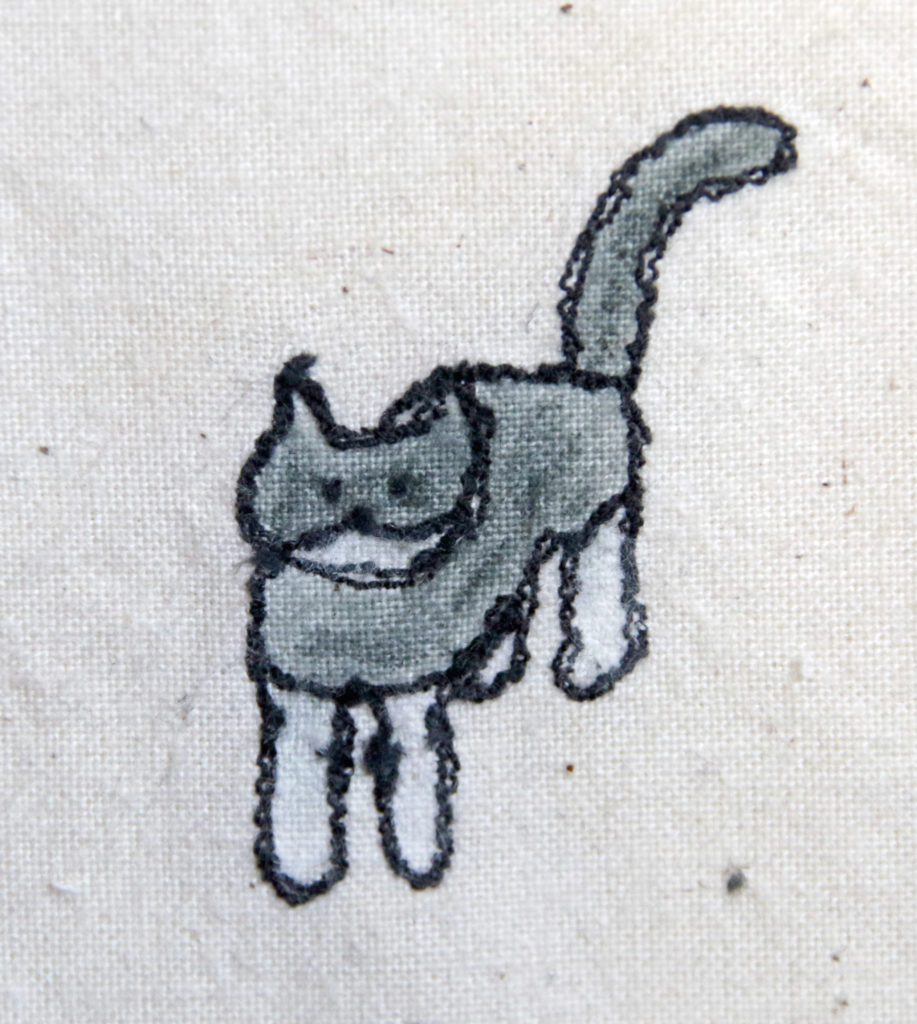
I’m very fond of pets, and regularly doodle my cats, Harry and Fizz.  I decided to have a go at designing some more cat images to frame or turn into cards.

I like the use of appliqué to add another dimension to the stitched cat, as shown on the far right.  However, I like the simple line drawing on the left, and am reluctant to add any shading or colour to it.  The middle images are coloured in with fabric dye sticks and paints.

They are all very different in style!  The middle ones are much more cartoon-like.  However, the tabby and black and white cat are much more personal, as they look like Harry and Fizz!

Continue ReadingStitching Cats

Recent inspiration – Jane Hunter’s ‘Haud Oan’

Since learning some free machine embroidery this year and combining it with appliqué, I have found it to be a great outlet of creativity.  However, when I heard the news on 24 June regarding the EU referendum, I found it very difficult to produce anything.

Jane Hunter’s new piece ‘Haud Oan’ is a great inspiration as a result.  She created it as a form of therapy to deal with the news that day.

I like how all of the yellow “remain” threads are held taut as they hold on in the direction of the centre of the EU.  The blue “leave” threads have no tension and fall loosely to the bottom of the frame.  It seems to symbolise how parts of England, Wales and Northern Ireland have voted to cut their ties from the EU.

It’s a great piece because it’s so simple yet effective in its message.  It’s matter of fact about the situation, and communicates the vote clearly away from words.  The fact that it doesn’t include any words helps me relate to it because I found it difficult to find any words to discuss the EU referendum on the day for a while.  Moreover it simply shows how this vote has created such divides in the UK.

Continue ReadingRecent inspiration – Jane Hunter’s ‘Haud Oan’

Free Motion Embroidery – drawing and writing with my sewing machine

Got your eye on an expensive yet impressive embroidery sewing machine?  Think again!

I’ve been admiring the lovely embroidery machines with their numerous stitch options and the possibility of embellishing handmade gifts with a name at the touch of a button (or a few).  I remember watching a demonstration of someone programming in a word and then watching in awe as the machine punched out the letters perfectly.  All I wanted to do was justify the cost of buying a sewing machine which did this!

Well, my bank budget (and boyfriend) will be relieved to know that I no longer have this impulse!  While embroidery machines are amazing – especially the ones where you can put your design into the computer and then transfer it to the machine to stitch it – I discovered free machine embroidery this year through a local course.

I signed up to this course without much thought about what it entailed.  I’ve always wanted to do a textile based course, but they’ve always been a long commute away or I hadn’t been able to justify the cost at the time.  This course was a reasonable price, within walking distance, and with my new working hours, I could make the time of the session.

Free machine embroidery (also known as free motion embroidery) is when you drop the dog teeth on your sewing machine, which normally propel your fabric in one direction (away from you).  You attach a new type of foot – a darning foot – and reduce the upper thread tension a little.  You can do it without a presser foot attached, but it’s a lot safer with one!  You use an embroidery hoop to keep your material firm and you’re ready to go!

It’s best to move the hoop really slowly and have a play at first.  It takes time to learn to keep your hands smooth and steady as you stitch.  Originally, I practised drawing lines with the machine, then made loop patterns and some basic shapes.

first attempt
My first attempt at free motion embroidery!

In the course, we learned shading, appliqué, writing and using water soluble fabric (which is a whole other aspect to discuss another time).

IMG_20160326_085029
Some shading added to this cat drawing
applique
Some abstract layering of different fabrics using appliqué and free motion embroidery

I really enjoyed all of it, but I am quite fond of writing with stitch.  I love looking at people’s handwriting, and I used to enjoy writing stories as a kid, which may explain my fondness of handwriting.  I have used writing in combination with other free motion embroidery techniques in producing the designs for some of my Etsy items– cards in particular.

Ultimately, the reason I’m addicted to free motion embroidery is that it is creates personality and individuality in makes.  Embroidery sewing machines are programmed to be perfect, but I am always going draw something with stitch a bit different every time I use it, which makes it more interesting.

It’s also a great stash buster!

Here are some useful resources and artists to look at if you fancy a go:

  • Craftsy has a useful ‘how to’ on creating embroidered works of art.  It’s very clearly laid out in simple steps
  • Poppy Treffrey does some lovely free machine embroidered items, focusing mainly on the seaside and animals
  • Lou Gardiner is another amazing free machine embroiderer and describes how she creates her work well on the introductory video on her site
  • Jane Hall focuses on nature in her work
  • Rosie James has a lovely book on drawing with stitch
Continue ReadingFree Motion Embroidery – drawing and writing with my sewing machine

Upcycling jeans – the sewing pinny!

One of the projects I made during #miymarch16 was the upcycled pinny from an old pair of jeans.

jeans before
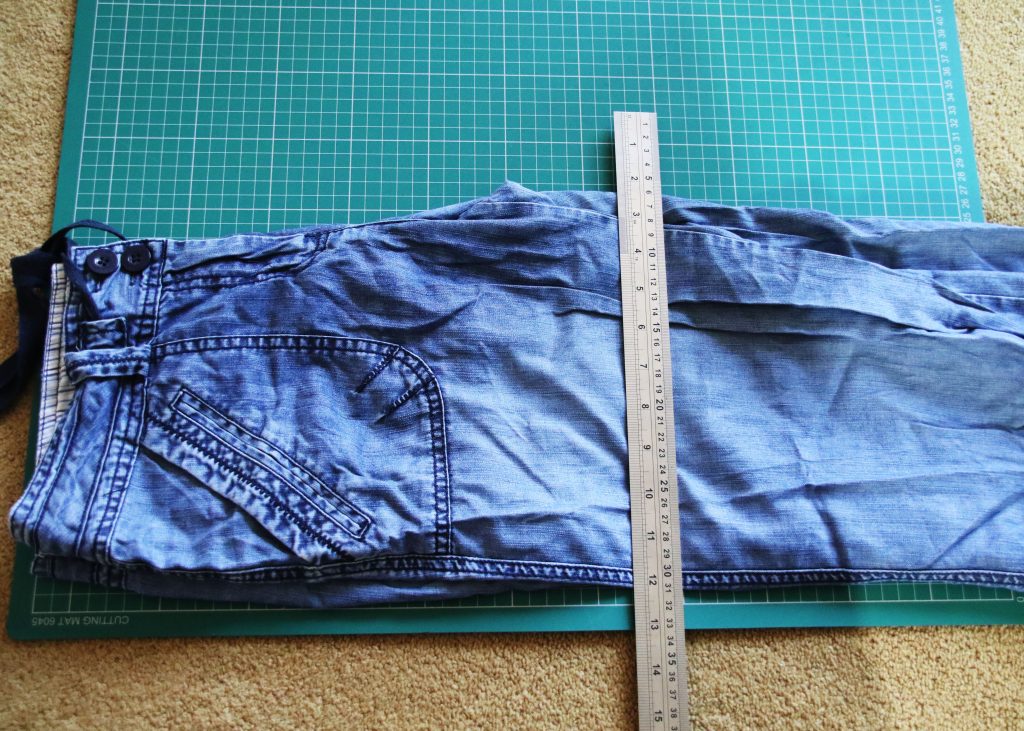
A very creased pair of old jeans!

I got these jeans for my 21st.  I’m a bit of a hoarder, and while they had a tear in them where the fabric was so thin and worn out, I hadn’t had the heart to chuck them away.

When I met up with my mum and sister in March, they suggested cutting them up into something new.  Due to the location of the worn out section, a skirt was not suitable!  However, we came up with making a tool belt.

jeans initial cut

One of the best parts of making something from something you’re prepared to throw away is that it doesn’t cost you anything and you have a lot of freedom to just go for it!  I simply placed a ruler over the jeans roughly where I thought the length would be good and took a rotary cutter to it!

IMG_20160316_223414

As you can see, I curved the back to make it more apron like, but also so I could keep the back pockets.  Jeans lend themselves to being a belt because of all the pockets!!  I added some patches to the back pockets and then added a pom pom trim and ribbon border.

IMG_20160317_083739

I wanted to add more decoration, and following my recent addiction to free machine embroidery (which I will go into more detail at some point in the future), I drew out some sewing related appliqué onto bondaweb!

pinny complete

Et voila!  Here is the end result!  I added some random buttons to the front pockets and stitched additional detail on the appliqué.  Now I put my scissors on a bungee rope so they’re always with me but I do think I need to add a scissor holster to it to improve it.

Continue ReadingUpcycling jeans – the sewing pinny!

#miymarch16

#miymarch16 may have been a couple of months ago, but here are the resulting images I posted from it below.

Make it Yourself March is an Instagram event.  It involves posting an image based on the daily photo prompt – a list can be found on Wendy Ward’s blog from this year.

New to Instagram, I found this event coincided beautifully with a couple of my goals – to become more familiar with using social media and to push myself to create more.  It was a great way to be inspired by fellow dressmakers.

Instagram is an easy form of social media if you have a smart phone and I’ve carried on using it since.

During March, I made 4 dressmaking items, completed upcycling projects, planned future projects, made gifts and machine embroidered.

Continue Reading#miymarch16

Crafting with Family – March

It’s been a while since I have posted and my post is all about a craft meet up two months ago!

Mum’s house is quite a good meeting point for her, my sister and I to meet up.  We managed to meet up in March and here’s what we got on with:

applique in progress

Having purchased a lovely new Singer sewing machine recently, my sister put it to the test by having her first attempt at appliqué!  Not one to be daunted by a challenge, she decided to appliqué a friend’s name.  A very impressive feat, going around all sorts of twists and curves when you’re still adjusting to a new technique and how your new machine works!

cushion

The great part about this bright and colourful cushion is that it’s all made from remnants.  The main cushion is made from an ex-display curtain from a department store, with the money going to charity.  The letters were cut from a swatch book, which had been picked up the same way from the same store.

I didn’t embark on a sewing project this time, but I did finish the second sleeve to a short sleeved cardigan I began two years ago!  It’s now at the sew up stage before the neck band and button band are tackled…

doll progress

There’s the progress of my mum’s doll, which she began in our February meet up.  It’s coming together now it has a head!  She wasn’t able to progress with it that weekend, but she did hem up someone’s new net curtains by hand!

Continue ReadingCrafting with Family – March

Mother’s Day gift making – bath hats and bags

in progress
Taking over the lounge- there is a cutting mat underneath the template – honest!

It didn’t take long to come up with this year’s mother’s day gift – mainly because I knew she wanted a new bath hat!

I made her one years ago from the Cath Kidston “Sew!” book.  Unfortunately, the waterproof fabric I chose for inside the hat was quite thick and stiff.  Also, we have big heads so I think the pattern was designed for a smaller circumference head!

2014-12-23 23.50.14
Bath hat #2

I’d made my nan this green bath hat above using material I got online which I think is used for making tents.  It was much more versatile than the thick waterproof plastic for bath hat #1 anyway!  I made a much larger template for this hat and added a brim and bow!

finished result
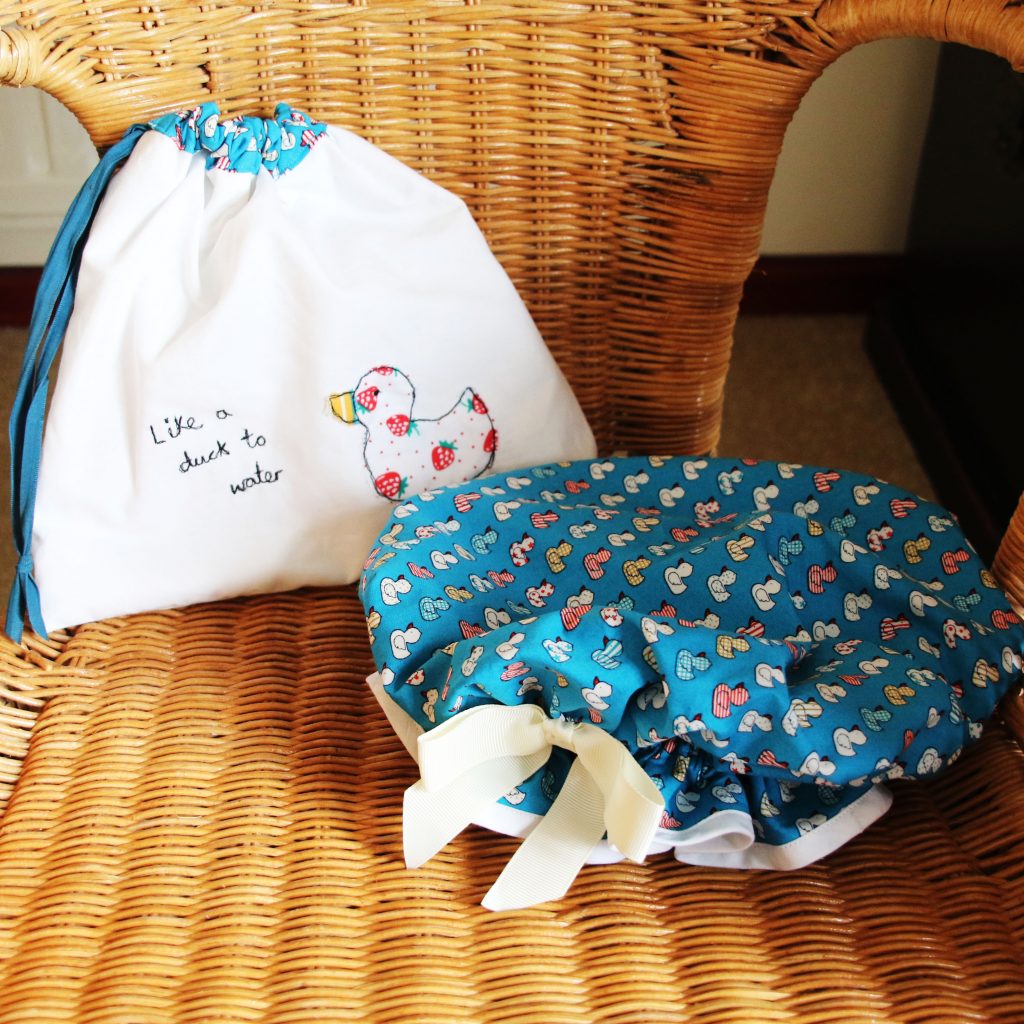
Bath Hat and Toiletry set complete

As hat #2 was a much better fit, I went along with this design for mum’s.  However, I tried a new lining.  The fabric I used was a white showerproof material from Fabricland in Bristol.  I was apprehensive about using this, as I wasn’t sure how robust it was for using for practical and wearable items.  However, it seems to have turned out to be the cheapest and most shower hat like option of the three tried and tested!

Still chirpy from making a toiletry bag for my dad’s birthday, I felt that the hat required a matching toiletry bag.  As I wanted the bag and hat to match, I added a strip of the duck material to the top and appliquéd a duck on it too.  I couldn’t resist having another go at writing with the sewing machine, so I wrote “like a duck to water” on it.

I really enjoyed this gift set make.  It’s something I am considering to sell on my Etsy store in time for people preparing for their holidays!

snoopy wearing completed hat
Snoopy modelling the bath hat for demonstration purposes
Continue ReadingMother’s Day gift making – bath hats and bags

Making Individual Gifts – for Dad

For my dad’s birthday this year, I decided to use my new skills to make some different gifts to normal.

Cufflinks

cufflink showcase

Here is a photo of him wearing the cufflinks I made in glass.  I had no idea you could make cufflinks from fused glass (or didn’t think of it until it was pointed out to me)!

I’m quite limited in my glass fusing skills at the moment, particularly in cutting, so I used inclusions for the decoration (note: inclusions are when you include certain metals between the two layers of glass so that they become sealed into the piece).  The inclusions are feet.  I chose feet as he enjoys running, so it fits in with one of his hobbies.

The class pieces were fixed onto the cufflink backs with an amazing adhesive called Hang-your-glass, which creates a strong finished piece.

Toiletry Bag

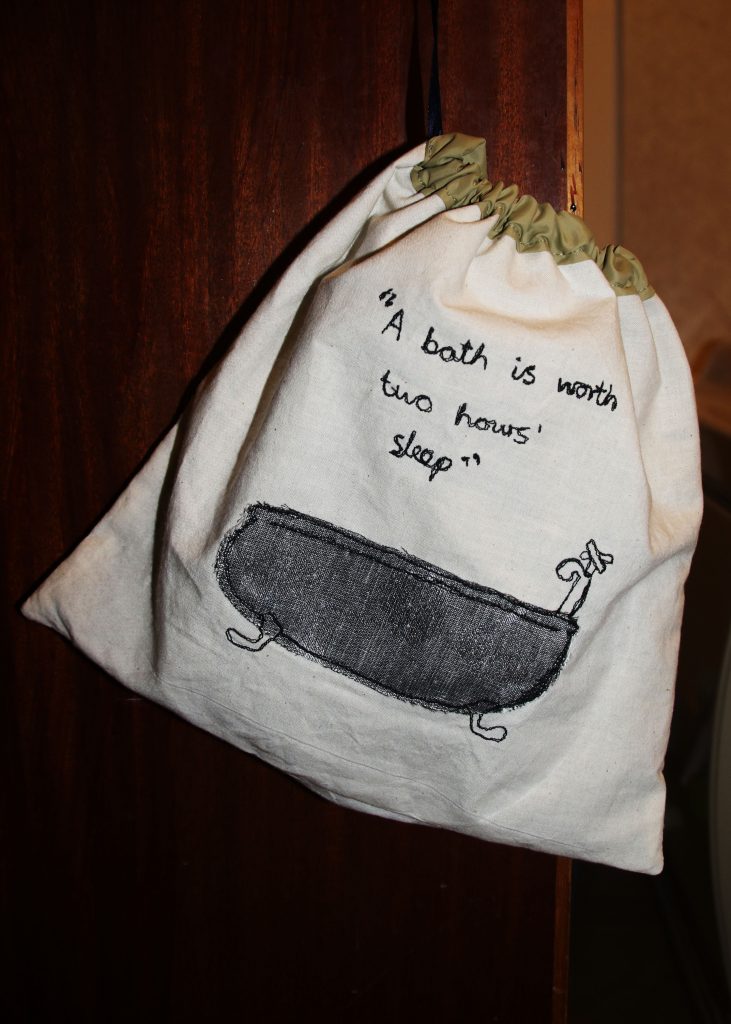
bath toiletry bag lower res

Here is a photo of the toiletry bag I made.  I used free machine embroidery to decorate this item.  I made up the design from a family saying – “A bath is worth two hours’ sleep” which I believe he relies on to keep up with his busy schedule!

I really enjoyed making the personalised design on this bag.  The bath tub was appliquéd on with an old curtain swatch remnant.  I particularly enjoy writing with the machine, which is great because I no longer gaze longingly at impressive but expensive embroidery machines with preset lettering options.  Sure, a machine program for lettering is faster and accurate, but free machine embroidery comes out differently every time.

Continue ReadingMaking Individual Gifts – for Dad